


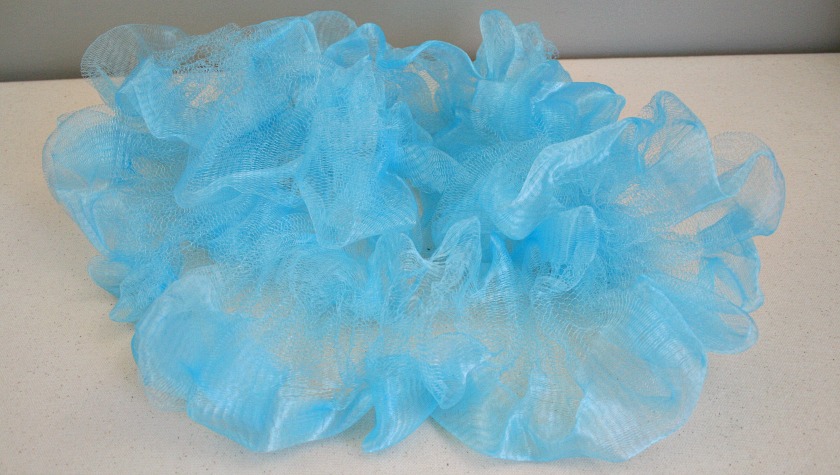
Have you ever treated yourself to or been given a pretty new shower puff only to have it unravel into an unusable mess after a couple of showers?
Throwing it out isn’t an option, especially if it was a gift.
Maybe you’ve tried refolding it accordion style and retied it, only to have it fall apart again.
There’s a super quick, long term fix that will have your unraveled shower puff looking like new again.
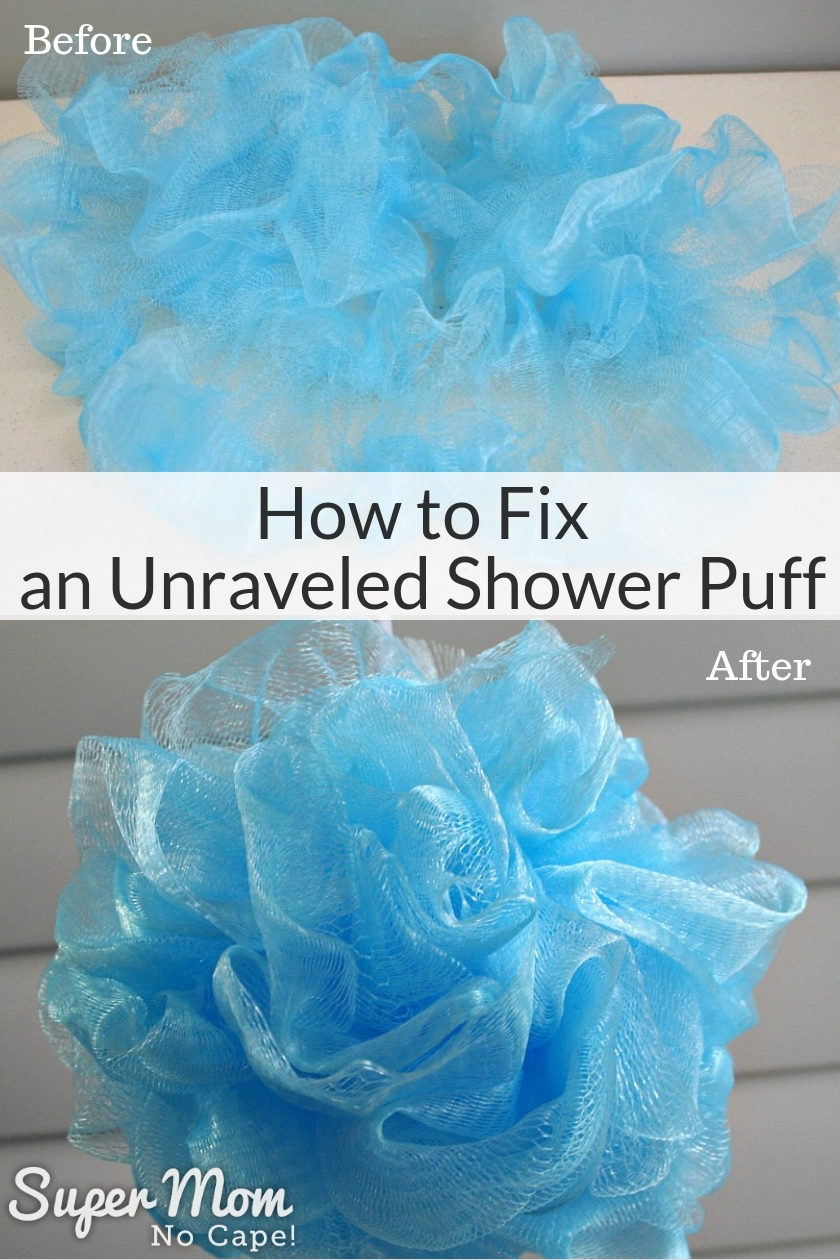
How to Fix an Unraveled Shower Puff

I actually have two shower puffs that need fixing.

Let’s start with the blue one.

What you’ll need to fix the shower puff:
- Long soft sculpture doll making needle
or darning needle
- 24″ to 36″ of 1/8″ satin Offray ribbon


Thread the ribbon onto a needle.

Starting at one end, weave the needle in and out through both layers of the mesh netting every 3/8 of an inch or so.

No need to be super accurate or fussy here, just weave the needle in and out and pull the ribbon along as you go.
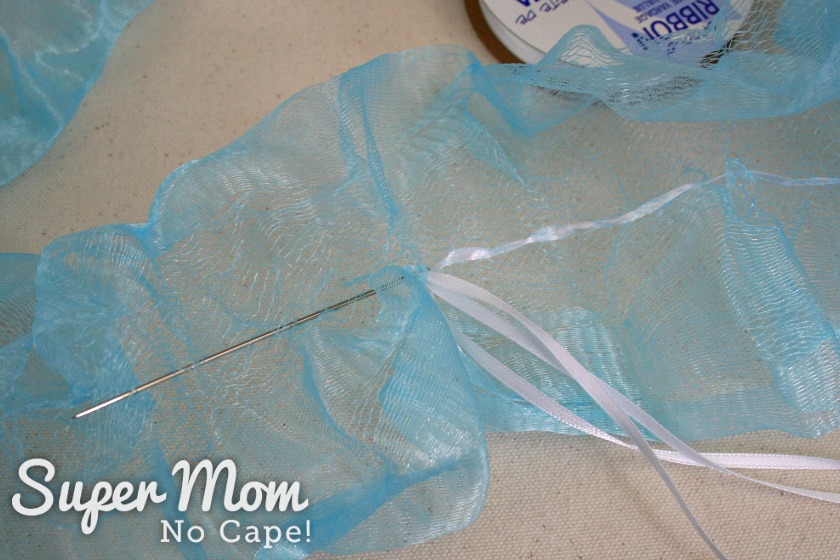
Continue to weave the needle in and out until you get to the other end of the shower puff mesh.

Once the entire length of the netting has been gathered on to the ribbon, cut the ribbon off the spool. Pull the ends of the ribbons to gather the shower puff evenly onto the ribbon as tightly as possible.
Tie a firm, tight knot. You may even want to double knot it.

Trim the ribbons to approximately 8 inches and knot the ends together.

This one is ready to hang in the shower.

Don’t worry if you don’t have one of those long doll making needles. A darning needle or any needle that has an eye big enough to thread the ribbon through will work.


Using a darning needle takes a little longer because it’s shorter than the soft sculpture needle but it gets the job done all the same.

This easy, long term fix may just have you gathering up all the shower and bath puffs in the house to get them repaired once and for all.

Time for a relaxing bubble bath!
Hmmm… which one shall I choose?

Please be sure to save this tutorial for How to Fix an Unraveled Shower Puff by clicking on the Pinterest button underneath this post.
And of course, I’d love it if you shared it on Facebook and Twitter as well. 🙂
Please note: This post was originally published on Super Mom – No Cape in July of 2015. It has been completely updated with new photos and text.


14 Comments
Angela Hagood
July 13, 2019 8:34 pmDear Super Mom, You are the bomb! I can’t believe that I have never thought of repairing one of these, nor did it ever occur to me to launder them. Thank you so much for both tips!
Super Mom No Cape
July 16, 2019 4:05 pmI’m so glad you found it helpful Angela!
Linda Humphrey
May 11, 2019 12:03 pmI really like this and second the “why didn’t I think of it!”. Hopefully these poofs get laundered with the towels. Apparently they can build up bacteria in them if you don’t.
Super Mom No Cape
May 29, 2019 10:56 amThanks Linda! And yes… they get laundered regular with the towels washed on hot. 🙂
Geri
August 17, 2018 11:28 pmI used your method to make a back scrubber. The shower puff was so puffy, with plenty of fabric to spare. I removed the stitch that held the puff together and added handles at both ends. I made very secure knots after gathering about 1/4 of the mesh and continued gathering the mesh, repeating the knots at the half way mark and at 3/4 of the way. I tied it off well while adding the 2nd handle. Now I have a two handled back scrubber.
Paloma
July 23, 2018 5:49 pmGot here from a google search. Thank you so much for this, haha! My husband always likes to hold his poof by the loop, but the loop is frequently the only thing holding the darn thing in one piece – so he destroys them nearly instantly! I just used your method to sew it up with super strong upholstery thread so now it should hold ’till kingdom come.
Roxanne Phillips
June 8, 2016 3:23 pmI just Googled how to fix a shower puff as mine came out of the wash all unravelled and your blog was one of the top hits! Thanks!
Dee
March 19, 2016 12:33 amThank you for the why-didn’t-I-think-of-that tip! I finally remembered a tute I needed to use–revived about six bath puffs. We now have happy bathers again!
Celtic Thistle Stitches
July 16, 2015 3:18 amGreat fix, and smart way to make your own puffs too!
Sandra
July 14, 2015 10:21 pmOh my thank you! I have retied, used an elastic, all temporary fixes before that puff (or poof as I call it) goes “poof!” into the garbage can. Will do this to the next one.
Mary
July 14, 2015 9:33 amGreat idea. Thanks.
Christine B.
July 14, 2015 9:22 amThis is a great tip! I always get frustrated when these shower puffs unravel and spend hours trying to get them to look as they should by tying them back up only to have them unravel again! Duh! 🙂 x
Jacque
July 14, 2015 9:45 amWow! It’s always so frustrating when that happens…now I know what to do, to fix it! Thanks!
Rachel
July 14, 2015 7:18 amA very neat bit of Make Do and Mend!
Comments are closed.