


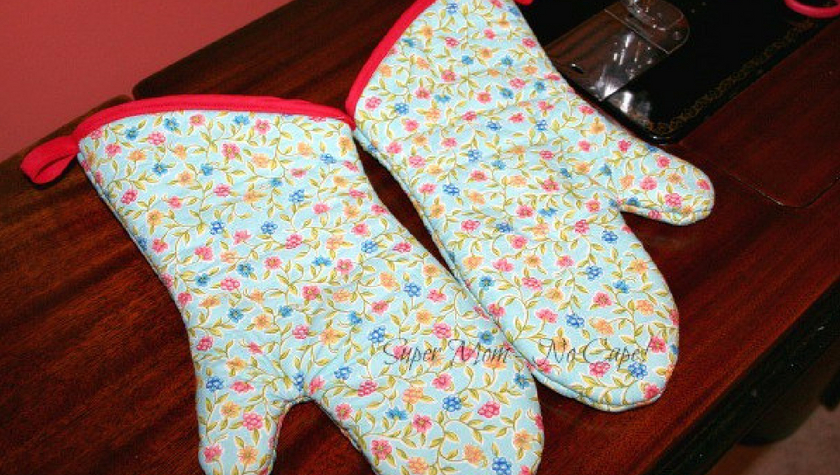
Do you have an old pair of oven mitts that have seen better days but are still good enough to use? Today, I’m going to show you how to recover oven mitts and give them new life using pretty new fabric and contrasting bias tape.
As you can see, our old oven mitts were looking rather the worse for wear. No amount of washing would take out the stains from years of use.

Now I suppose, I could have made a completely new pair of oven mitts. I have lots of fabric and Insul-brite
But the inside of these ones were still good… just the outside looked shabby. So I put them through the laundry with a load of towels to make sure there were no food stains since the last time I’d washed them.
I took some pictures as I recovered them but this is more a how-I-did-it than an in depth tutorial.

How to Recover Oven Mitts
First, you’ll need to unpicked the seams.

Remove the old bias tapes from the top of the oven mitts. Give them a good pressing.
Go through your fabric stash and find pretty new fabric to recover your oven mitts. Make sure to use only 100% cotton fabric. Anything other than 100% cotton will not be able to withstand the heat of taking dishes out of the oven.
I went through my fabric dresser to find some pretty floral fabric.
Pin the fabric to two layers of a batting
Quilt as desired.
For mine, I practiced a free motion quilting design I’m thinking of using for another project that I’m working on.
Pin the old oven mitts pieces to the quilted fabric as shown in the photo below:

Cut around the oven mitt pieces leaving about 3/8″ extra of the quilted fabric all around the outside.

Machine baste the quilted fabric to each piece.
This next step is one that I’ve found helps when it comes to the final step of sewing the thick layers of oven mitts together.
Serge, overlock or zigzag all the way around the edge of each piece.
This acts to compress those layers, making it easier to sew them together. The serger also trims off the extra quilted fabric so that it’s even with the old oven mitts.
If you’re not using a serger, use scissors to trim the excess quilted fabric.

Sew double sided bias binding to the top of each oven mitt piece.
Pin or clip the pieces right sides together.
I found that clover clips


Thread your machine with a heavy weight upholstery thread.
Cut two pieces of 2.5″ bias tape to make the hanging loops. Fold them in half and insert them in the side seam at the top.
Sew each oven mitt together using a 3/8″ seam allowance.
Turn them right side out.

They’re ready for kitchen duty!
Save this post to refer back to next time you want to know How to Recover Oven Mitts by clicking on the Pinterest button underneath this post.
And of course, I’d love it if you shared it on Twitter and Facebook as well. 🙂

This post contains affiliate links. For more information please check my Disclosures and Disclaimers page. It doesn’t cost you any extra, but it does help support this site.


17 Comments
Lisa // Cucicucicoo: Eco Sewing & Crafting
June 16, 2018 5:18 pmWhat a fantastic idea! I have some really scummy looking oven mitts that could really use this treatment! I’ll have to try. Thanks! 🙂 Lisa
Happiest Camper
June 15, 2018 12:56 pmI never would have thought to do this. Great idea!
Cath
November 23, 2015 6:39 pmand just like that a ‘new’ pair of oven mitts! the inside of those looks rather cosy so I am not surprised you wanted to keep the main structure of the mitts….you are lucky last…I have visited everyone on the list now!
Rebecca Grace
November 23, 2015 4:31 pmWhat a fantastic idea! My own oven mitts look a lot like your “before” photo and I never thought of “reupholstering” them like you did. Thanks for the inspiration and congrats on your finished oven mitt makeover!
Iris-Julimond
November 22, 2015 4:41 amYour Recovery looks great. I will do it with my oven mitts. They look like yours and they need “help”.
Greetings from Germany
Iris
Mary Anne
November 21, 2015 7:40 pmA lot of work to re-vamp them, but the end result is so pretty. Oven gloves and I don’t get along – I can burn a hole in them within a matter of a couple of days and then that hole will be invariably where I try to pick up something hot. Necessary evils, oven gloves….but I don’t have to like them!!
Flashinscissors
November 21, 2015 2:33 pmLovely job, Sue! Very pretty!
Barbara xx
Mary
November 21, 2015 11:09 amSuch a nice remake of the mitts!!! Great job, Sue.
Laney
November 21, 2015 8:58 amWhat a great makeover! Nice tip about serging before sewing.
susan
November 21, 2015 8:58 amVery productive for FNSI- and they do look so much better.
Rachel
November 21, 2015 6:41 amA great success, indeed!
Michele T
November 21, 2015 7:38 amIwell, well, well… I should do this with my oven mitts!!! Looks easy enough?
Maria
November 21, 2015 2:18 amHmm a lot of work but they do look great finished…..
Karen
November 21, 2015 2:07 amPretty and practical…..you have to be happy with that.
Susan
November 21, 2015 1:10 amVery cute! That would never have occurred to me to do. But then, I don’t have any oven mitts anyway. =) It’s the kind of thing my mother would have loved, though. She didn’t like to throw away anything with any good left in it.
threeundertwo
November 21, 2015 1:05 amWhat a great idea! I have some that could definitely use a facelift. Great way to practice a quilting design and so smart to use the clips! I have some and never use them for anything except binding. Have a great weekend!
Lynn
November 21, 2015 1:50 amThey look great – a lot of work but well worth it when they last for quite a while.
Comments are closed.