


As we move into the cooler weather of fall and then winter, we’ll all be making more soups and stews. Because, let’s face it, there’s nothing more comforting than a bowl of good hearty soup or stew to warm you up on a cold day.
And as much as I’d like to say that Dave and I eat every meal at the dining room table, that simply wouldn’t be true. We often eat supper with our feet propped up, watching a movie or one of our favorite shows on Netflix.
Eating soup while sitting on the couch isn’t the easiest thing in the world.
In the past, I’ve used a place mat to set the bowl on to keep the heat away from my lap. Well, not anymore!
I’ve been seeing these soup bowl cozies all over the net. In fact, there’s a video tutorial for how to make a bowl cozy that’s been making the rounds and I shared it on my Facebook page @1SuperMomNoCape thinking that they’d make super quick Christmas gifts.
You know how sometimes you see something and it starts the gears turning around and around in your mind? Well that’s what that video did.
A while ago, I showed you a photo of the scrap drawer of my fabric dresser overflowing. To partially solve that problem, I made a Pretty Fabric Pop Up Basket to store all the fabric scraps I use for appliqué.
But what I really need to do to solve the problem of that overflowing scrap drawer is to start making some scrap projects.
All the tutorials for soup bowl cozies that I’ve seen online call for using two 10″ squares.
But for this sewing project, I wanted bright, colorful and scrappy.
In the tutorial, I’ve used leftover charm squares. Since I plan on making many more of these bowl cozies for us and for gifts, I’ll be cutting squares from fabric in my scrap drawer.
This is a super quick project and several could be sewn in an afternoon or evening.
I’ve made the tutorial with lots of detailed photos and explanations so even if you’re a beginner sewer you can feel confident making them.
Want the ad free PDF?
All the instructions you need to make these super handy Charm Square Soup Bowl Cozies are right here in this post. But I realize that it might be more convenient for you to have a copy that you can download to your computer to print out and have beside you as you work. You can purchase the ad free Printable Charm Square Soup Bowl Cozy PDF file for only $5 from my shop. It has this complete step-by-step tutorial with all the accompanying photos.

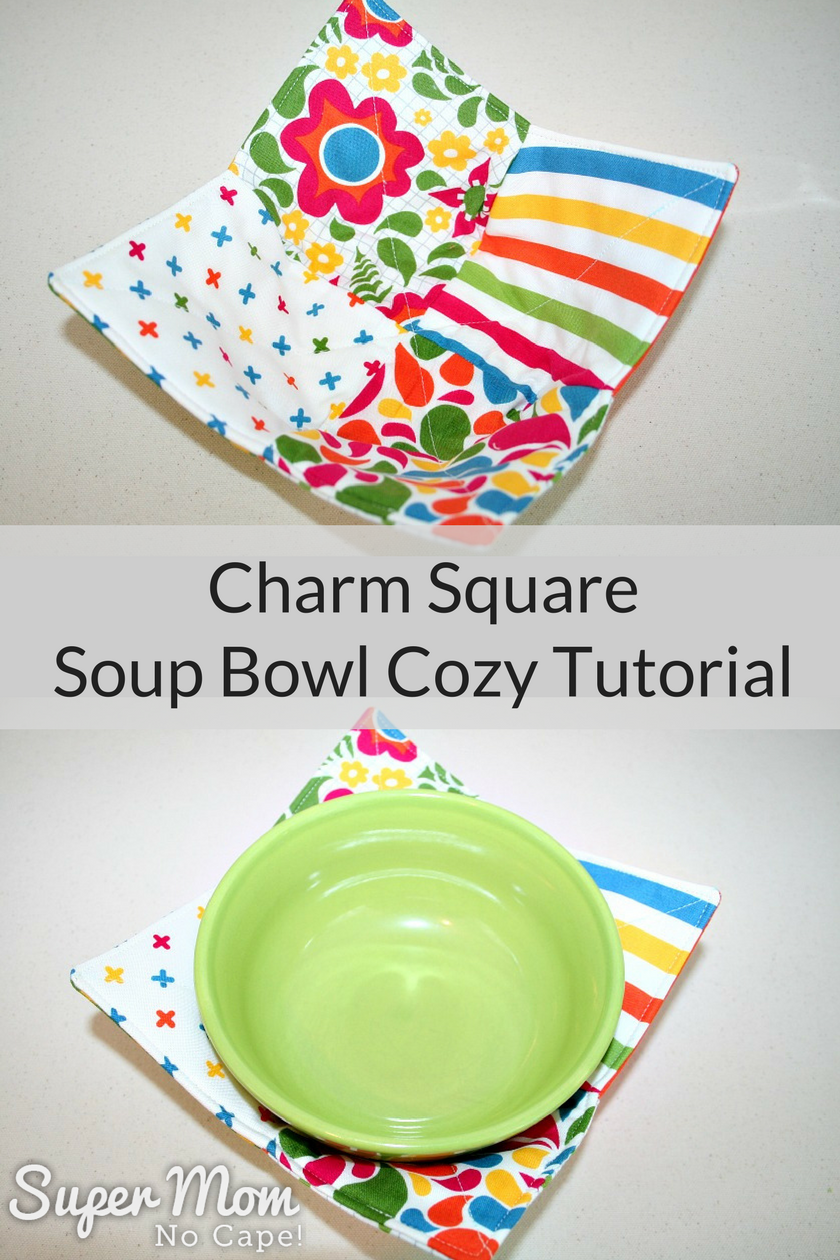
Charm Square Soup Bowl Cozy Tutorial
Materials needed:
8 Charm squares or fabric cut into 5″ squares
Batting cut to 9 1/2″ square
Thread
A quick note: If you’re planning to use these bowl cozies in the microwave, make sure to use 100% cotton fabric, batting and thread.
Purchase a product such as Pellon Wrap-N-Zap Cotton Quilt Batting which is made specifically for use in items that will be microwaved.
Microwave with bowl inside no longer than 3 minutes.
To begin making your Charm Square Soup Bowl Cozy:
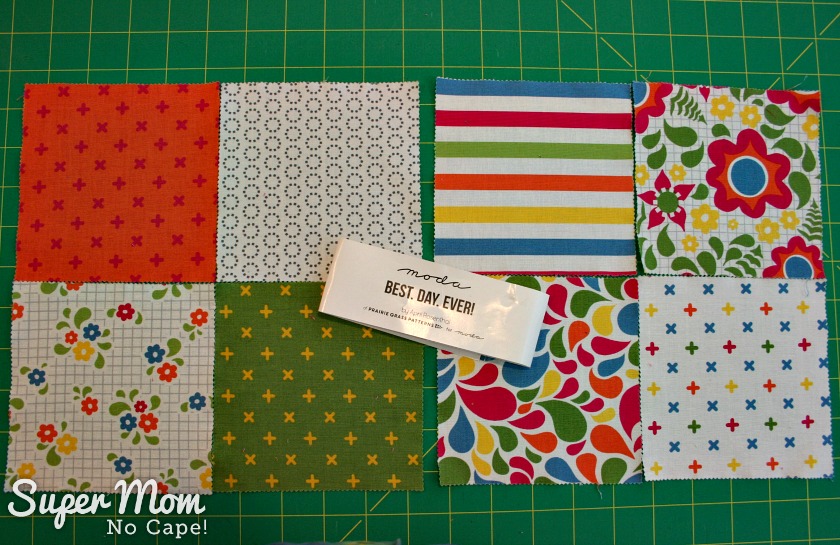
Select 8 charm squares (or cut eight 5″ squares)
Arrange the squares how you’d like them to be in the finished bowl cozy.
These Best.Day.Ever charm squares by April Rosenthal for Moda are from an older fabric line left over from another project.
Flip the square on the right over onto the left square, right sides facing.
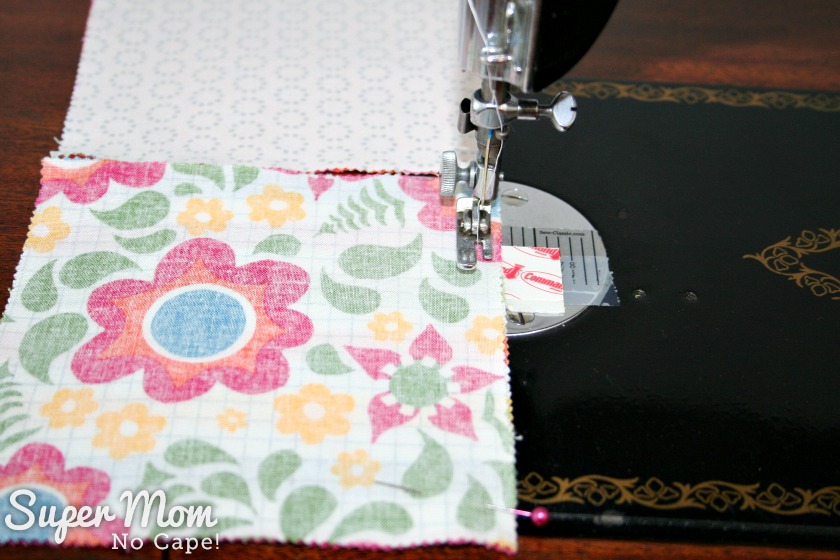
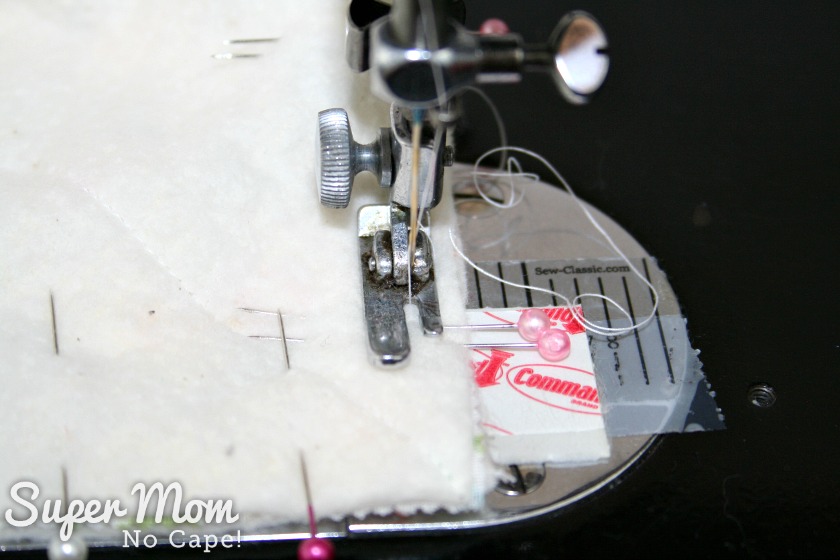
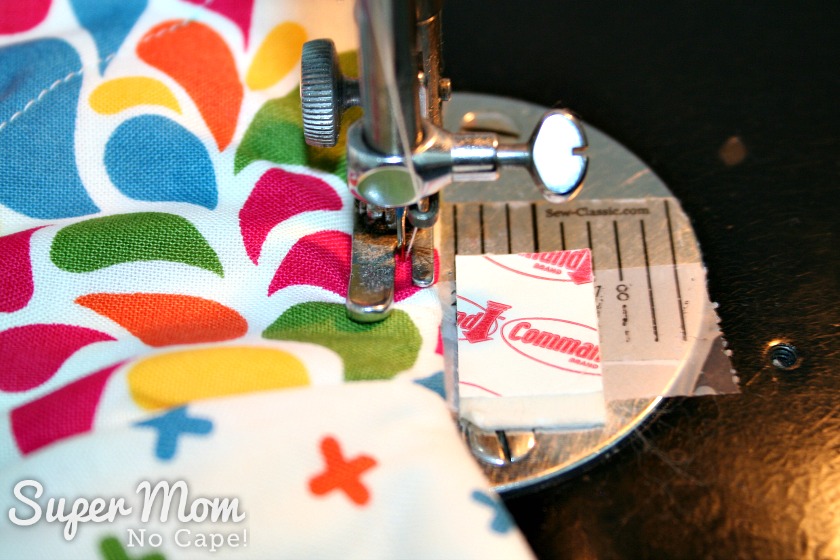
Sew the pairs of squares together using a 1/4″ seam allowance.
Quick tip: I’ve marked the 1/4″ seam allowance with small piece cut from a Command hook strip
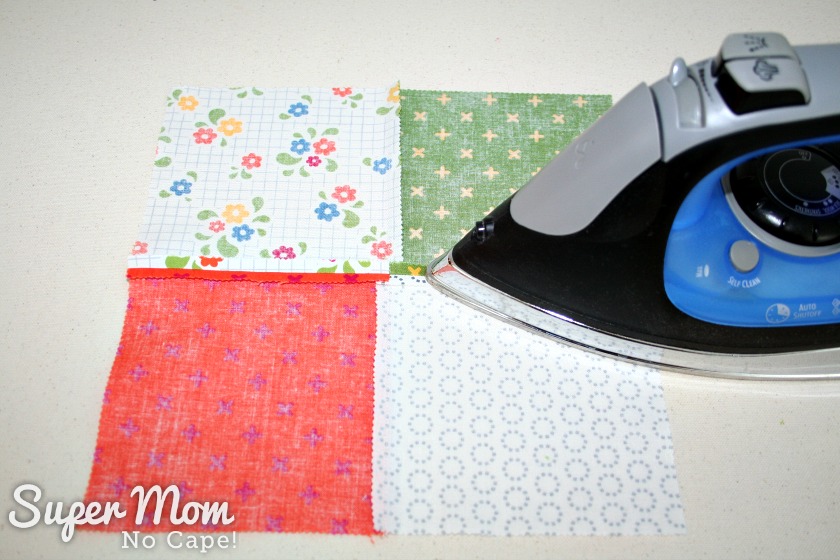
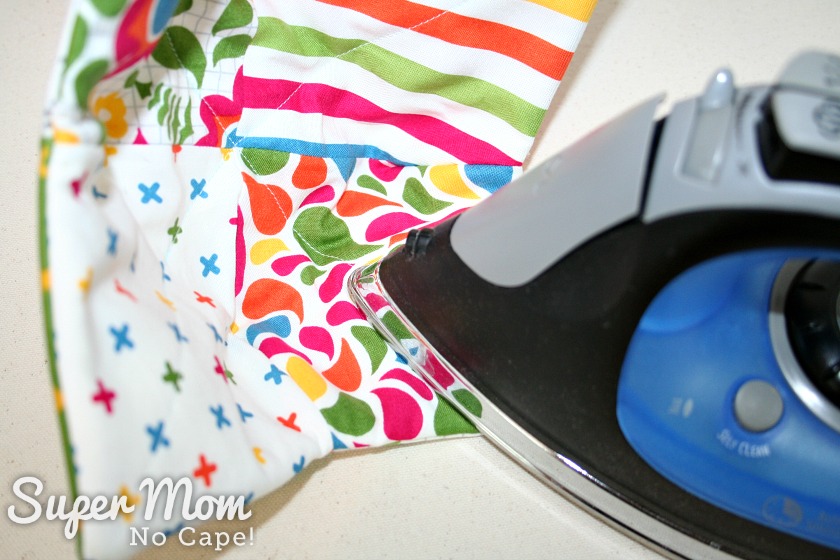
After sewing the squares together, set your seams with your iron.
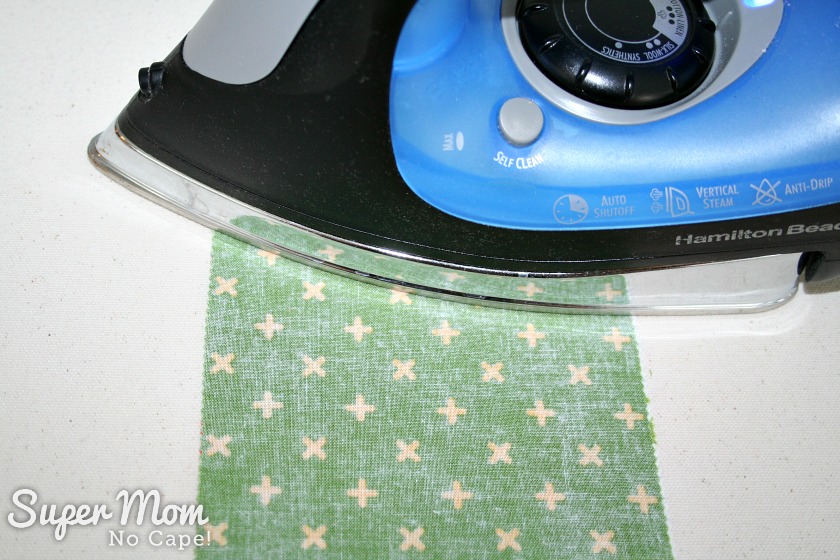
Press the seam allowance towards the darker fabric.
To do this, place the piece on your pressing surface with the dark fabric facing up. Flip the dark fabric up and press.

Next you’ll want to pin the 2 patches together.
With right sides together, nest your seams as in the photo below:
Sew using a 1/4″ seam allowance, as before.
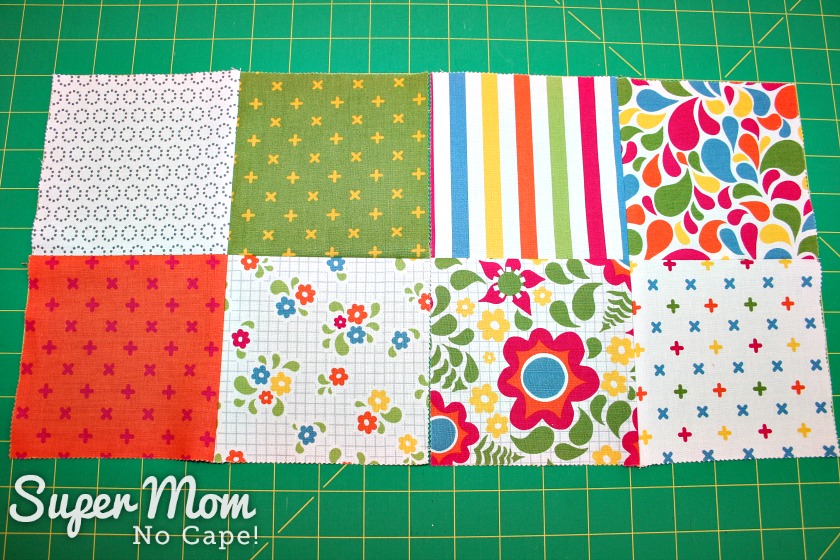
This time you’ll be pressing the seams open. I chose to press this seam open to reduce bulk when everything is sewn together.
You’ll have two 9.5″ 4 patches like this:
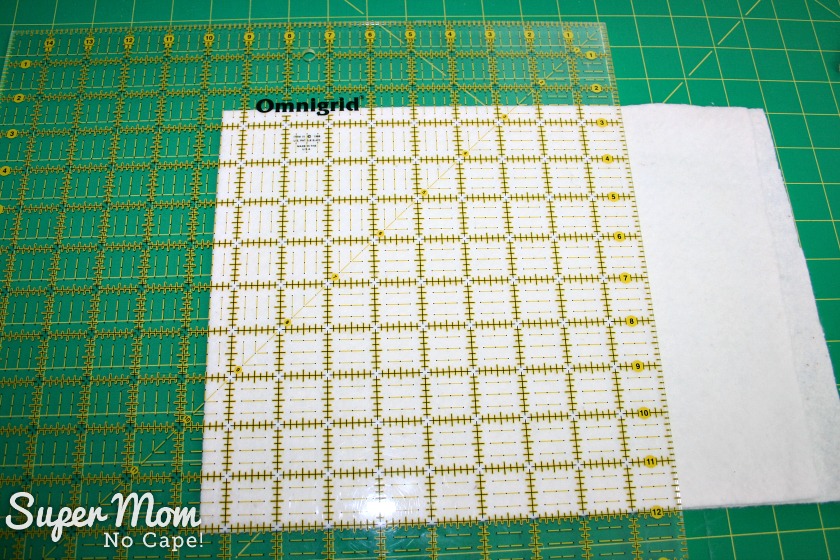
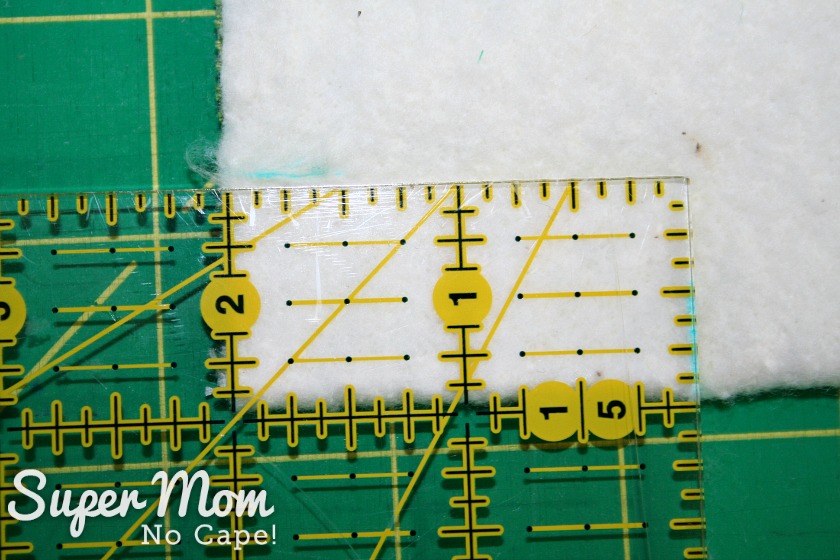
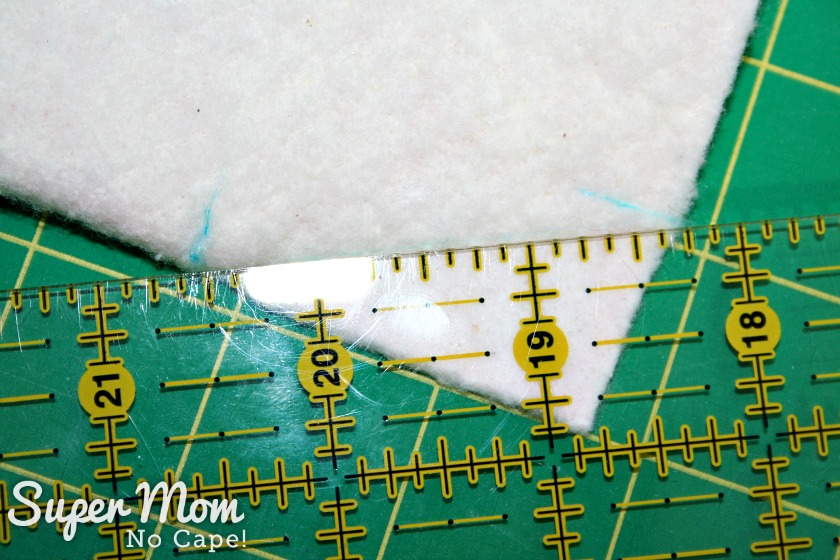
Next, you’ll need to cut the 9.5″ squares of batting.
This is an opportunity to use up scraps of batting as well, if you’ve got them.
Here I’ve folded the scrap of batting in half and lined up the 9.5 inch mark along the straight edge.
Cut through both layers.
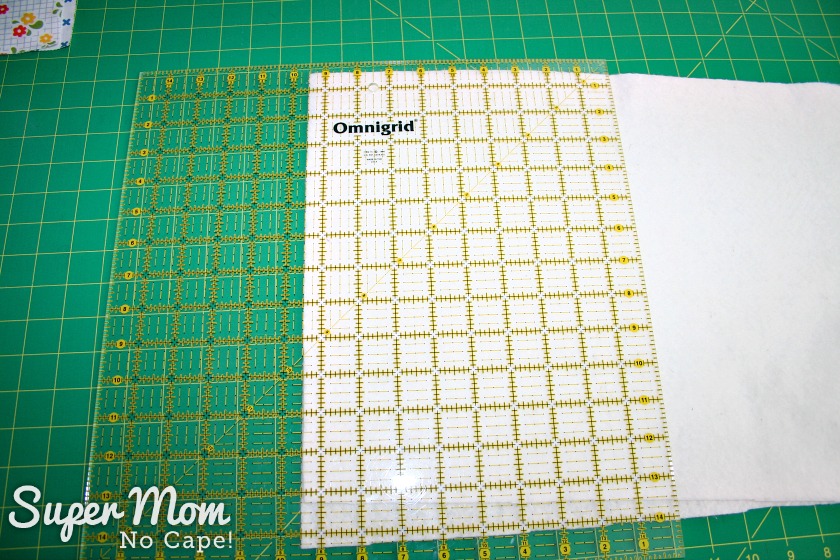
Turn the batting, line the ruler up again at 9.5 inches and make a second cut.
To attach the 4 patches to the batting:
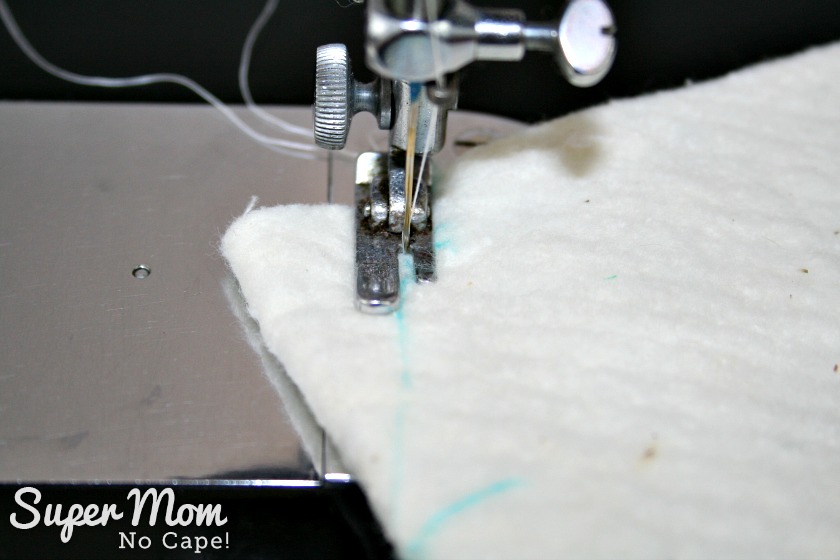
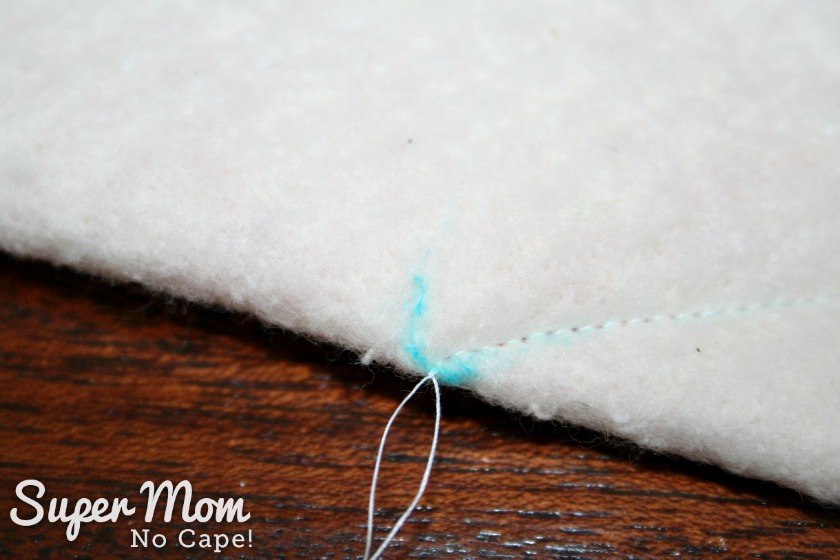
Using a water soluble marker, draw a diagonal line from one corner to the other. And then again in the opposite direction making a large X.
I love this Clover Water Soluble Marker.

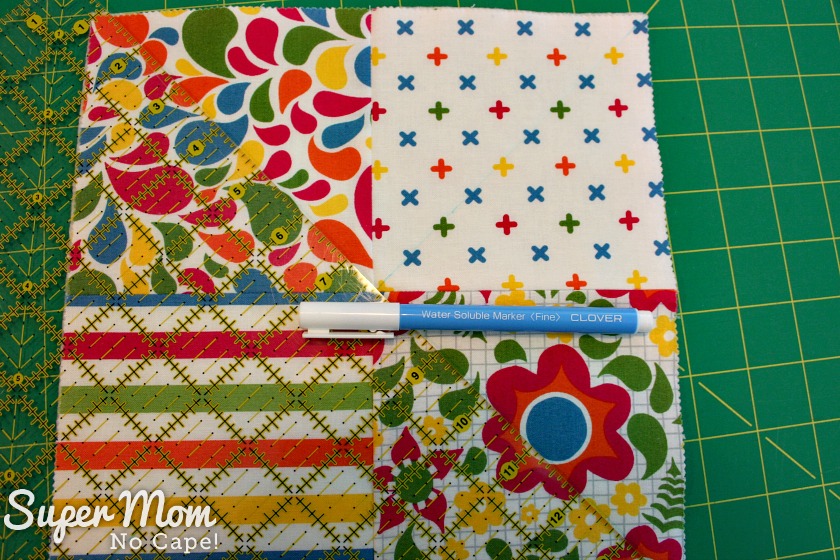
Place each 4 patch on a square of batting. Pin and sew along the marked lines.
Make sure to remove the pins as you get to them, so that you’re not sewing over them.
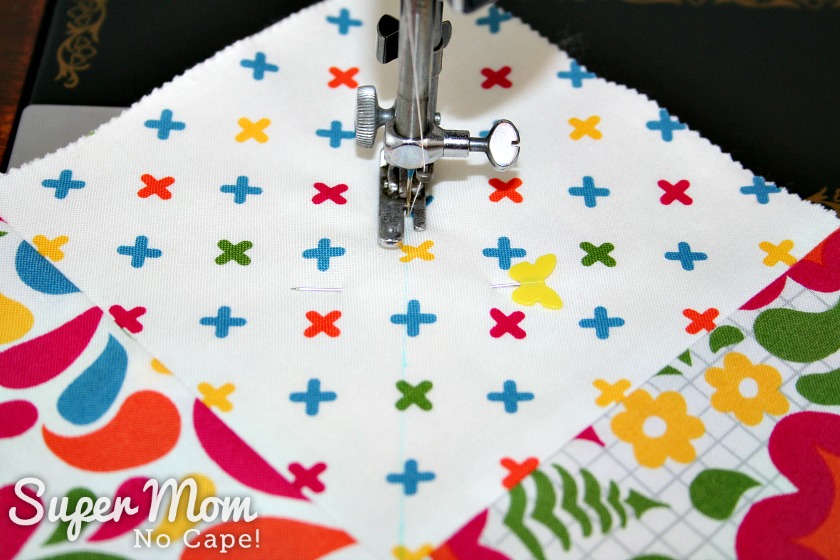
Once you’ve sewn one line, sew the line going in the opposite direction.
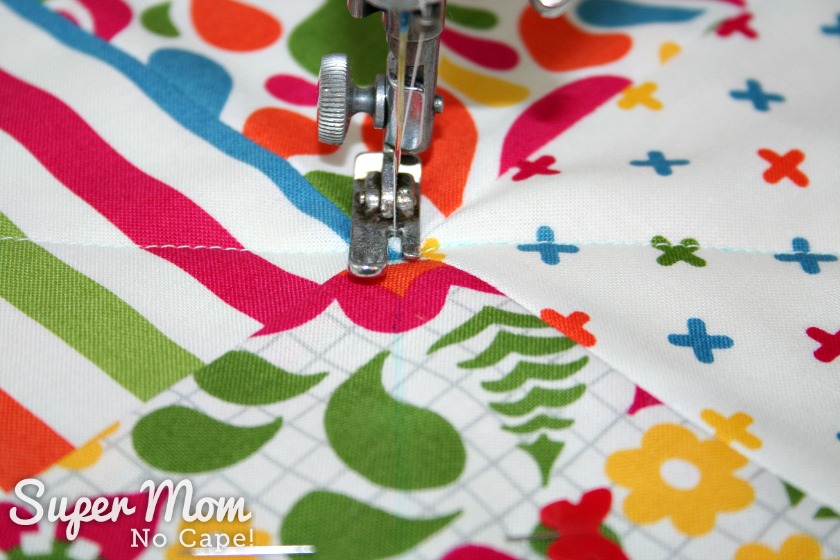
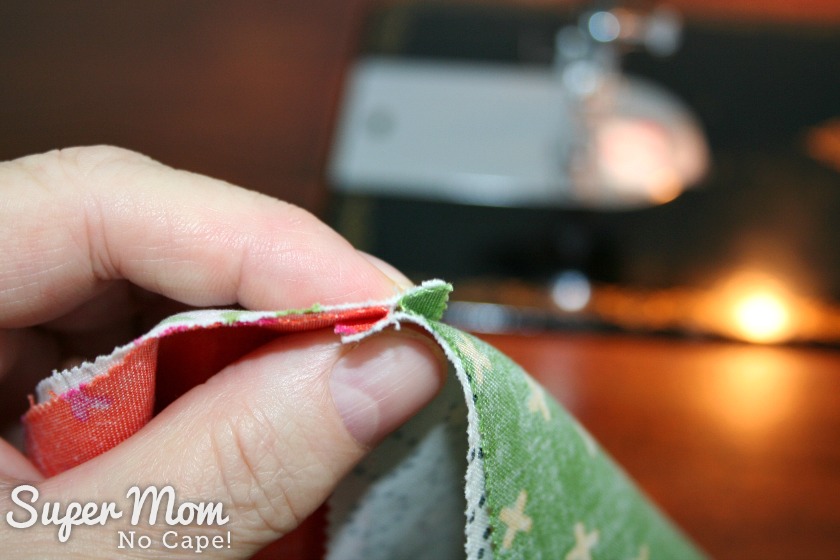
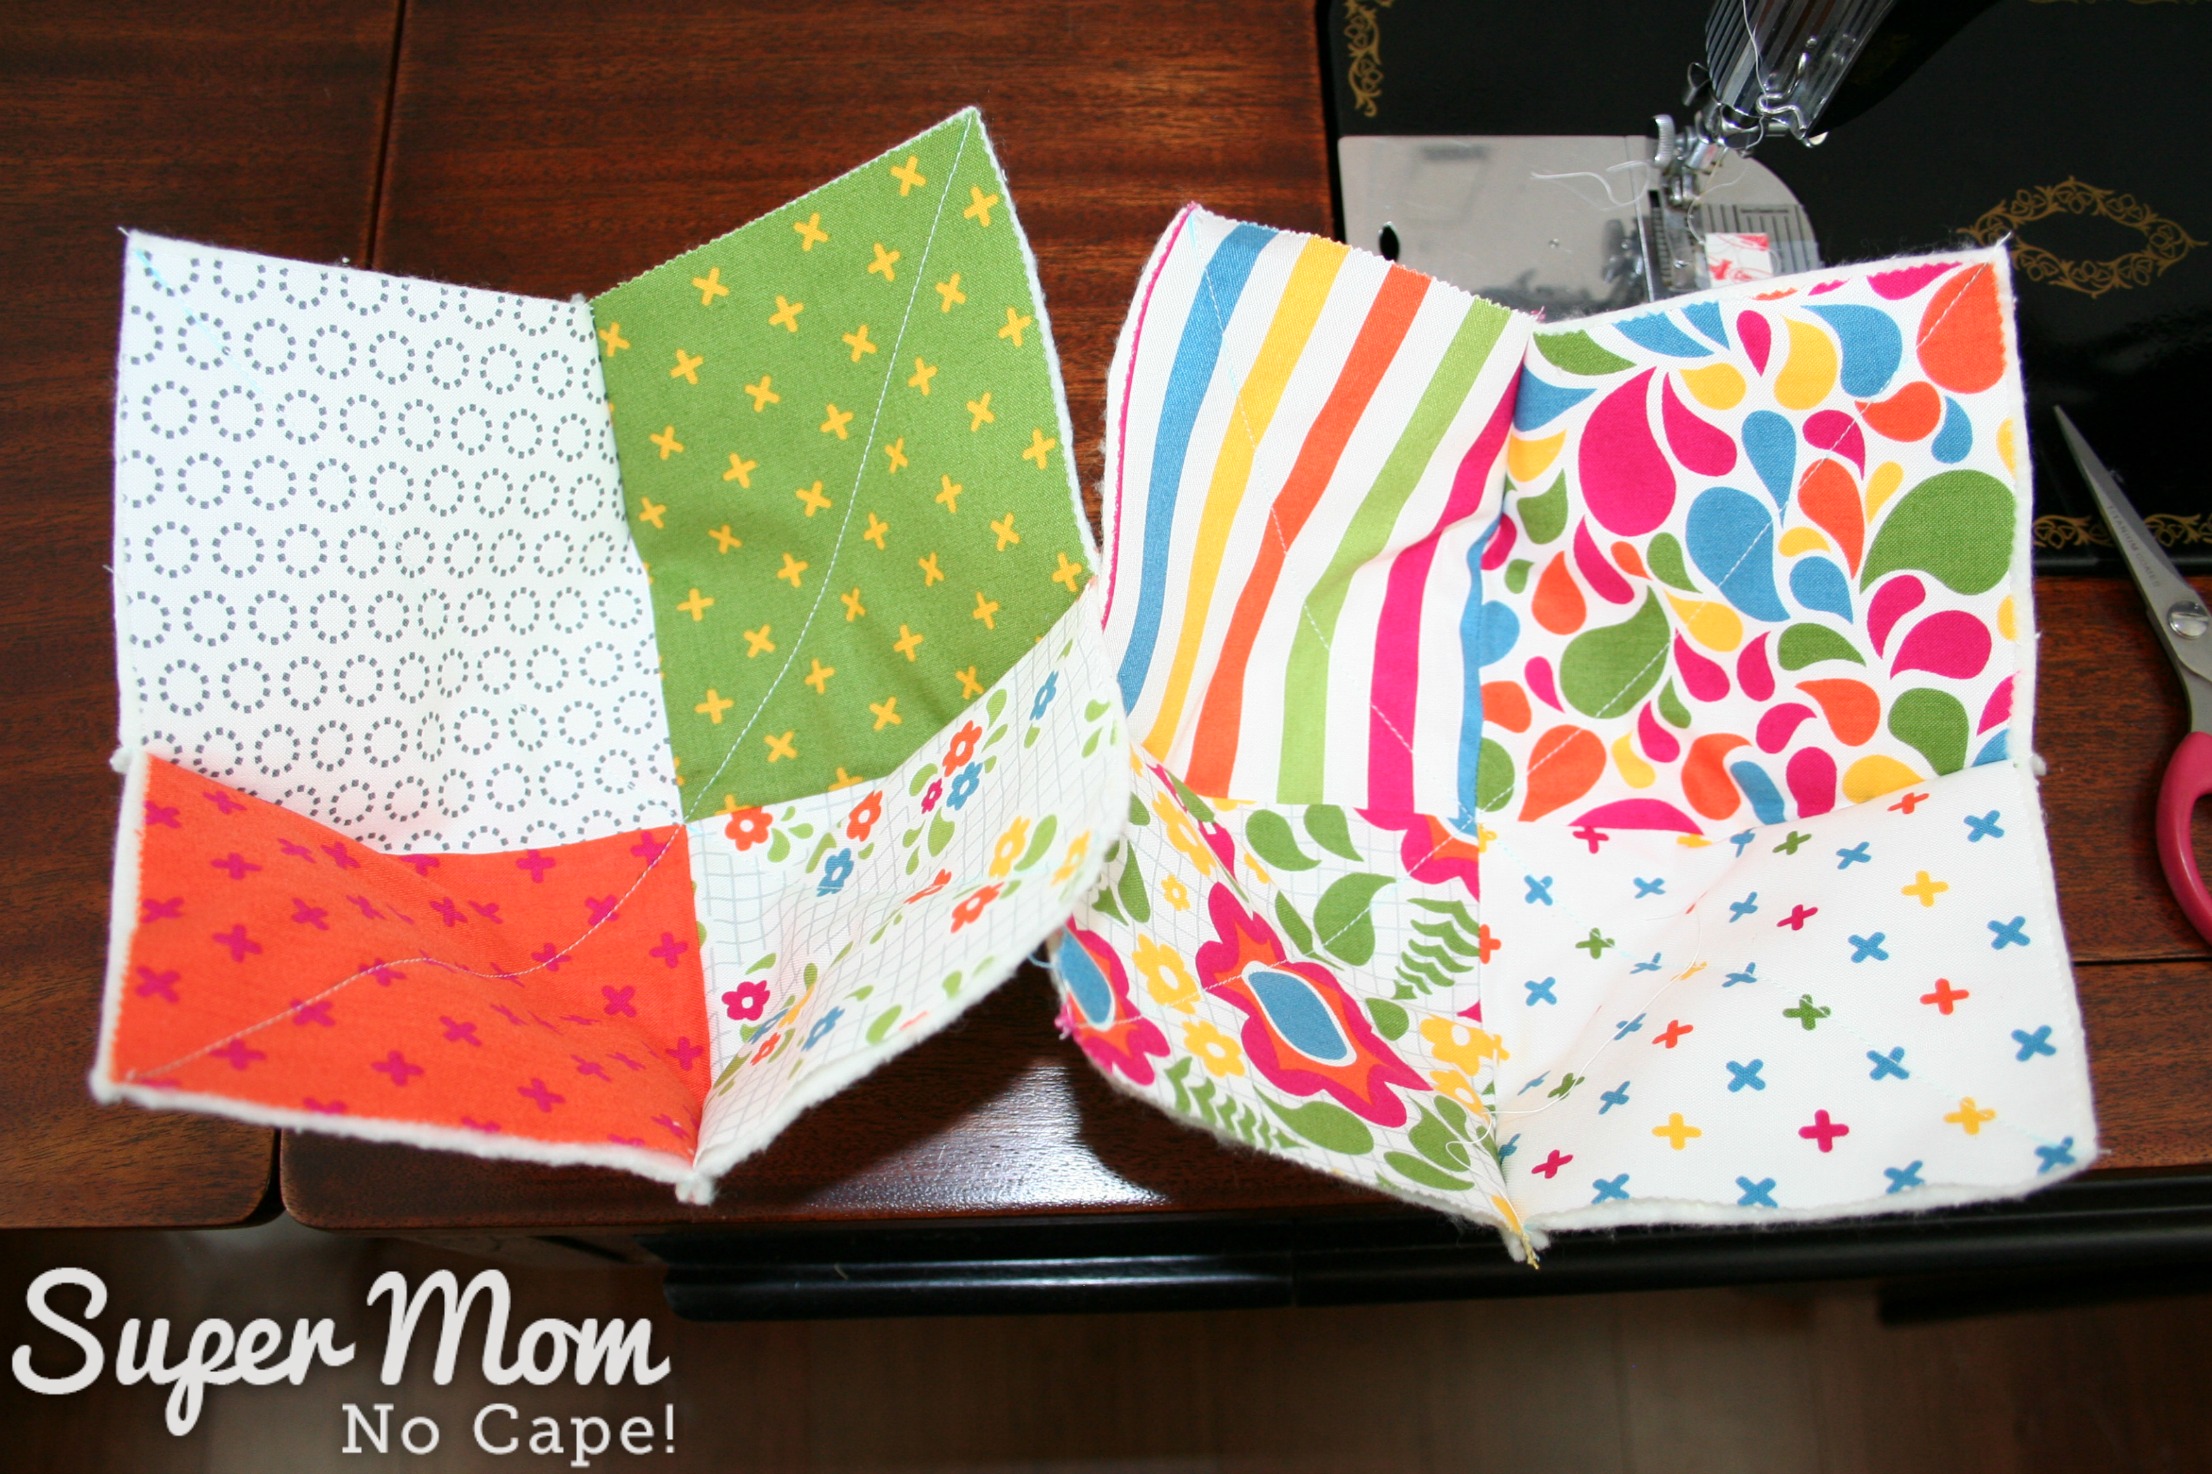
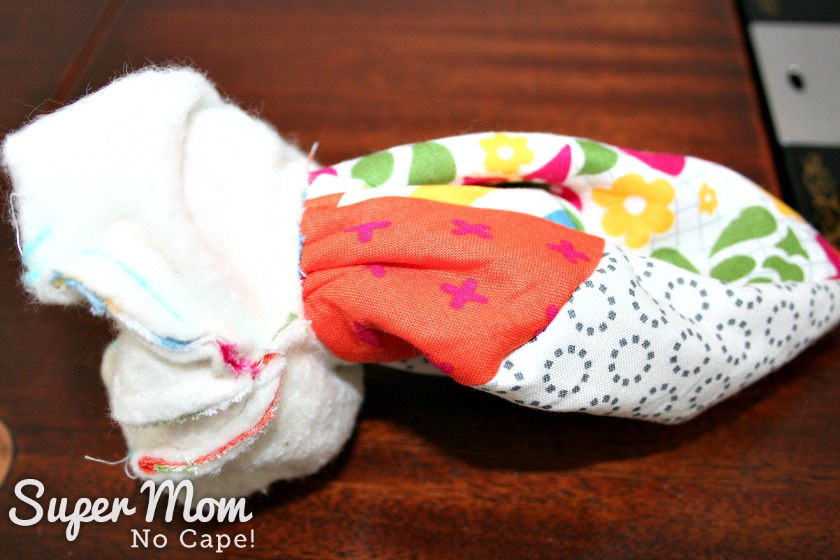
Next, fold each of your 4 patches with batting in half, right sides facing. On each end of the fold, mark 1 inch from fold and 2 inches from end.
Draw a diagonal line from one mark to the other.
Sew on the diagonal line, starting at the outside edge sewing towards the point.
Backstitch at the beginning of the seam but not the end!
Trying to backstitch at that tiny point through that thickness of materials may leave you with a tangled mess of threads.
I prefer to tie a knot at the point as you’d do when making the dart in a garment.
 Repeat on the other folded corner.
Next, fold each piece in half in the opposite direction. Once again mark the corners to make your diagonal lines.

Sew those two corners as before.
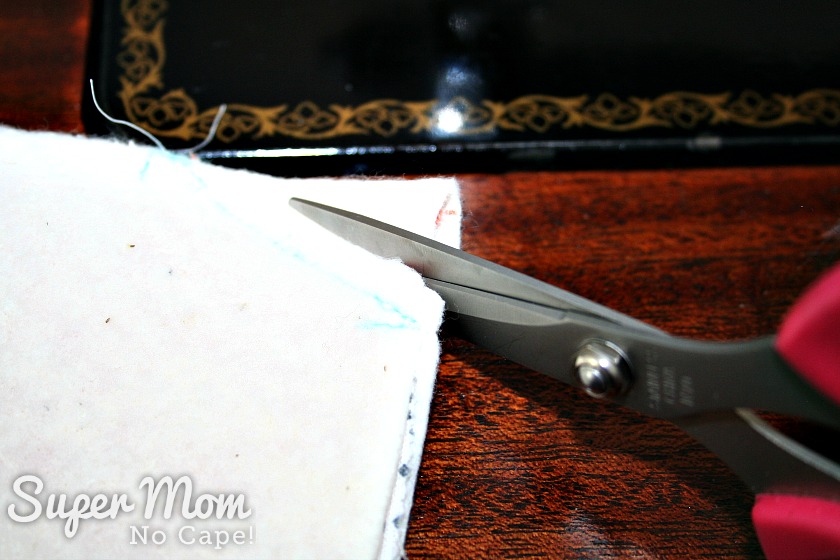
Trim off the excess fabric and batting on all four of the corners just sewn on both of the 4 patch pieces.
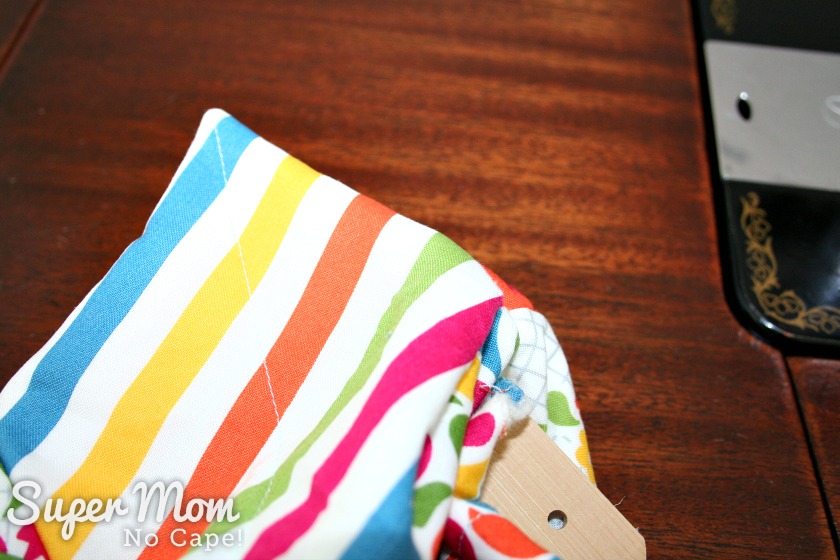
You should now have two pieces that look like this:
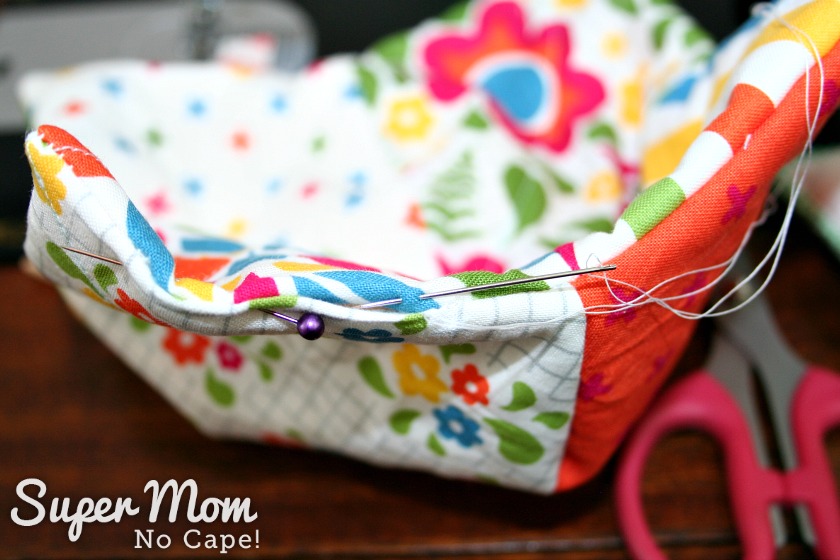
Pin those two pieces right sides together, matching seams.
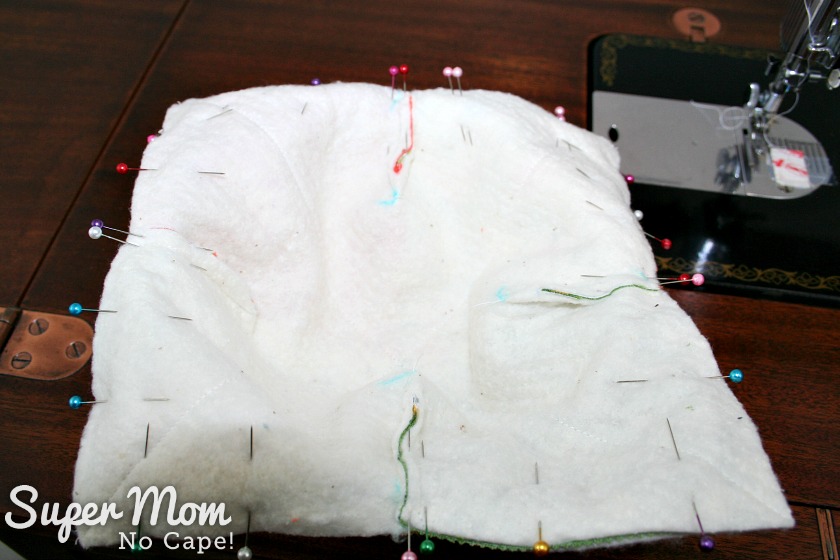 Sew all the way around the outside using a 1/4″ seam allowance. Make sure to leave a section open for turning.
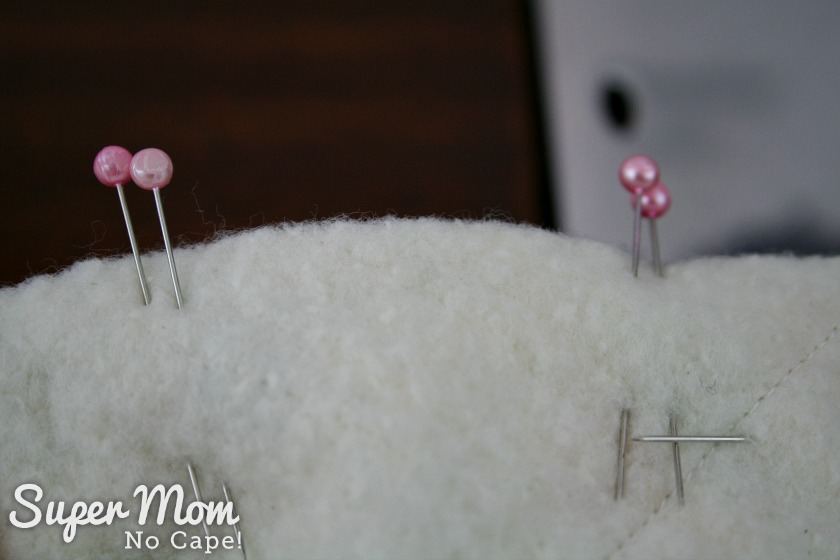
Quick tip: Mark the places where you want to start and stop with two pins with the same color heads, as shown below:
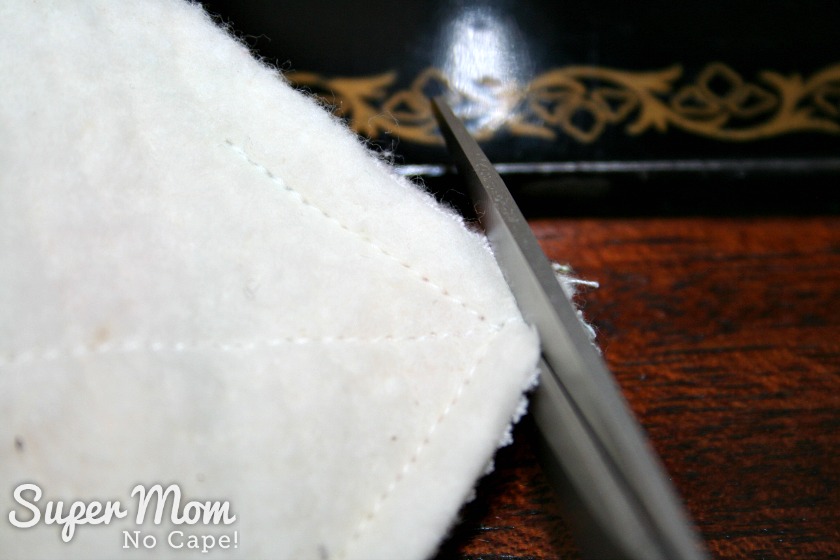
Trim excess fabric from corners to reduce bulk.
Starting with the corner opposite the opening, turn the piece right side out.
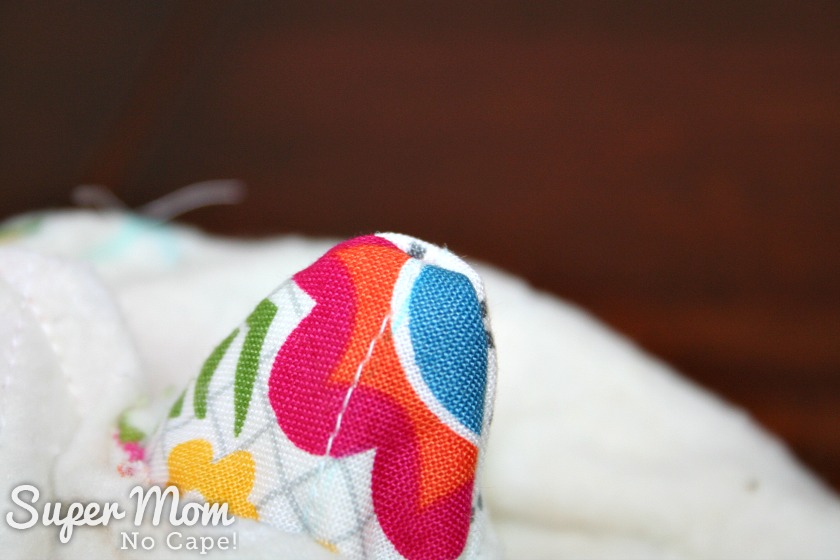
Now is a good time to push that corner all the way out using a point turner.

But if you don’t have a point turner, the tip of your scissors or a chop stick will work just fine.
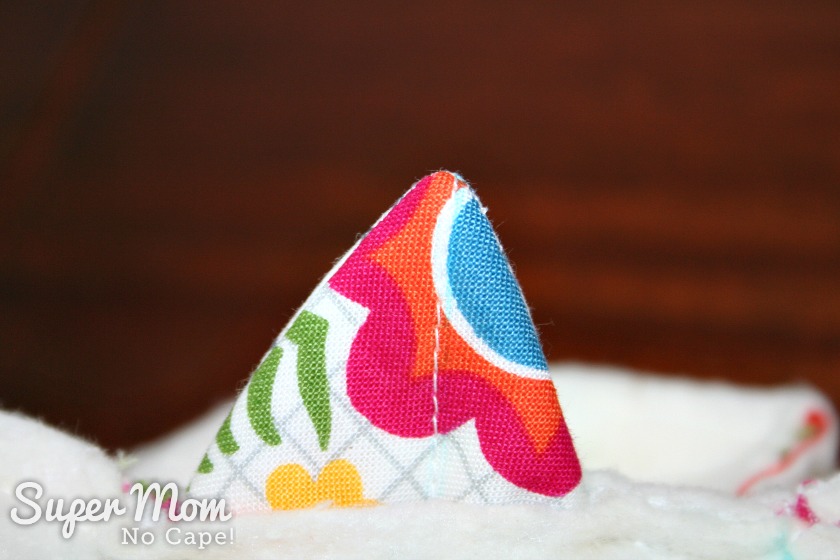
Continue to turn the piece right side out.
Once it’s turned completely right side out, use the point turner to form nice square corners on the other three corners.
Stitch the opening closed using a ladder stitch.
Press well.
Topstitch all the way around the outside edge, stitching about 1/8″ from the edge.
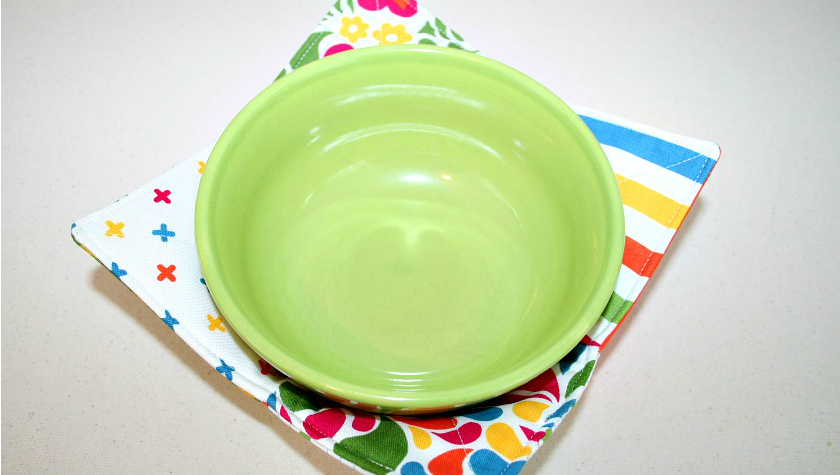
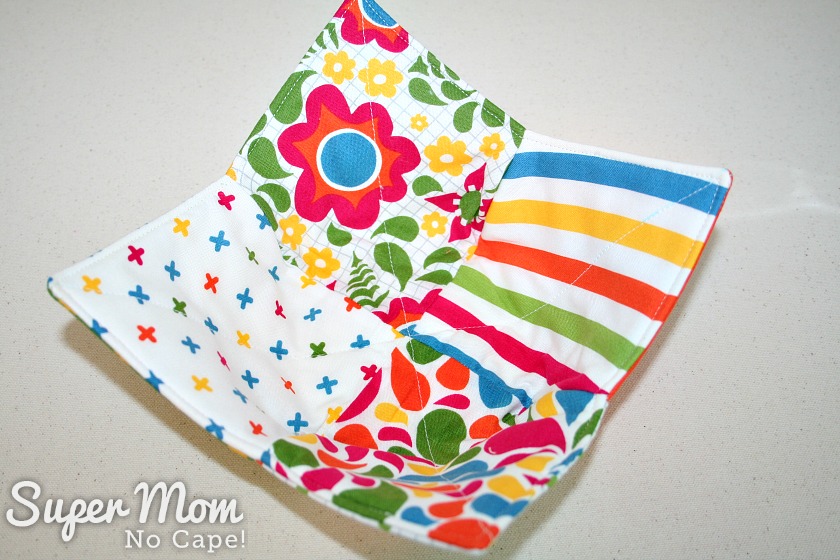
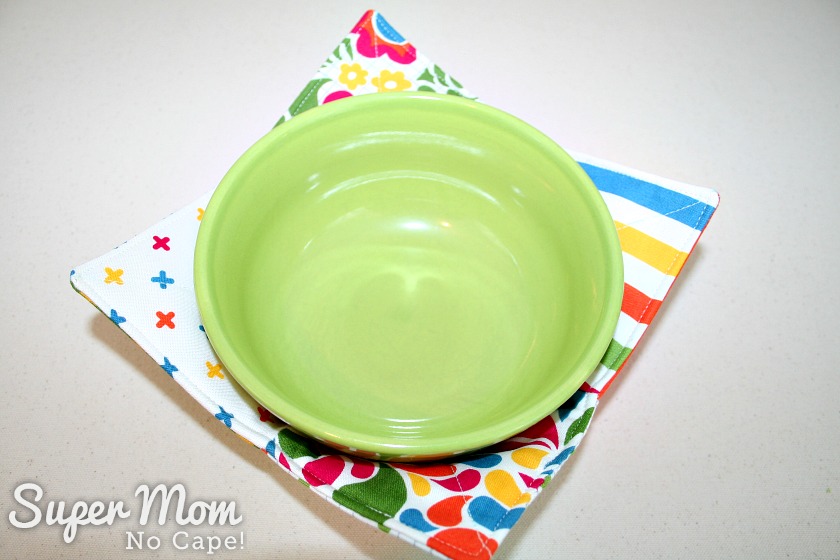
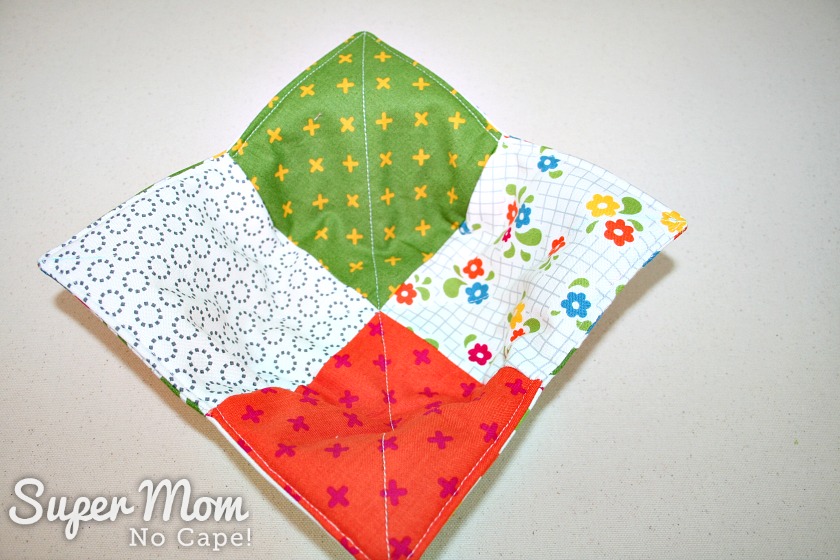
And there you have it… a finished charm square bowl cozy.
It goes perfectly with my green soup bowls.
And if you get tired of that side of the bowl cozy facing up, it’s reversible!

Get the ad free PDF
All the instructions you need to make these super handy Charm Square Soup Bowl Cozies are right here in this post. But I realize that it might be more convenient for you to have a copy that you can download to your computer to print out and have beside you as you work. You can purchase the ad free Printable Charm Square Soup Bowl Cozy PDF file for only $5 from my shop. It has this complete step-by-step tutorial with all the accompanying photos.
If you make one, two or even more Charm Square Soup Bowl Cozies using my tutorial I’d love it if you tag me. I’m @supermomnocape on Instagram, @1SuperMomNoCape on Twitter and @1SuperMomNoCape on Facebook.
If you’d like to follow me on any or all of those, I’d welcome that too. 🙂
Pin this tutorial so you can come back to it at any time by clicking on the Pinterest button under this post.
And of course, I’d love it too if you shared it on Facebook or Twitter.


19 Comments
Jeanne Z
December 9, 2021 11:39 amIn one of the photos, it looks like a Command strip on the plate on top of a piece of scotch type tape. Is this set up as a stitch gauge? How does it work? Does the Command strip peal right off the tape? I have used them to place extra lighting on my machine but have trouble removing the tape residue.
Super Mom No Cape
December 12, 2021 12:08 pmHello Jeanne,
The scotch tape was there to hold down the seam guide that had lost some of it’s stickiness and had started to peel up. These vintage Singer sewing machines didn’t have seam guides etched into the metal plate the way more modern ones do. I’ve since replaced the seam guide sticker with a new one so I no longer need the scotch tape.
I’ve never had a problem with the command hooks leaving a residue of adhesive. But then I don’t leave them in place for longer than it takes to do a quilting project.
I use the command strip to keep a consistent scant 1/4″ seam allowance when I’m piecing quilt blocks. Then I remove it when I work on just regular sewing projects.
Hope that helps.
Lynn
December 18, 2019 5:26 ami have trouble at the seam not the point..it is “cumbersome”..not sure why I’m have this problem. I try opening up the seam to sew, but I’m just doing something wrong. So much bulk, and I do trim excess fabric once i stitch the 1/4 inch…
Lynn
November 4, 2019 7:56 amWhat is the finished size of these cozies? I made some from another tutorial last year but they only hold a 5-6” bowl. Yours appear larger.
Super Mom No Cape
November 7, 2019 1:42 pmHello Lynn,
Mine hold about the same size bowl. They’re designed to hold a regular cereal or soup sized bowl. But if you need them larger, you could try cutting larger squares and then follow the tutorial from there.
RoAnn
June 14, 2019 1:36 amI’ve tried bowl copies from other tutorials but I love your use of “charm” squares. It’s such a great way to use my fabric and batting scraps. I am a widow and quite often I have a Lean Cuisine instead of preparing a meal for one. Have you ever considered designing a cozy for a Lean Cuisine or Smart One container? Thanks again for your design and photo instructions.
Super Mom No Cape
June 19, 2019 2:58 pmThank you RoAnn, for your wonderful comment.
I hadn’t thought of making them for frozen dinners… that’s a great idea. I’ll have to see what I can come up with. 🙂
Michele T
December 12, 2018 6:59 amI love that you made these with charm squares… perfect for making a set that matches.
Jacque
September 25, 2017 7:58 amAwesome tutorial, very clear and great photos. Love the tip on how you mark the 1/4 inch, too!
Super Mom No Cape
October 2, 2017 1:02 pmI’m playing catch up replying to comments today as I’ve gotten behind.
Thank you Jacque for such a lovely comment!
That little trick with the 1/4 inch mark has made such a difference when I’m piecing quilt blocks. Before I started using that (and a nifty little ruler that I really need to post about) I always had trouble with getting an accurate 1/4″ seam consistently for every project.
Jenny
September 23, 2017 8:19 amBet the turtles would love some soup! We miss the turtles.
Super Mom No Cape
October 2, 2017 1:29 pmHello Jenny,
Your comment made me smile.
We have a really fun turtle post that we’re planning for Christmas Eve again this year as Dave and I are going on vacation and taking the turtles with us so we can create an extra special story.
I have another one on a hard-drive that crashed that I’m hoping can be retrieved once I’ve got the extra money to pay to have that done. I lost six months of photos because what I thought was being backed up wasn’t.
But there are definitely more turtle stories in the works. 🙂
Holly Maudsley
September 23, 2017 6:59 amLove the idea for using charm squares! Quick Christmas gift…….homemade, washable, and reusable. Thanks for the idea and great directions. I so love that it’s not a video!
Super Mom No Cape
October 2, 2017 1:35 pmThanks so much for your sweet comment Holly!
Dave and I are planning to start doing video tutorials but that will be in addition to a photo tutorial with written instructions because I know that not everyone has the time or the bandwidth to watch video tutorials.
Rachel
September 23, 2017 5:56 amWhat a great idea!
Super Mom No Cape
October 2, 2017 1:35 pmThank you Rachel!
Super Mom No Cape
October 2, 2017 1:39 pmThank you Rachel!
I’ve got several more that I’m working on. I found some more charm packs that only had a few squares each left in them, so I’m trying to get those used up before I start cutting into my scraps.
mary
September 22, 2017 4:48 pmThose are so cute! The options are unlimited in the patchwork. Thanks so much for sharing the idea.
Super Mom No Cape
October 2, 2017 1:41 pmThank you Mary!
It’s a good thing I’ve got lots of scraps because I’ve had a few “orders” from our kids for sets for themselves.
Comments are closed.