


Are you tired of trying to fit your dirty clothes into those cheap plastic laundry bags the hotels provide? Make your own sturdy Travel Laundry Bags to take on vacation or when traveling for work.
After our kids were all grown and on their own, we put all our things in storage and then for the next few years, I traveled from contract to contract with him.
One thing I quickly discovered was that we needed some sturdy laundry bags. The cheap hotel ones are only good for one use and the mess store bought ones don’t hold up over the long term.

Travel Laundry Bag Tutorial
Materials needed:
Heavy white cotton thrifted sheet(s) (I used two full-sized flat sheets to make four laundry bags with fabric leftover for another project)
Optional:
Scraps of fabric for the lettering
Iron-on adhesive for fusing letters to laundry bag (I used a product called HeatNBond
Make a snip in the long edge of the sheet, close to the bottom hem. Rip the fabric.

Because the sheet is cotton, it will rip along the grainline of the fabric.
Measure 25 inches from ripped edge and clip.

Rip again.

Fold this large rectangle of fabric in half, matching the ripped edges. The fold will form the bottom of the laundry bag.
If you want to add lettering to the bag, do so at this point. Go here for Part 2 of the tutorial explaining how to add the word “laundry” to each bag you’re making
Next, with wrong sides together, place a pin or make a mark 2 inches from the top of the bag.

Begin sewing at this mark, using a 1/4” seam. Repeat for second side. Be sure to backtack at the beginning and end of each seam.

Make a 5/8” clip in the seam at the point where you started sewing.

Turn the bag so that right sides are facing. For one side, start sewing at the top, using a 3/8” seam and sew to the bottom. For the second side, start sewing 2 inches from the top, below the clip, using a 3/8” seam. This second seam encloses the first, finishing it neatly and makes the side seams of the laundry bag good and strong. Be sure to backtack at the beginning and end of each seam once again.

Press open the side seams above where you clipped the seams.
On the side where you started sewing the 3/8″ seam 2 inches from the top, tack those seams down by sewing them in place 1/4” from the edge as pictured.

This will prevent those edges from coming out when the cording is drawn back and forth through the casing.
To create the casing, fold under ¼” along the top and then fold under again 1”. Pin in place.

Please note: Because the top edge of the bag was the selvedge edge of the sheet, I could have gotten away without turning under that ¼”, but I prefer the look and sturdiness of the folded edge.
Sew close to the folded edge all the way around.

Cut a piece of cording 60” long and place a safety pin at one end.

Thread the pin through the casing. Remove the safety pin and knot the two ends together.
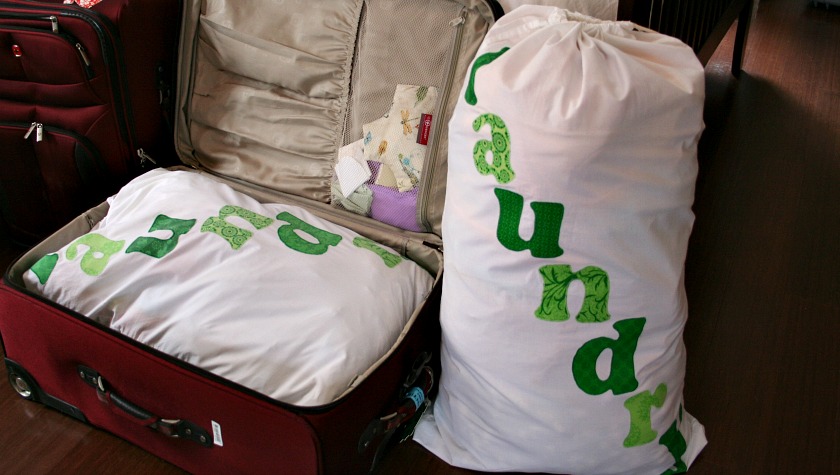
Below are my completed laundry bags.

For the lettering on the two bags pictured above, I used fabric leftover from my 4th of July picnic quilt.
The letter on the second set of laundry bags, part of a green fat 1/8 bundle was used, alternating the letters between light and dark fabric.


This post contains affiliate links. For more information please check my Disclosures and Disclaimers page. It doesn’t cost you any extra, but it does help support this site.


3 Comments
Tania
August 31, 2012 9:44 amThis is a cute little laundry bag, I might have to make one for my trailer! Thanks for stopping by and commenting on my vintage trailer door stop!
Tania
Comments are closed.