


Tired of paying for gift wrap year after year?
Do you cringe when you see that pile of paper on Christmas morning that you know will end up in the landfill (most gift wrap can’t be recycled.)
There’s a simple and very elegant solution!
Sew your own collection of gift bags. The initial cost may be a little more but the bags last for years and years meaning that you will save money in the long run.
To reduce the cost further, I watch for Christmas fabric to go on sale. You’ll find it deeply discounted in January, at Christmas in July sales and even in the months leading up to Christmas.
This Grommet Bow Gift Bag Tutorial is a good place to start or add to your collection of handmade gift bags.
Even if you’re a beginning sewist, by following these step-by-step instructions you’ll have able to sew one (or more) of these beautiful gift bags.
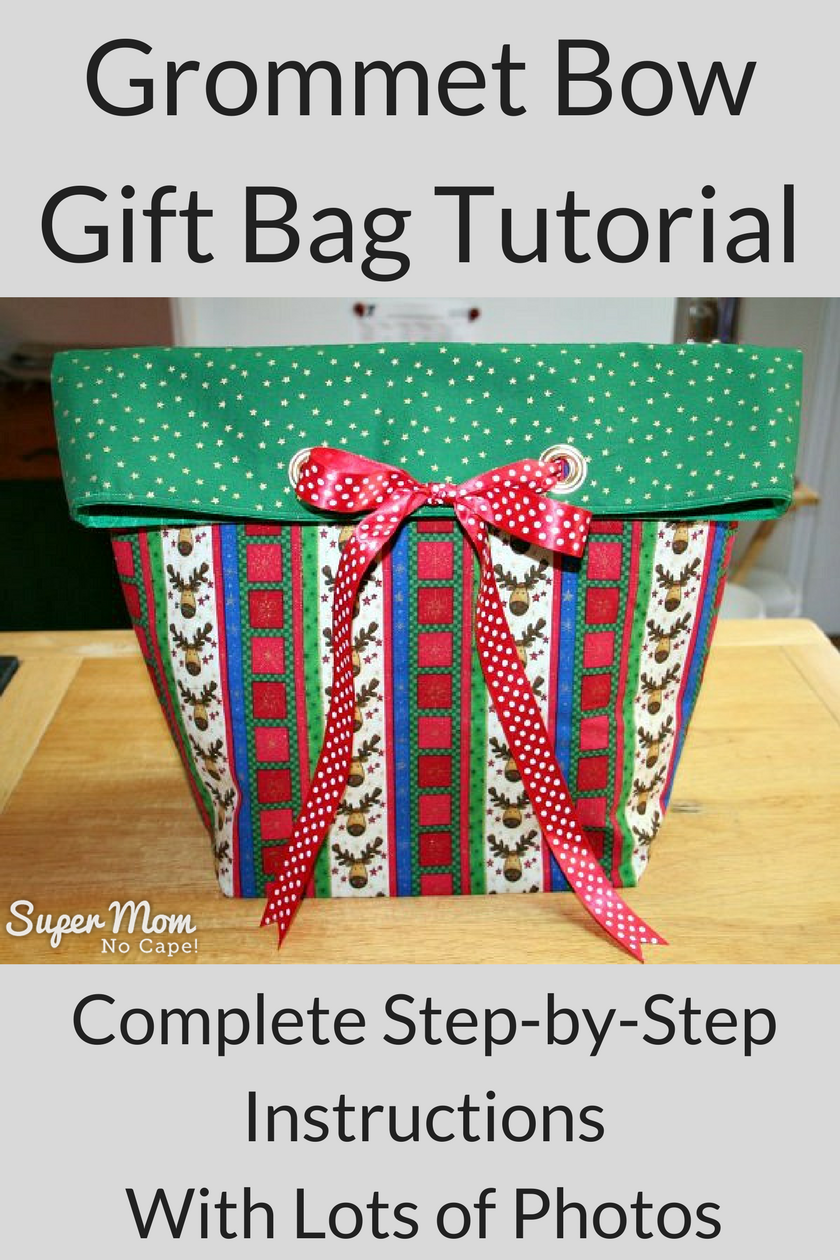
Materials Required:
2 fat quarters in co-ordinating fabrics
2 fat quarters or 1/2 yard for lining
1/2 yard of medium weight interfacing (either fusible or sew in)
Thread
Please note: You may notice that the fabric changes sometimes from picture to picture… that’s because I was making three gift bags and was sewing them assembly line fashion. 🙂

I found that my rotary cutter


Instructions:
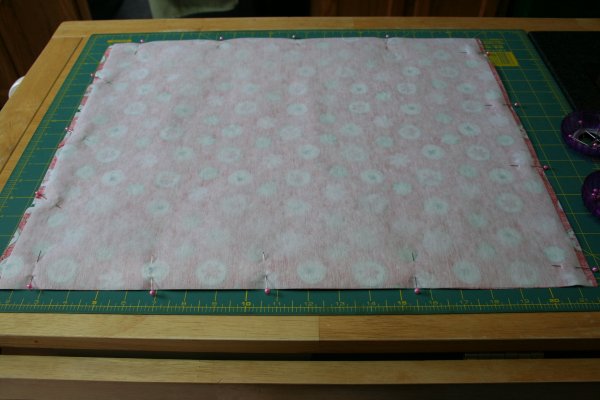
Cut 1 rectangle 16 ½” X 20 ½” from fabric that you want to be the front of the gift bag.
Cut 1 rectangle 16 ½” X 20 ½” from fabric that will be the back of the gift bag and the portion that will fold over to the front.

Cut 2 pieces of lining fabric 16 ½” X 20 ½”
Cut 2 pieces of medium weight sew-in interfacing 16 ½” X 20 ½” (As a side note, the interfacing I had was 20″ wide, so I cut my pieces 16 1/2″ X 20″ to conserve interfacing and then I just centered the interfacing on the back of the fabric. (see photo below)
Use ½” seam allowances throughout.
Note: If you are using fabric with an obvious directional print, I recommend that you use it for the front of your bag. If you were to use a directional print on the back, the print will be upside down when you fold the bag over. (See photos.)

Pin and baste interfacing to the wrong side of the front and back pieces.
Cut a 3” square out of each corner of one 16 ½” side. This will form the bottom of the bag.
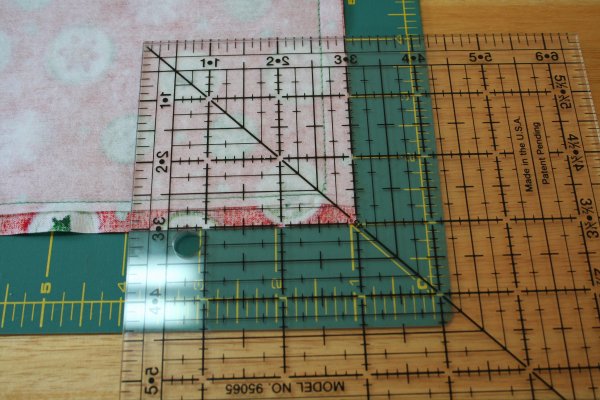
When cutting the square out of a directional print, make sure to cut the square out of the bottom as pictured below.

Repeat this step for the lining pieces.
With right sides together, sew side and bottom seams of the front and back of the outside of the bag.

Repeat for the lining pieces, leaving a 4 inch opening in one of the side seams. (Or you could do as I usually do and sew the entire seam using a regular stitch for 6 inches, backtack, change to a longer stitch length for the 4 inches, backtack, change back to a regular stitch for the remainder of the seam.
I remove those stitches after the seam is pressed open. I do it this way because it gives me a nice crisp folded edges when I’m closing that seam after the bag is turned right side out.
Press all seams open. In case you’re wondering how to press open that bottom seam, this is how I do it:


Please excuse my stained ironing board cover. I had been starching quilt blocks and didn’t have time to wash it before starting this project.
Go here for Grommet Bow Gift Bag Tutorial – Part 2
Grommet Bow Gift Bag Tutorial – Part 3 – Installing the Grommets
Grommet Bow Gift Bag Tutorial – Part 4


3 Comments
Lisa Mcgee
September 25, 2021 9:52 pmCould you use iron on interfacing? Just thought it would save A step.
Super Mom No Cape
October 2, 2021 12:09 pmHello Lisa,
Yes, you could use iron-on interfacing if you like.
I use the non-fusible because there tends to be less wrinkling when turning the bag right side out. And what wrinkles there are, press out easier than when the interfacing is fused to the fabric.
Hope that helps.
Patricia with ZiaMariaDesigns
September 15, 2011 10:20 amVery nice tutorial, thanks for preparing and sharing.
Comments are closed.