


When was the last time you took a sewing class? I have to admit that it had been years and years since I’d taken any kind of crafting class, let alone a sewing class. So I was super nervous when I arrived to take Brenda Miller’s class for her Everything Goes Bag.
I’d met Brenda at our local downtown farmers’ market one Saturday back in July when she was promoting her shop’s Grand Opening. It was at the Grand Opening for her ABQ Sewing Studio that I signed up to take this bag making class from her.
As I mentioned, I was super nervous. I’m very much an introvert and meeting new people is often a challenge for me. Plus I’m used to working on sewing projects alone.
But Brenda is such a sweet person that she makes you feel welcome right away.
This can be attested to by the fact that three of the ladies in the class had taken classes from Brenda before… two of whom had gotten up extra early to drive the hour and a half to get there.
We started at 9 am. The class was scheduled to end around 5 pm with a lunch break at noon.
Now I’m not what you’d call a speed demon when it comes to sewing. I like to take my time and work on things until they turn out exactly the way I want them to. If I don’t like the way something looks, out comes the seam ripper.
And the seam ripper made more than one appearance that day, let me tell you.
I’d brought my modern portable Singer sewing machine to class and let’s just say that she and I don’t always get along. 🙂
At lunch time, I was wayyyyy behind the other ladies and spent most of the break working to catch up.
I knew from reading the pattern beforehand and being fully aware of my personal style of working, that it wasn’t likely that I would finish the entire bag before the end of the day. But I did manage to get the outside of the bag and the handles sewn together before I decided that it was time to quit for the day and finish sewing the rest of the bag at home on my trusty vintage Singer 15-91.
It should be noted that all the other ladies finished their bags in class! Want to see their versions? Brenda wrote a blog post about them.
This is what my bag looked like when I called it a day.

Over the weekend, I worked on making the lining.
This is the side with the divided pocket attached to a large pocket that can accommodate an iPad or tablet.

The other side has the zippered pocket to keep your passport or other valuables secure. It’s attached to another large pocket.

Brenda has a very clever way for attaching the recessed zipper at the top of the bag.

You may be able to see that I added a heavy weight fusible interfacing to the lining of my bag. (I keep several yards in my stash at all times.)
It’s not called for in the pattern instructions, but as I have a tendency to fill (or overfill) every pocket in my bags, I decided the lining needed extra reinforcement.
I also like the way an interfaced lining makes it fit more smoothly inside the bag once the outside and lining are sewn together and flipped right side out.
Here are the outside of my bag and the lining finished, ready to be sewn together.

See how roomy it is inside!

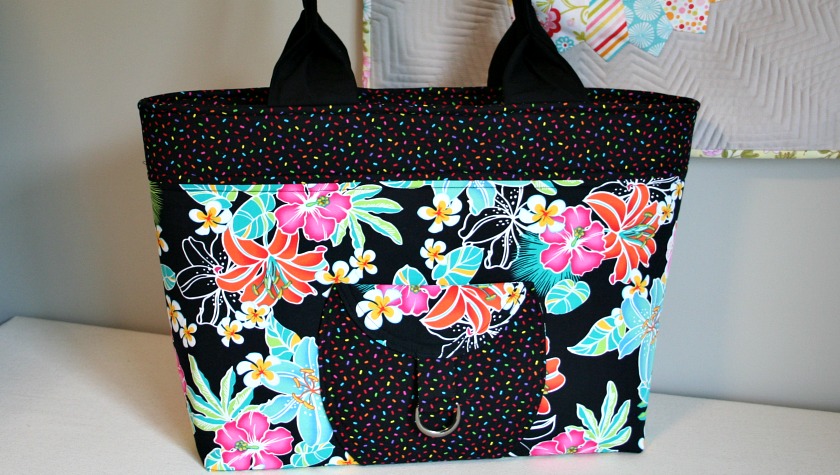
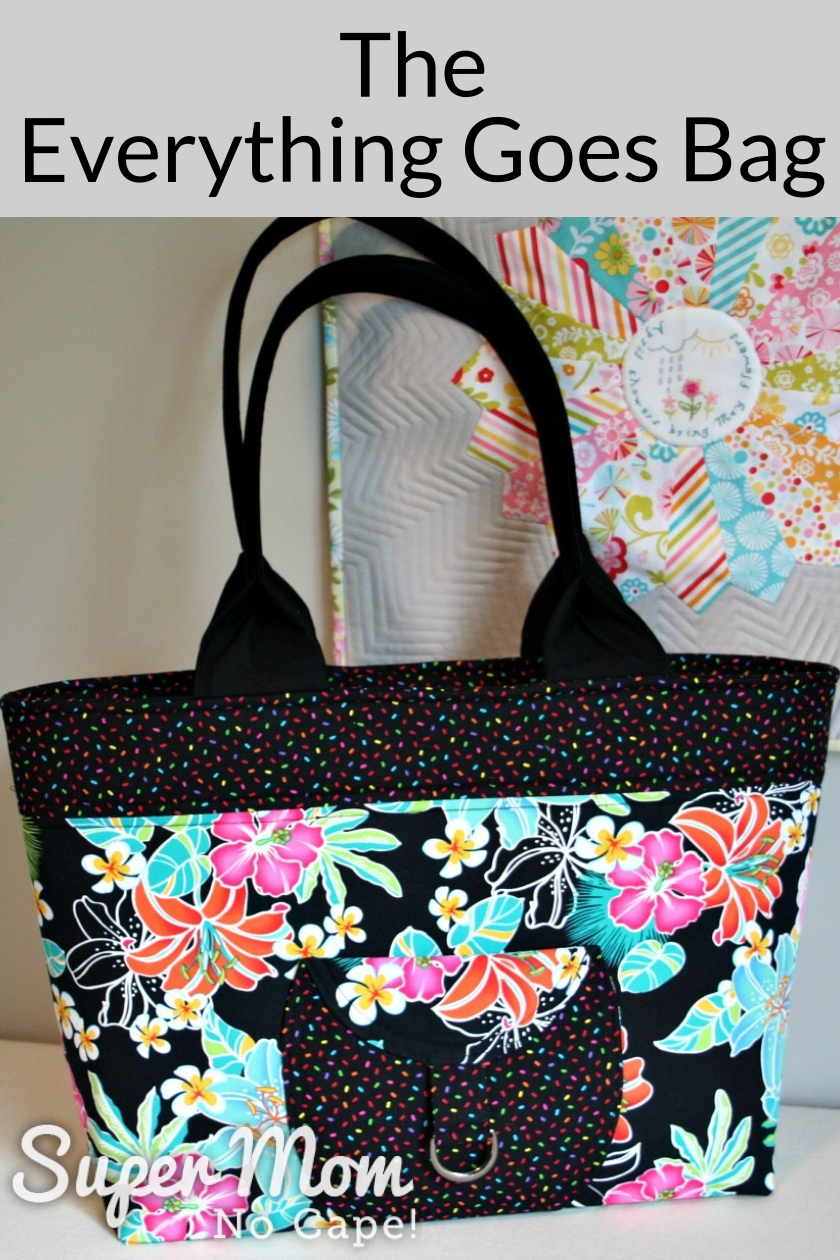
I’m so happy with my new Everything Goes Bag!

Here’s a little closer look.

If you’d like to make one as well, head on over to Brenda’s Shop and scroll down until you find The Everything Goes Bag pattern.

She also carries all that you’ll need to complete most any bag such as zippers, D-rings, fusible batting and stablizer.
I’d never worked with Bosal In-R-Form stabilizer before. I was surprised how easy it was to work and sew with.
Brenda did advise us though to be careful to press with the iron while fusing and not iron with the iron (as in wiggling or moving it around.) If you move the iron around, the fabric doesn’t adhere properly and can cause wrinkles to form.

The stabilizer is about ¼” thick and gives the bag a good sturdy structure.

Now I just need to make some matching accessories to go with the bag.
I had enough small scraps left to make this travel tissue holder.

With the rest of the scraps, I plan to make one of those bag inserts so I have even more pockets to organize things. I talk about my need for pockets in my post about my Almost Perfect Purse.
What was last sewing or craft class that you took? Let me know in the comments.
Be sure to save The Everything Goes Bag so you can find it again in the future by clicking on the Pinterest button underneath this post.
And of course, I’d love it if you shared it on Facebook and Twitter as well. 🙂

6 Comments
Catherine
December 6, 2018 5:02 amWhat a great bag! And it sounds like you enjoyed the class.
Rachel
November 1, 2018 12:47 pmA great success, indeed!
Theresa
October 31, 2018 7:21 pmYou did a nice job. I used the link you provided to the pattern site but could not find the pattern you used.
Super Mom No Cape
October 31, 2018 8:02 pmSorry about that Theresa… I updated the link. 🙂
Mary
October 31, 2018 5:22 pmThat is a great bag. The fabrics are wonderful and all of the detail is super fun. You did a beautiful job on it too.
Super Mom No Cape
October 31, 2018 8:05 pmThank you Mary! What a nice compliment!
Comments are closed.