Welcome! Whether you’ve arrived from Facebook, Pinterest, Total Tutorials or another of the wonderful sites that have linked to my DIY Wooden Yarn Bowl… I’m so glad you’re here!
DIY Tutorials are the most rewarding posts that I create for Super Mom – No Cape!
Does your yarn keep rolling away when you’re knitting or crocheting?
A yarn bowl is just the thing to fix that problem!
I’ve been wanting a yarn bowl ever since I saw some at a local craft fair. The handmade ones that the potter was selling were beautiful but at $30 to $50 each, they were not in the budget at the time.
Back in this post about some recent thrifts store finds, I showed you a wooden bowl that I’d picked up at one of our local thrift stores. I asked my husband Dave if he could turn it into a yarn bowl for me and I was surprised what a quick and easy project it turned out to be.
In this simple step-by-step tutorial, we demonstrate how to make a yarn bowl from a thrifted or purchased wooden bowl.
DIY Wooden Yarn Bowl
Materials you’ll need to make your yarn bowl:
Wooden bowl 6″ to 7″ in diameter – this beautiful 6″ Acacia wood bowl is the perfect size if you can’t find one at your local thrift store
A cordless Dremel tool and drill bit
Instructions to Make the Yarn Bowl:
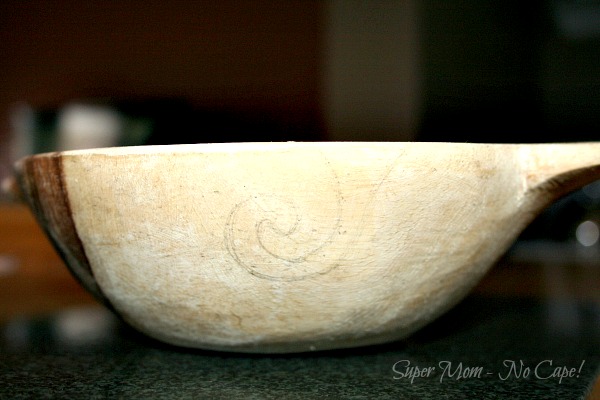
First, draw a cursive type Y shape on the side of the bowl. The reason you’ll want this shape is that the little curled tail of the Y keeps the yarn from slipping out of the slot.
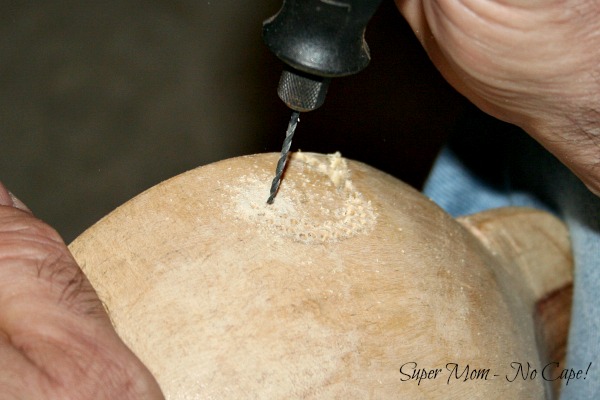
Then use the lines as a guide to drill several small holes with the cordless dremel tool.
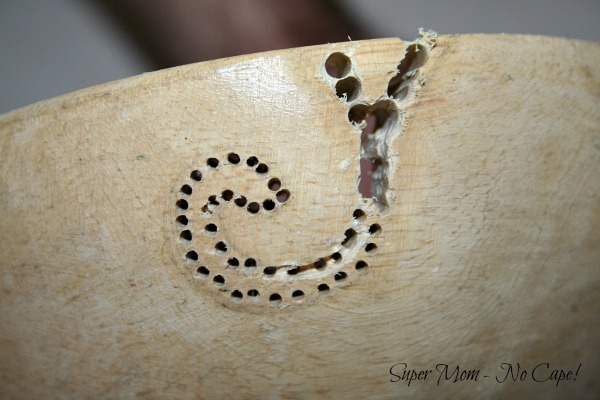
Next, using the side of the drill bit in the dremel tool, cut away the wood that remains between the drilled holes.
After all the excess wood is removed, you’ll have this rough shape cut into one side of wooden bowl:
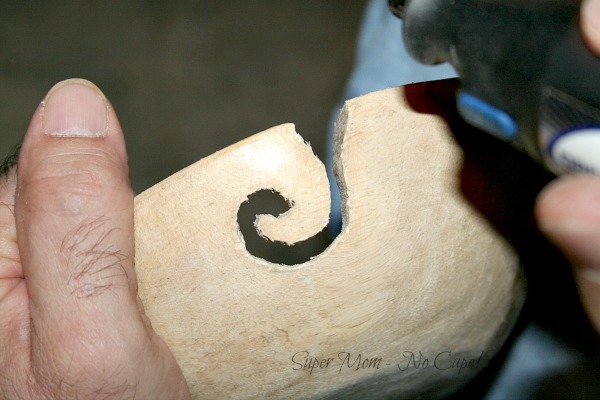
To sand the rough edges smooth, begin by using a piece of 180 grit 3M sandpaper wrapped around a metal rod.
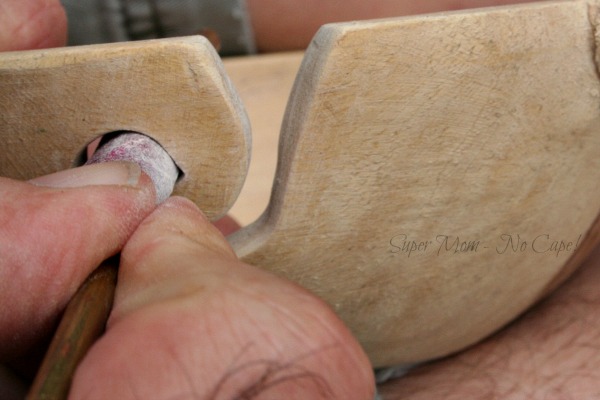
Continue sanding until the edges of the Y shaped slot are smooth and rounded.
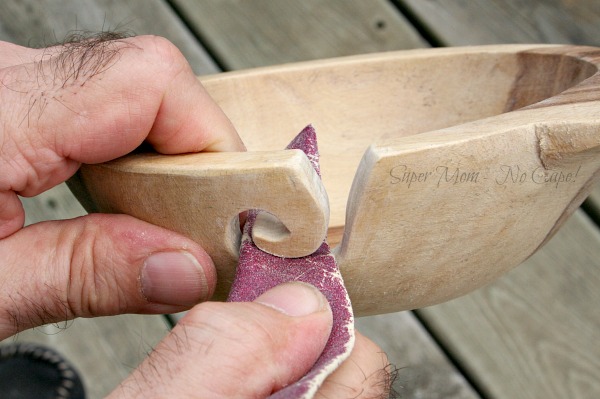
The final sanding is done with the 320 grit 3M sandpaper to make absolutely sure there is nothing that can catch or snag your yarn.
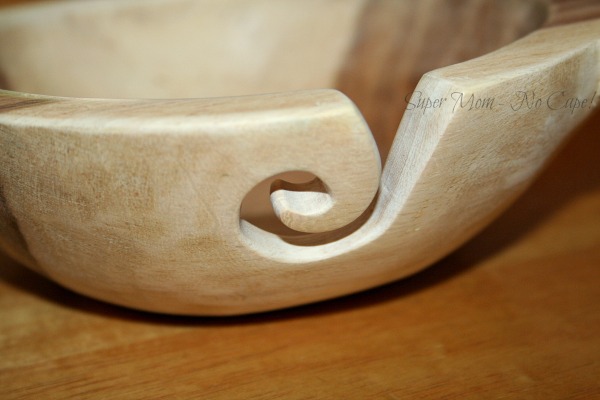
The finished opening should be so smooth that even this soft, fluffy super bulky weight yarn pulls through easily without catching.
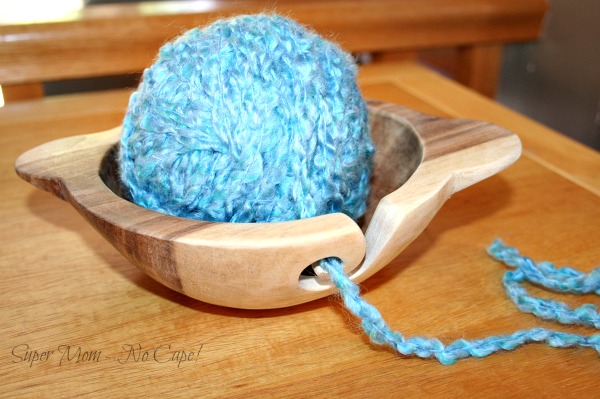
I love my wooden yarn bowl. And I know that you’ll love yours too!
It’s been so great to sit outside in the mornings with a cup of tea and knit without worrying about my yarn rolling away from me. My yarn chasing days are over. 🙂
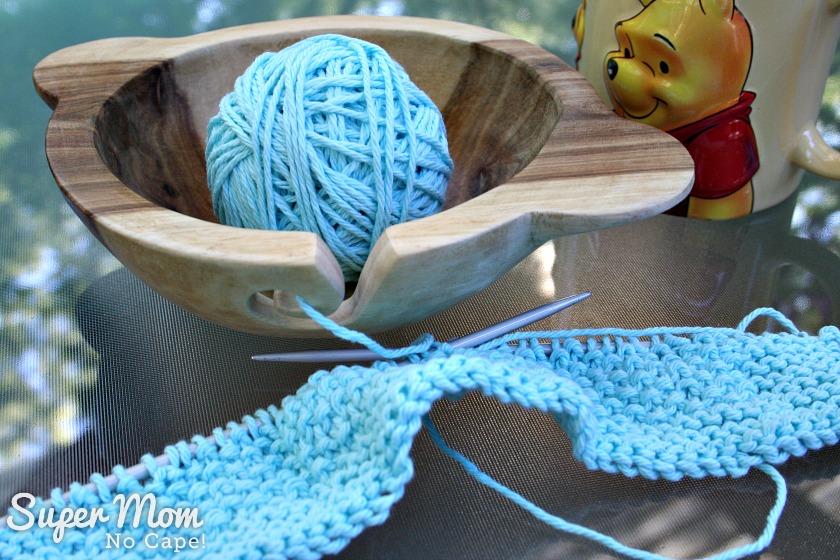
I’ve even taken it in the car on a road trips. And it’s made a few trips to the dentist’s office as well.
We’re now on the look out for some more wooden bowls for Dave to transform into yarn bowls to give as gifts.
Once you’ve made your yarn bowl, test it out using my Knitted Seed Stitch Dishcloth Pattern.
Another quick, easy one to try is my Scrap Hat Pattern. It’s a great way to use up all those small balls of leftover yarn!
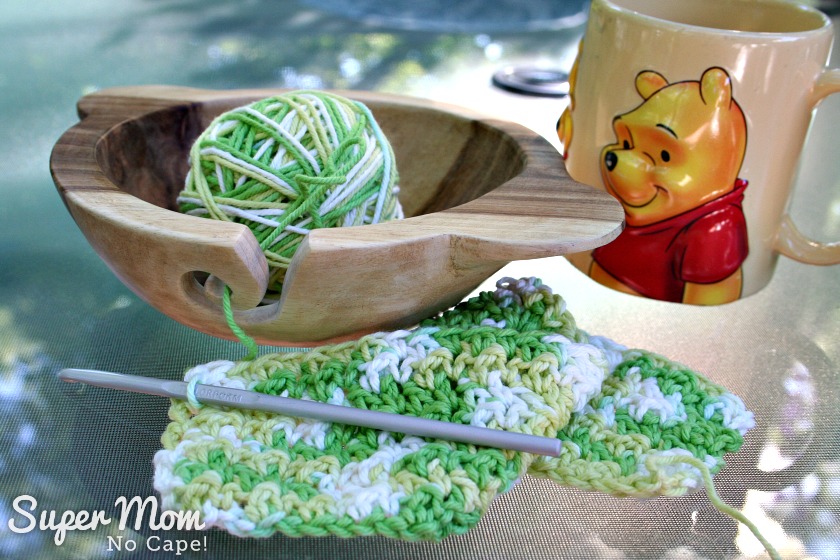
Or if you prefer crochet… check out my Crocheted Seed Stitch Dishcloth Pattern.
Love the idea of a yarn bowl but don’t have time to make one?
This Sea Turtle Yarn Bowl is on my wish list!
Or how about this beautifully carved wood yarn bowl.
For the cat lover… Red Cat Yarn Bowl
Pin this DIY Wooden Yarn Bowl Tutorial for future reference by clicking on the Pinterest button underneath this post.
And of course, I’d love it if you shared it on Facebook and Twitter as well. 🙂




15 Comments
alida
December 6, 2018 11:50 pmI have turned a bowl but am nervous doing the slot…
Mike Spaugu
October 26, 2018 5:46 pmVery clever reuse of a wooden bowl. I make bowls on my wood lathe and your article has inspired me to get busy making some of these for gifts and to see how they sell at our next craft fair. Thanks again for a wonderful article.
Super Mom No Cape
October 29, 2018 2:14 pmThank you Mike! I wish you the best of luck at your craft fair. I hope you sell lots!
Angie
June 17, 2015 6:53 amYou are so clever! What a great little bowl and at a fraction of the price!
FromMyFrontPorchToYours
June 10, 2015 3:38 pmWhat a fabulous idea!! Thanx for sharing at THT.
mdm samm
June 9, 2015 4:49 amthis is really beautiful, very well done….your photos are nicely laid out
Katie
June 8, 2015 9:21 amWhat a neat idea. Great job to your hubby!
CathieJ
June 7, 2015 8:09 amMy son gifted me with a pottery yarn bowl this past Christmas and I love it. Yours is beautiful and your husband is quite handy. I love your idea of finding more bowls to give as gifts.
twotoast
June 5, 2015 10:42 pmGreat idea – sounds like he’s a keeper 🙂
Wendy
June 5, 2015 10:55 amvery clever! I was bought a gorgeous ceramic yarn bowl as a present otherwise I’d get my Dremel out and try this!
Christine B.
June 5, 2015 7:27 amThis is a really great idea, although I don’t think I would ever be able to get my husband to make something like that! 🙂 x
Jeanne Meddaugh
June 4, 2015 8:30 pmLove your yarn bowl! You and your husband make a great team.
Mary Anne
June 4, 2015 5:37 pmI am lucky enough to own a ceramic bowl and I love it, but I have to admit I would love a wooden one even more. My dad was a woodworker after he retired from farming and I have a love for wooden pieces.
Rachel
June 4, 2015 3:23 pmVery ingenious – and clearly very useful indeed!
Helen Philipps
June 4, 2015 3:32 pmWhat a great idea, and it looks lovely!
Happy weekend.
Helen xox
Comments are closed.