


When Pam from Threading My Way posted her Drawstring Gift Bag with Divider ~ Nail Polish Bag ~Tutorial for the 2nd Monday of the Sew Early for Christmas Blog Hop, I just had to make one. Well actually I ended up making two, which I’ll explain about in a bit.
They are the perfect little project for using up scraps of fabric! And since we’re sewing to get a head start on Christmas gift making and holiday decor, I decided to use up some of my Christmas fabric scraps.
As you can see from these two drawers of my fabric dresser I have no shortage of Christmas fabric to choose from!

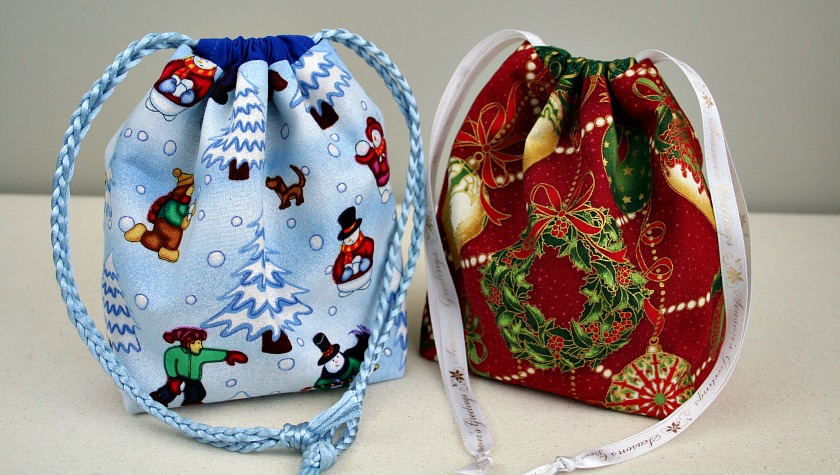
Here’s the first gift bag I made from Pam’s Drawstring Gift Bag with Divider Tutorial.

For the outside of the gift bag I used scraps that our middle daughter gave me that were left over from the Christmas stockings she made last year to sell.
That’s one of the bonuses of having daughters who sew. You get their fabric scraps! 🙂
The casing for the drawstring and the lining were made from a pretty green with gold swirls and stars.

The unique feature of Pam’s gift bag is this divider.

It’s that divider that led me to make a second one of these drawstring gift bags.
In Pam’s tutorial, she mentions that she had a difficult time photographing and explaining how to add that little divider. She also mentioned that she’d tried to use the cut out method to box the bottom of the gift bag but decided to use the method she details in her tutorial.
Now, I must confess. I didn’t use Pam’s method for constructing her gift bag.
Do you have ways of creating certain projects that you always use no matter what the pattern instructions tell you to do?
It may be because you find that particular method easier or perhaps it’s just the way you first learned how to do it and why change something that works for you.
Well… I’m that way with boxing the bottom of these kinds of gift bags. I always use the cut out method, no matter what the instructions say. I even used it for my own Grommet Bow Gift Bag Tutorial.
I decided to make a second Drawstring Gift Bag with Divider so I could show you how I went about boxing the bottom of the gift bag and adding the divider.
But first, you’ll need to head on over to Pam’s blog post to get the fabric measurements and her tutorial. Then if you like, you can come back here and I’ll give you some quick hints showing how I made her drawstring gift bag with divider.
Note: This will not be a full, detailed tutorial. Pam has already written that.
These are just what I hope will be some helpful hints if you happen to need them.
Also note: ¼” seam allowance was used except where indicated.

Drawstring Gift Bag with Divider – Helpful Hints
First, cut out the outer gift bag fabric and the lining fabric according to Pam’s measurements.
Then cut a 1½” square out of each of the two bottom corners. If you’re using non-directional fabric, it doesn’t matter which 2 corners you cut the 1½” square out of as long as the corners are parallel to each other and not diagonal to each other.
If you are using directional fabric make sure you cut the squares out of the side that you want to be the bottom of your bag.
I was using directional fabric so that’s what I did.
Also if using directional fabric, instead of cutting one divider piece, cut 2 divider pieces 3¼” X 5″.
You may also want to cut a small 2¾ X 4¾” piece of heavy weight Pellon 808 interfacing to give the divider a bit of body.
Here are all my fabric pieces cut out for the second drawstring gift bag ready to sew:

Isn’t that fabric with the snowmen and kids having a snowball fight fun! Those pieces are cut from some of the last scraps I have left from making stockings for my step grandson and later his sister the Christmas after they were born. Step grandson turned 14 this past spring, so that tells you how old those scraps are. 🙂
To make the divider for the drawstring bag if using directional fabric:
Sew the two 3¼” X 5″ pieces of fabric right sides together along one 5″ side. Press the seam to one side.
Fuse the 2¾” X 4¾” piece of heavy weight interfacing as shown in the photo.

Fold down the other half of the divider and press well. Set aside for later.

Sew the outside pieces for the gift bag right sides together along the bottom. Press seam allowances open.

Sew sides. Press the seam allowances open.
To box the bottom corners:
Match the side and bottom seam and pin.

Sew from one side to the other as shown below:

Set the outside of the drawstring gift bag aside.

To add the divider to the drawstring gift bag:
Sandwich the bottom of the raw edge of the divider between the bottom of the lining pieces.

Sew the bottom seam using slightly more than ¼” seam allowance rather than the ¼” seam allowance that was used for the outside of the gift bag. I do this so that the lining will fit better and more smoothly inside the bag.
Start the seam slightly more that ¼” in from the edge and stop slightly more than ¼” from the end. Press the seam open.

Fold back the lining on either side of the divider.

Sandwich the side of the divider between the sides of the lining. Pin well.

It should look like this when viewed from the bottom of the bag:

Sew from the top of the side seam to the bottom of the side seam.
Box the bottom corner as you did for the outside of the gift bag and sew using slightly more than ¼” seam allowance.

Press the side seam open.
A tailor’s sleeve pressing roll

Complete the drawstring gift bag with divider according to Pam’s tutorial.

I’m so glad I was able to find another project to use this fun fabric in!

And there’s that little divider snuggled in the lining.

To make this post even more helpful, I thought I’d share with you some options for what you could fill the gift bag with.
First, I followed Pam’s example and added nail polish. I also popped in a small nail care kit.

Another option would be to create a mini spa kit for the women on your list.

For the gift bag above I filled three cello bags; two with Epsom salt and one with bubble bath balls. A small loofa was also added. And for an extra special touch… some bangles to make her feel pretty.
Most of the men I know love bubble baths too… so why not create a spa gift for them as well.

Or if they’re not a bubble bath loving guy, this Men’s Travel Drawstring Gift Bag might just be the perfect gift.

Bullet Journals are all the rage right now. Pop in a small journal and some colored pencils for a gift that will definitely be used long after the holidays.

We’ve still got two more Sew Early for Christmas posts coming on in the Blog Hop.
Joy from Days Filled With Joy will be sharing her post on Monday, July 23rd.
And then on Monday the 30th of July, the final Sew Early for Christmas tutorial will be presented by Dione over at Clever Chameleon Quilting.
And of course, I already shared my Quilted Christmas Wreath Pillow Cover on July 9th.
Be sure to save this post for future reference by clicking on the Pinterest button underneath this post.
And of course, I’d love it if you shared it on Facebook and Twitter as well. 🙂


12 Comments
Carol
November 5, 2021 11:37 pmI’ve been making my own bags for several years but haven’t made one with a divider before. Great idea. My granddaughters will love them. Thank you.
Super Mom No Cape
November 7, 2021 8:16 amYour welcome, Carol. Have fun making them!
Velia
August 30, 2018 11:58 amI love visiting you, however, the ads are so obnoxious I cannot stand to read through your postings. I am interested in you and what you have to say, NOT the advertising.
Super Mom No Cape
August 30, 2018 3:20 pmI’m sorry you feel that way, Velia. Ads are what allow me to continue to provide you and my other readers with free tutorials and content.
Julie
July 31, 2018 3:55 amI saw Pam’s tutorial too and it’s on my to do list. I’ve pinned this too so when I’m ready I can read through both ways. The idea of the built in divider really appealed to me.
I often meander from the instructions for things too, sometimes that’s a good thing, sometimes not so much!
Leonore
July 25, 2018 4:36 pmThis is a really excellent tutorial!! Great Idea to have a divided bag! I will be making these to have on hand for gifts! Keep making these great tutorials.
MaryAnne
July 24, 2018 9:30 pmWhat fun! I just discovered the original tutorial the other day and then was surprised to see your post about it too. I really like this little bag and can’t wait to try making some for including in my Christmas box. Thanks for your additions to it!
Velia
July 24, 2018 5:36 pmFor years, quilt guilds and I have been making drawstring gift bags, pillow cases and special sheets with pockets, for Xms and other holidays for the children’s hospitals here in San Diego Ca.
Pam @Threading My Way
July 24, 2018 6:10 amLove the red/green fabric, Susan. Great photos and easy to follow instructions.
Super Mom No Cape
July 24, 2018 2:13 pmThanks so much Pam!
And thanks for the tutorial. I’ll likely be making a few more before Christmas. 🙂
Rachel
July 24, 2018 4:49 amLovely – and very useful, too!
Super Mom No Cape
July 24, 2018 2:12 pmThank you so much Rachel! They’re fun little bags to make.
Comments are closed.