


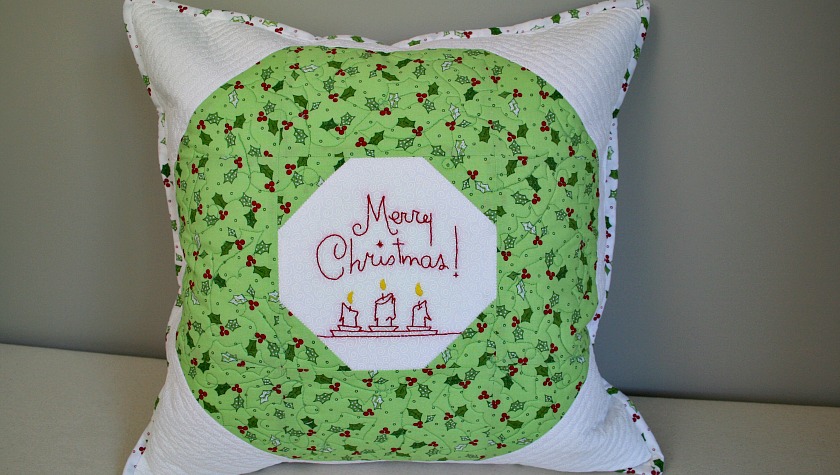
Welcome to the first day of the Sew Early for Christmas Blog Hop. In today’s Quilted Christmas Wreath Pillow Cover Tutorial, I’ll be showing you how to create the 9 patch wreath quilt block and turn it into a pillow cover to add to your holiday decor or to gift as a gift.
Each Monday in July, starting today, one of the four bloggers in the hop will be sharing a sewing or quilting tutorial to help you get an early start on your Christmas sewing.

Here’s the schedule for the remaining weeks of July:
- Monday the 16th of July is Pam from Threading My Way
- Monday the 23rd of July is Joy (our hostess) at Days Filled With Joy
- Monday the 30th of July is Dione from Clever Chameleon Quilting
I do hope that you’ll pop over to each of their blogs and subscribe or follow them on social media so you won’t miss their tutorials.
I originally designed this pillow cover as one of the gifts for my swap partner Debbie in the 2015 Santa Sack Swap. I’ve been meaning to make another one to be able to share the tutorial with you for how to make it ever since.
So let’s get started!

Quilted Christmas Wreath Pillow Cover Tutorial
Materials needed to make on Christmas Wreath Quilt Block:
- 1 fat quarter of green Christmas themed 100% cotton quilt fabric
- 1 fat quarter of white 100% cotton quilt fabric
- Thread
- Embroidery floss
- Merry Christmas Candles Embroidery Pattern
Addition materials needed to make the Christmas Wreath Pillow Cover:
- 21″ X 21″ cotton quilt batting
- 21″ X 21″ white backing fabric
- 2 pieces of fabric 11″ X 18.5″ for pillow back
- 2 pieces of fabric 11″ X 18.5″ for pillow back lining
- 20″ nylon zipper
If you will be finishing your pillow with binding:
- 3 strips WOF (width of fabric) for binding
Instructions to make the Quilted Christmas Wreath Pillow Cover:
Begin by cutting your fabric.
From the white background fabric cut:
- Five 6½” squares
- Four 2½” X 6½” rectangles
From the green fabric cut:
- Four – 4½” squares
- Four – 4½” X 6½” rectangles
- Four – 2½” squares
For my Christmas Wreath Pillow Cover, I chose a white on white background fabric and Jingle All the Way Green Holly & Berries by Kim Christopherson for Maywood Studios.

Pin one 2½” X 6½” white rectangle to each of the 4½” X 6½” green rectangles, right sides together. Sew using a scant ¼” seam allowance.
Note: going forward all seams are a scant ¼” unless otherwise indicated.

Press the seam allowance towards the green fabric. Set these four blocks aside.

Draw a diagonal line from corner to corner on the wrong side of each of the 2½” and 4½” green squares.

Each square will look like this:

Pin a 2½” green square to each corner of one of the 6½” white squares, right sides together.
Sew along the right hand side of the drawn line. If you look closely at the photo, you’ll see the needle is not going into the fabric in the center of the pencil line, but on the right hand side of the line.

Once all four corner squares are sewn on, the block should look like this:

Place the ¼ line of the ruler on the seam and trim the seam allowance.

Once the corners are trimmed the block will look like this:

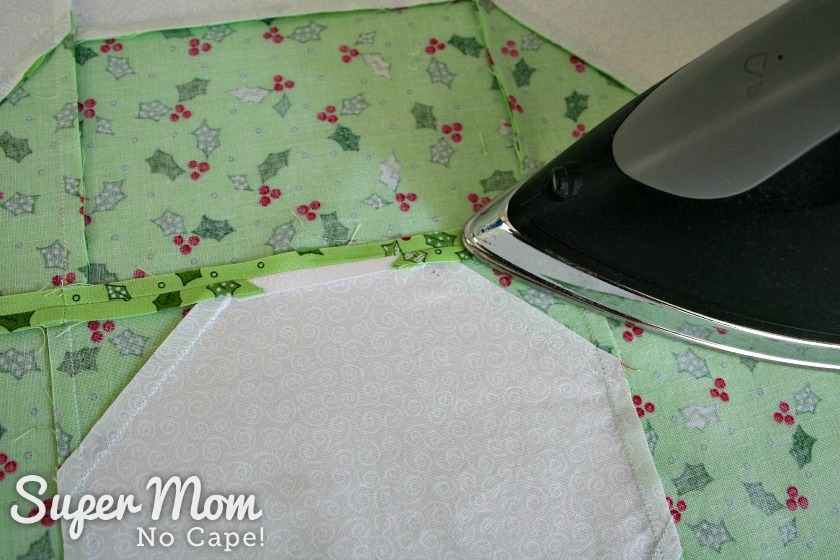
Press the seams towards the green fabric.
The center block for the Christmas Wreath Pillow Cover is done. Set it aside with the other four completed blocks.

Pin one 4½” green square to the corner of a 6½” white square. Repeat for the remain squares.
Sew as you did for the smaller squares.

You’ll end up with four blocks that look like this:

Trim, leaving a ¼ seam allowance as shown previously.


Press the seam allowance towards the green fabric.
Now that the nine blocks are finished, lay them out to form the Christmas wreath as shown in the photo below:

Flip the blocks on the left over onto the center blocks.

Pin and sew together.
Lay the blocks out again.

Flip the blocks on the right over onto the center blocks.

Pin and sew together.
Press the seams of the top and bottom rows towards the center blocks.
Press the seams of the center row towards the outer blocks.


Lay out the three rows of the Christmas wreath quilt block right sides facing up.

Flip the top row down onto the center row.

Nest and match the seams carefully. Sew together.

Lay the blocks out one more time.

Flip the bottom row up onto the center row. Sew together.

Sew the seam.
Press the last two seams open.
 The top for the Christmas Wreath Pillow Cover is complete!

Trace the Merry Christmas Candle Embroidery Pattern onto the center block.

I use a Huion LED Light Pad.
I love that you can easily adjust the brightness just by tapping the On button. It also has a neat smart memory feature that remembers the brightness you set it to the last time you used it. It’s AC powered and light weight with a nice size drawing surface (16″X12″.)
If you don’t have a light box, taping the pattern to a window and then tracing on the fabric works too. I did that for years.
Once the pattern is traced, stitch the embroidery pattern in floss colors of your choice.
I used DMC Red 321 and DMC Yellow 973.
To quilt the Christmas Wreath Pillow Cover front:
Layer the backing fabric, batting and Christmas Wreath Pillow block.

Baste using your favorite method.
My favorite method is hand basting.

I feel that all the hand stitches hold the layers together much better than pins. And I’m able to quilt right over the basting stitches without having to remove pins as I go. Then once the quilting is done, it’s a simple painless process to remove the basting threads.

Quilt the pillow cover front however you desire.
For my pillow cover, I chose to stitch in the ditch around the outside and inside of the wreath. Then I shadow quilted around the wreath in the white background fabric using the edge of my walking foot as a guide.

Then the wreath was free motion quilted with holly leaves.

Once the pillow front for the Christmas Wreath Pillow Cover is finished, follow the instructions in my How to Make a Concealed Zipper Pillow Back to make the back of the pillow.
For the pillow cover back, I used a fabric that didn’t need to have the prints matched so I was able to skip that part of the instructions.
If you’re finishing your pillow cover by adding binding, place the front and back with the linings facing, machine baste together using a long stitch on your sewing machine. Add the binding using your favorite method.
A simpler way and I’ll admit much quicker way to finish the pillow is to place the front and back, right sides together. Pin and then sew all the way around. Make sure to open the zipper half way, so that you’ll be able to turn the pillow cover right side out after sewing.
When the holidays roll around all you’ll need to do is add a pillow form.
Your Christmas Wreath Pillow could be set on a bench in your front hall to greet your guests.

For some extra holiday cheer, you could even add a Santa Hat!

And of course, it will be equally at home decorating your living room couch.

For those of you who might be curious, I used the same fabric line for the binding and the concealed zipper pillow back as I did for the wreath, except in the white color way. It’s called Jingle All the Way Holly & Berries White.

I hope you’ve enjoyed this tutorial, as much as I’ve enjoyed creating it for you.
If you make a Quilted Christmas Wreath Pillow Cover, please post it on Twitter, Facebook or Instagram and tag me so I can come see. I’m @supermomnocape on Instagram, @1SuperMomNoCape on Twitter and @1SuperMomNoCape on Facebook.
And please do follow me on any or all of them.
Now don’t forget to visit the other bloggers taking part in the Sew Early 4 Christmas Blog Hop on their designated Mondays.
Be sure to save the Quilted Christmas Wreath Pillow Cover Tutorial for future reference by clicking on the Pinterest button underneath this post.
And of course, I’d love it if you shared it on Twitter and Facebook as well. 🙂


6 Comments
MaryAnne
July 24, 2018 9:26 pmAnother fun project! I’m also thinking the little stitchery in the center would make perfect ornaments on its own.
Susan
July 13, 2018 8:17 pmThanks, that’s a great pillow. I might make more than one. =)
Rachel
July 9, 2018 11:33 amChristmas? Noooooooo! *runs and hides*
I do so admire people who can bring themselves to do Christmas stitching in a heatwave!
Dione
July 9, 2018 8:22 amThis is a great Christmas pillow – it would make a lovely hostess gift. Love it, thanks for the tutorial.
Joy
July 9, 2018 6:50 amOoooh, I love it Sue!! Thanks so much for sharing such a great project! I am going to start tracing 🙂 xx
Pam @Threading My Way
July 9, 2018 5:53 amA beautiful Christmas cushion – love it!!!
Comments are closed.