


They can be made as plain or as fancy as you like.
Do you have bits and pieces of edging lace, cording or fringe that you’ve been saving because you can’t bear to throw it away?
Get them out and have fun embellishing the fabric cones to fill with treats for everyone you want to give a small gift to this Valentine’s Day.
And you don’t even have to use Valentine’s fabrics. They can be personalized to the tastes of whoever you’re giving them to.
If you’re a mom with young children, they’d make awesome little treat containers for a Valentine’s party favor.
And what teacher wouldn’t love to receive one of these filled with her favorite candy. Let her know that you won’t mind if she re-gifts the cone after she’s eaten the candy.
Maybe you have a group who meet regularly to sew, quilt or craft. I’ll bet the ladies would each love to receive one of these filled with candy.
Whether you’re just learning to sew or more advanced these fabric cones are a fun, easy project to spend some quality time at your sewing machine making.
Let’s get started!
Want the ad free PDF?
All the instructions you need to make beautiful Fabric Cones are right here in this post. But I realize that it might be more convenient for you to have a copy that you can download to your computer to print out and have beside you as you work. You can purchase the ad free Printable Fabric Cone Tutorial PDF file for only $5 from my shop. It has this complete step-by-step tutorial with all the accompanying photos.

How to Make Fabric Cones
Materials Needed:
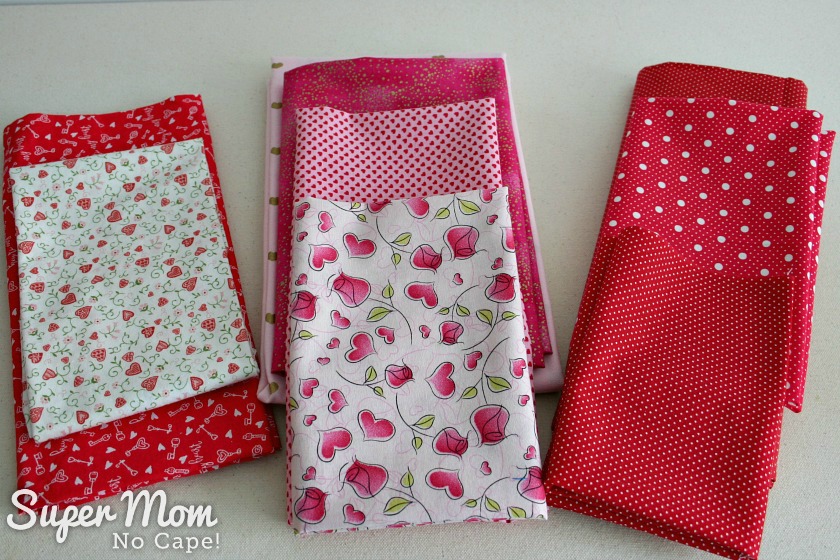
- Fabric for outside of cone (large scraps if you have them) approximately 7 inches square
- Fabric for the lining (again larges scraps will do) same size as for the outside
- Pellon 808 interfacing
- Pellon Featherweight Interfacing
- Thread
- 7½” Baby Ricrac or ribbon for the handle


Optional: 9½” Eyelet lace, lace or trimmings of your choice
Instructions to make one fabric cone:
Download, print and cut out the fabric cone pattern. Make sure to have your printer set to print at 100% or no scaling.
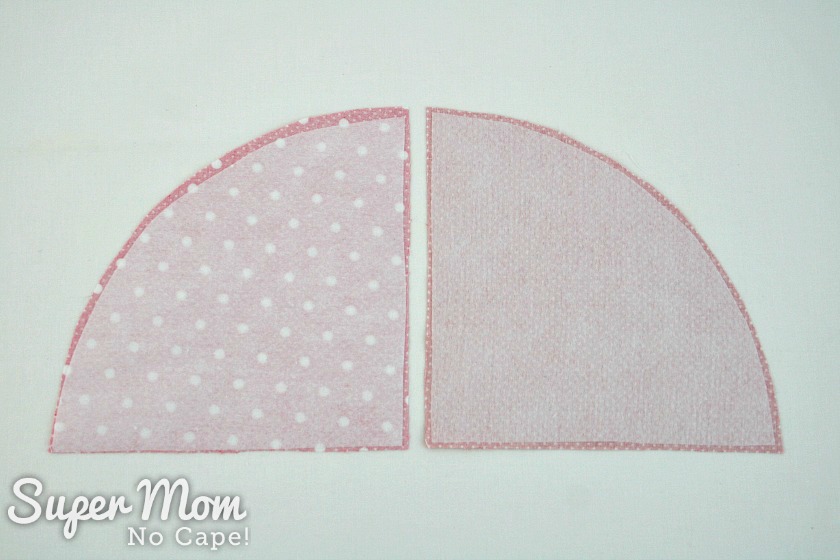
Use the pattern template to cut one from whatever fabric you chose for the outside of the cone. Cut one from the lining.
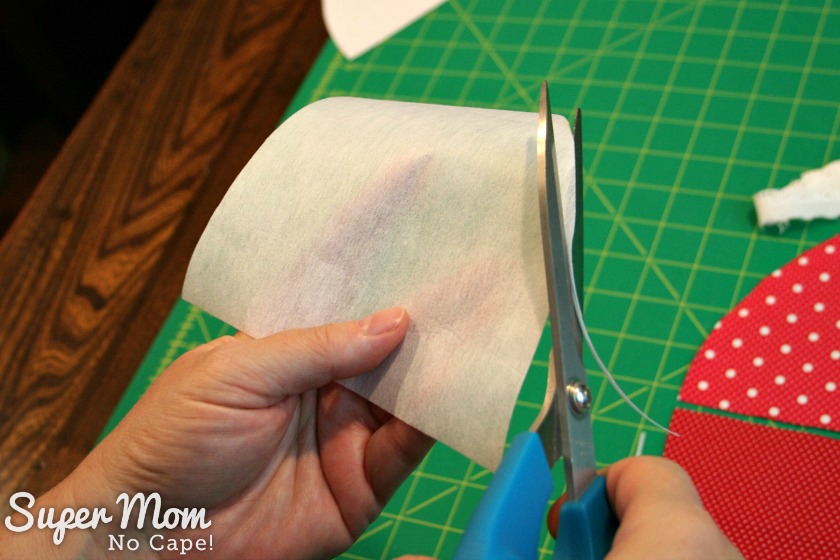
Cut one each of the heavy weight interfacing and the light weight interfacing.
Quick tip: If you’re going to be making a lot of fabric cones, make a template of the pattern from plastic or cardboard and then trace the shape on to the fabric before cutting out. That will eliminate the need to pin the paper pattern to the fabric .

To reduce bulk in the seam allowance, trim 1/8″ off interfacing all the way around.
 Place the heavy interfacing on wrong side of the outer fabric and the light weight interfacing on the wrong side of the lining fabric.
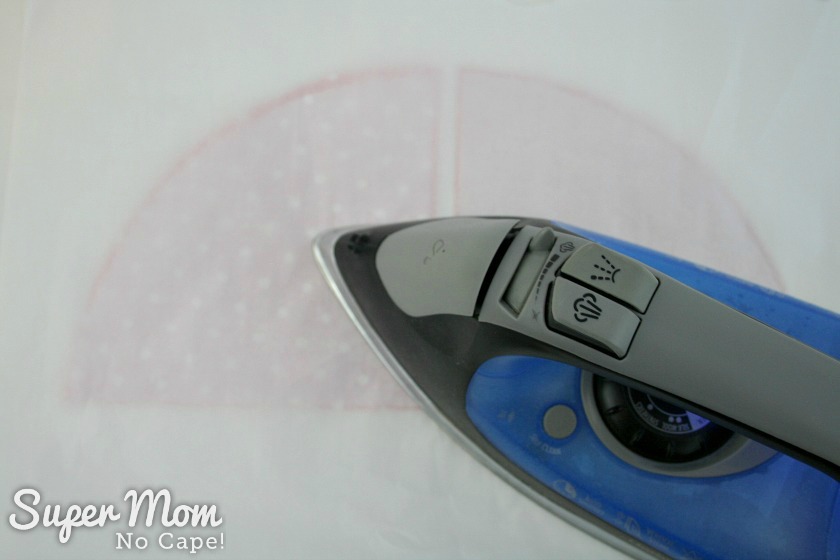
Fuse the interfacing in place.
I like to place a sheet of parchment paper over whatever I’m fusing to prevent any of the adhesive from getting stuck to my iron.
Next, pin the ricrac handle in place at the dots indicated on the pattern.
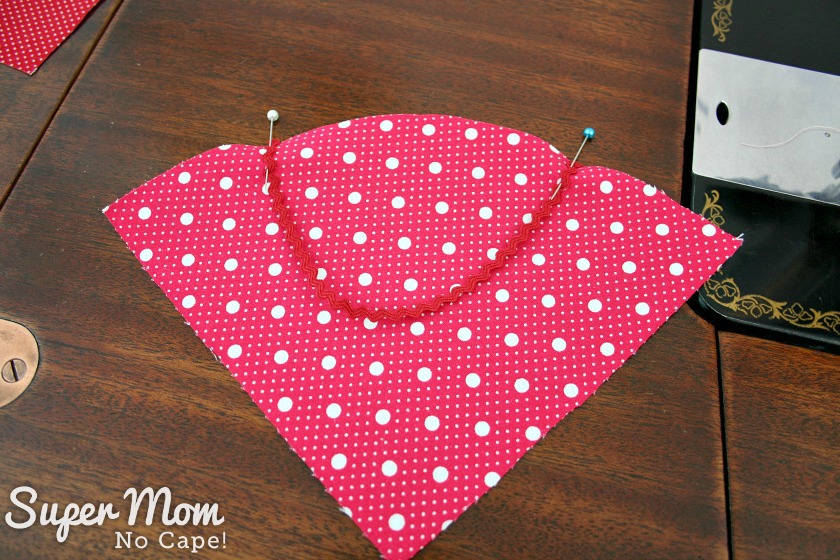
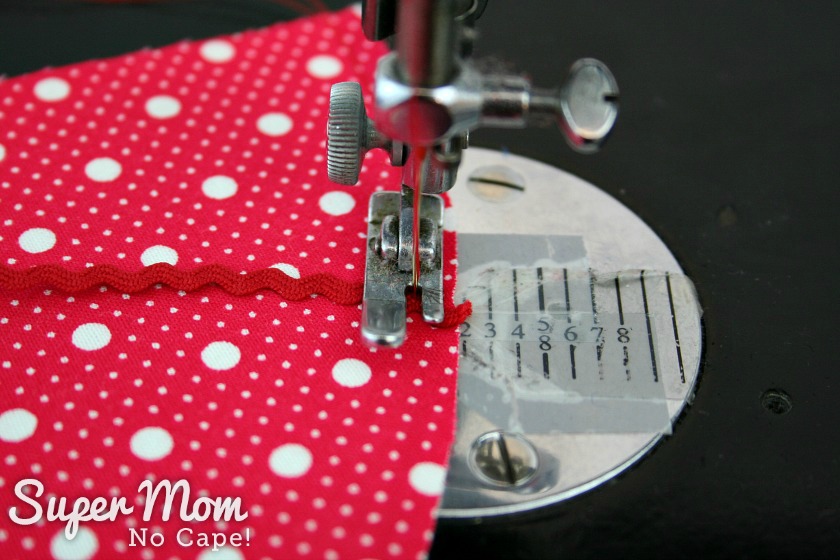
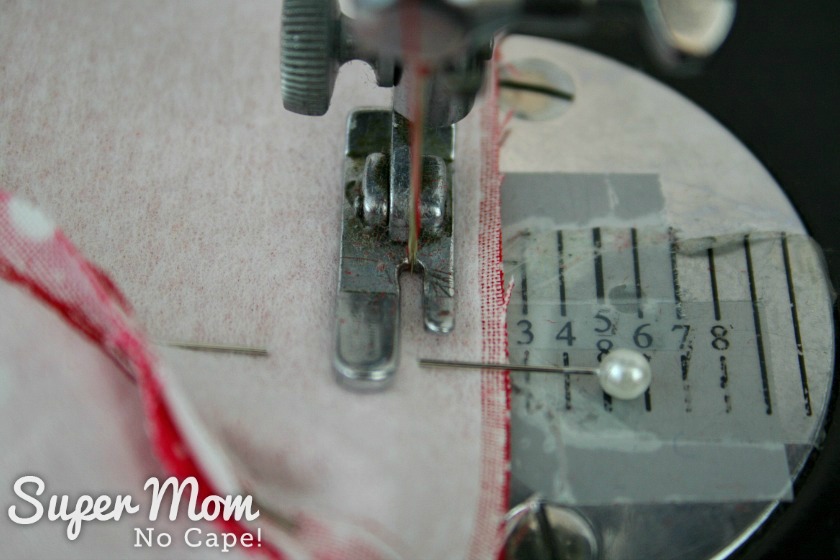
Baste the handle in place using a long stitch on the machine.
If I’m adding an edging, I like to start the basting stitch at the edge of the fabric and then sew all the way across the top curve so that I can use that basting line as a guide when placing the edging.
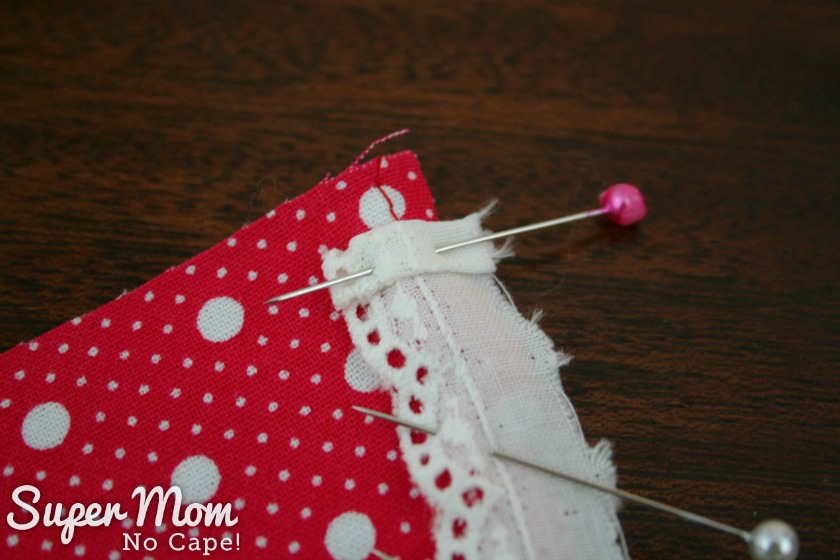
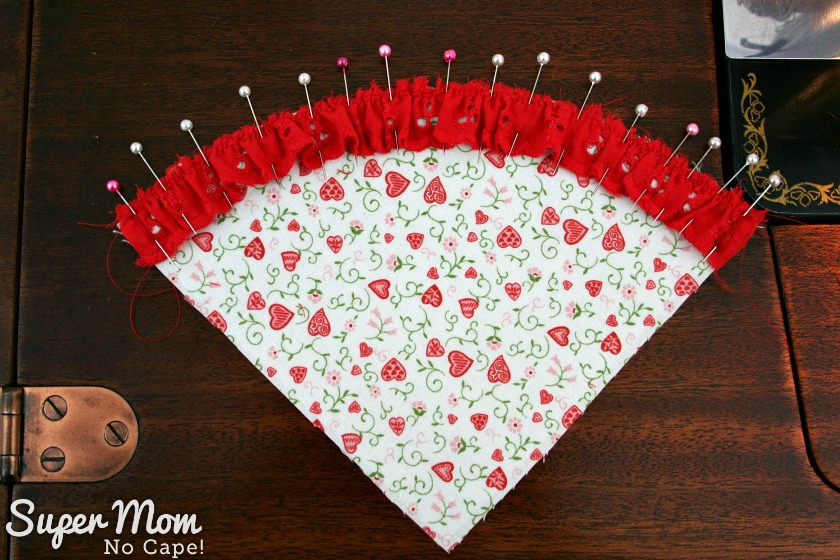
Fold the end of eyelet trim or lace over twice and pin along the curved edge of the cone. Do this on each end.
Make sure to place the trim in at least 3/8″ from the long straight on either side to make sure it doesn’t get caught in the seam allowance when you sew the cone together.
Baste the eyelet trim in place.
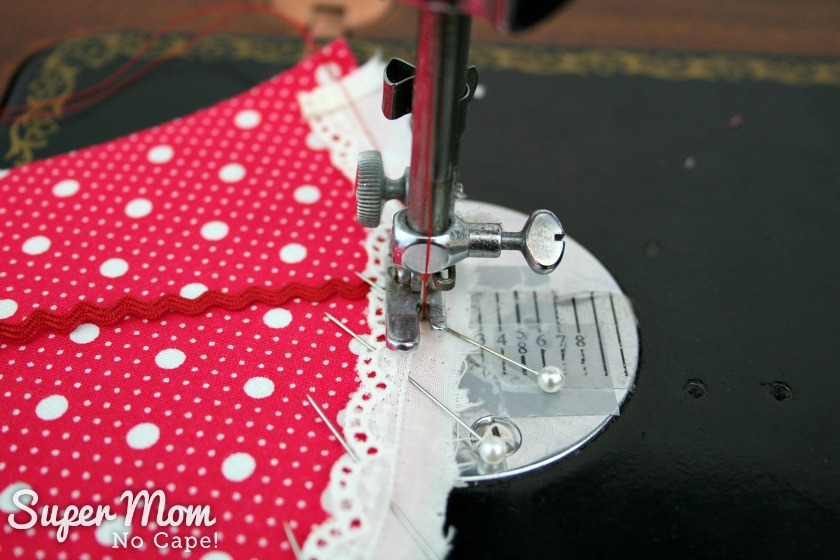
Note: If you want the trim to stand up… the photo below shows the wrong way to position the trim!

I spent some quality time with my seam ripper after that mistake!
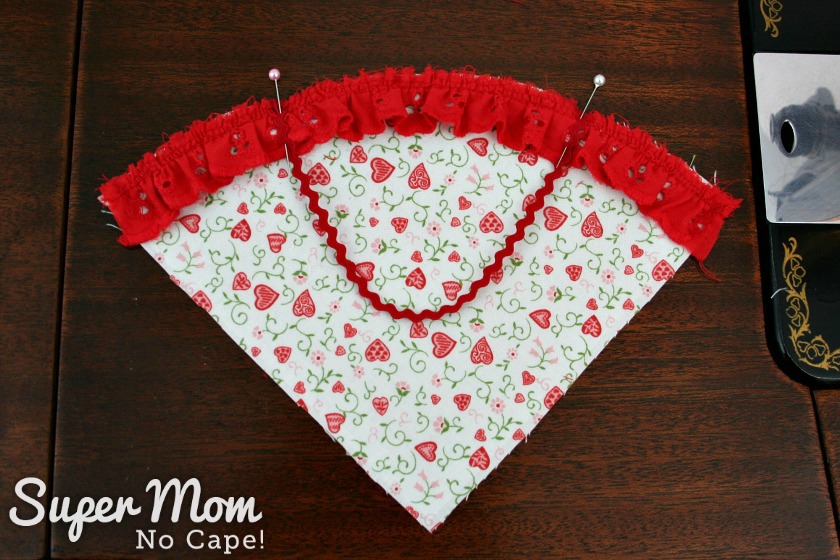
However, if you want the trim to lay down, pin it in place like this and baste.
Then pin the ricrac handle over the gathered red eyelet trim or whatever trim you’re using.
Pin the lining to outer piece; right sides together
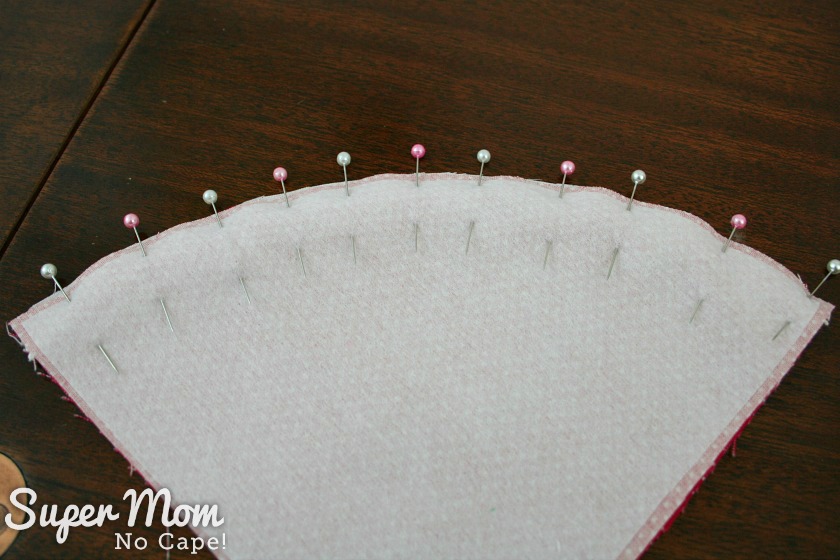
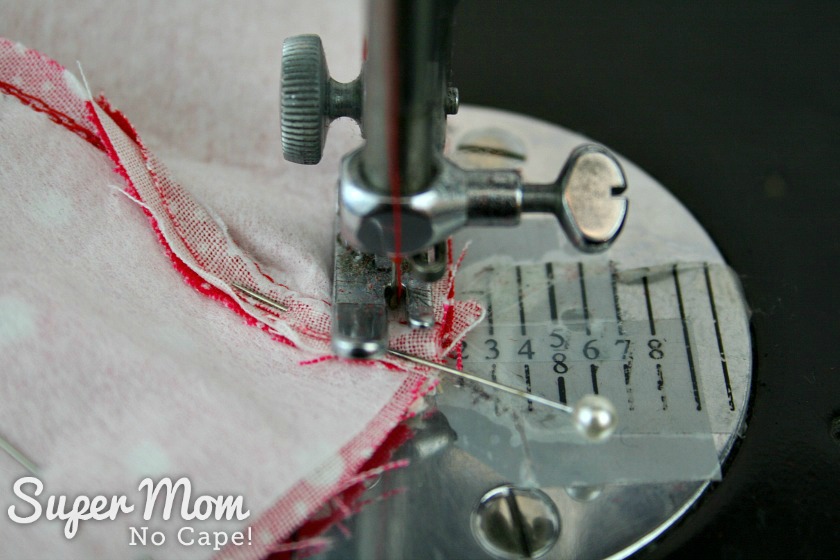
Sew along the curved edge using a ¼” seam allowance. Backstitch at both the beginning and end of the seam.

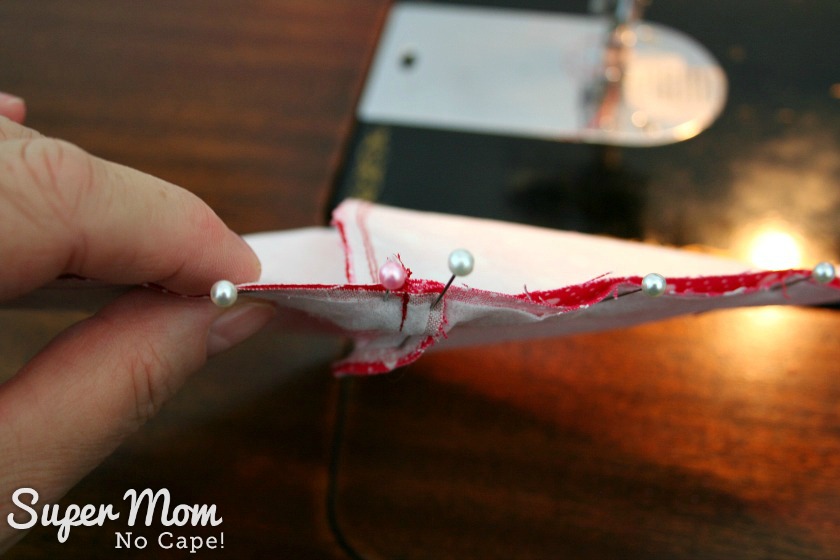
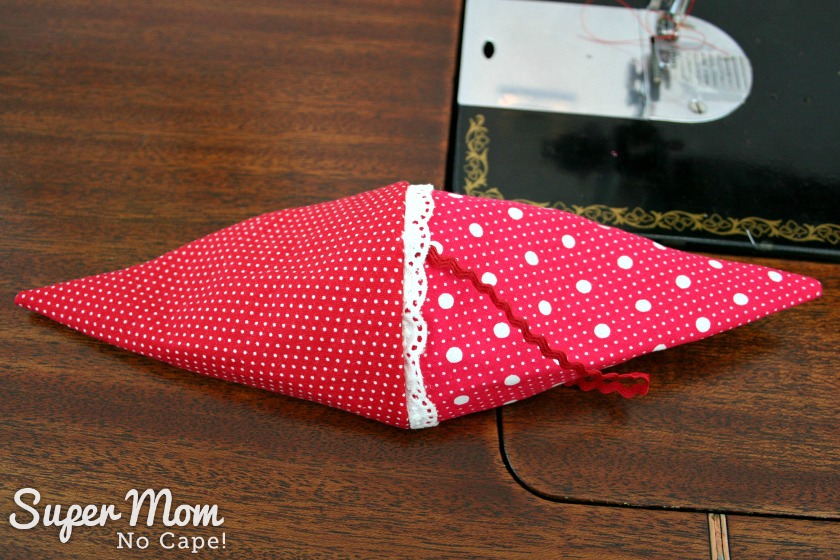
Fold the cones in half and sew together as shown in the photo below.

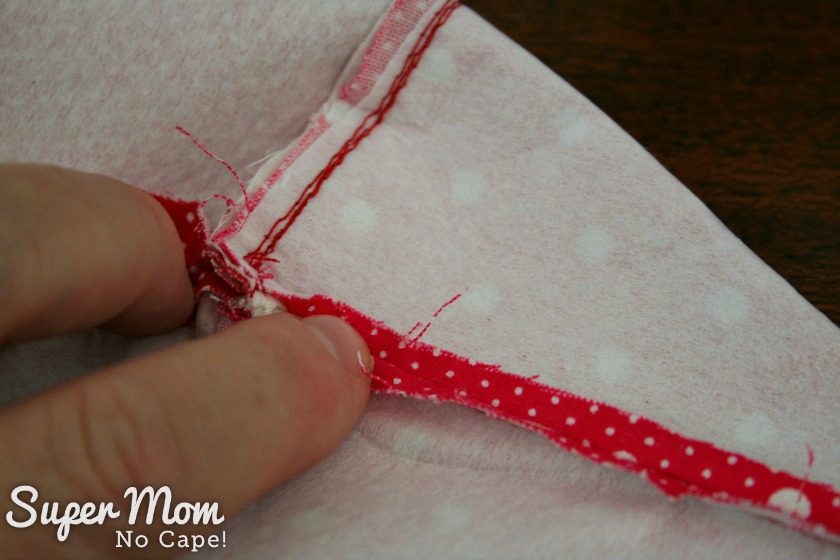
To reduce bulk at the top of the cone, nest the seams. Pin one seam allowance in one direction and the other in the opposite direction.
Here’s another quick tip… sew the lining piece with an almost 3/8″ seam allowance starting at the bottom of the cone and then gradually decrease to a 1/4″ seam allowance as you approach the top of the cone.
Make sure to leave an opening of at least 2″ in the lining seam for turning. To do this… begin your seam at the bottom of the lining (the pointed end,) sew for about an 1½”. Backstitch.
Start sewing again about 2″ further along. Remember to backstitch again. Continue to sew until you get to the point of the outer cone. Backstitch.
Quarter inch seam allowance at the top of the cones:
Quarter inch seam allowance on outer cone.
By doing this, you’re making the lining ever so slightly smaller than the outer cone so that it will fit smoothly and snugly when pushed inside.

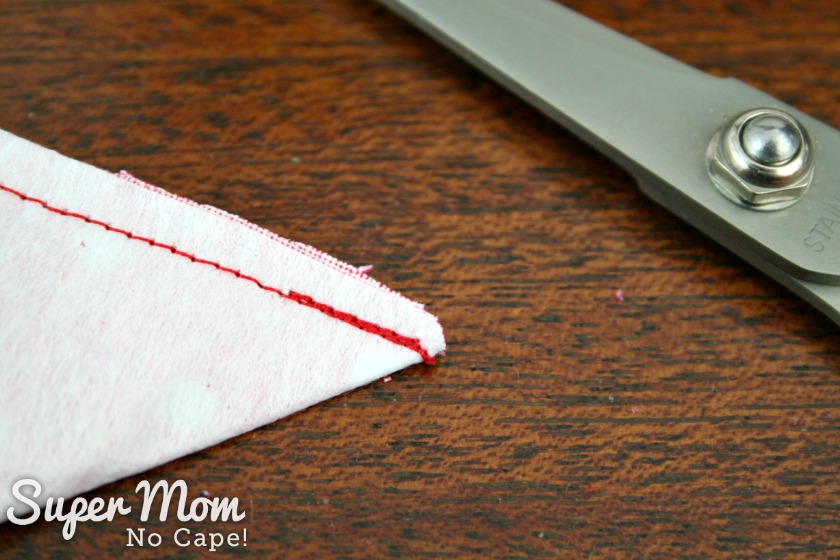
Clip the corners diagonally.
Finger press the seams open.
Turn the whole thing right side out through the opening.
Sew the opening closed using a ladder stitch.
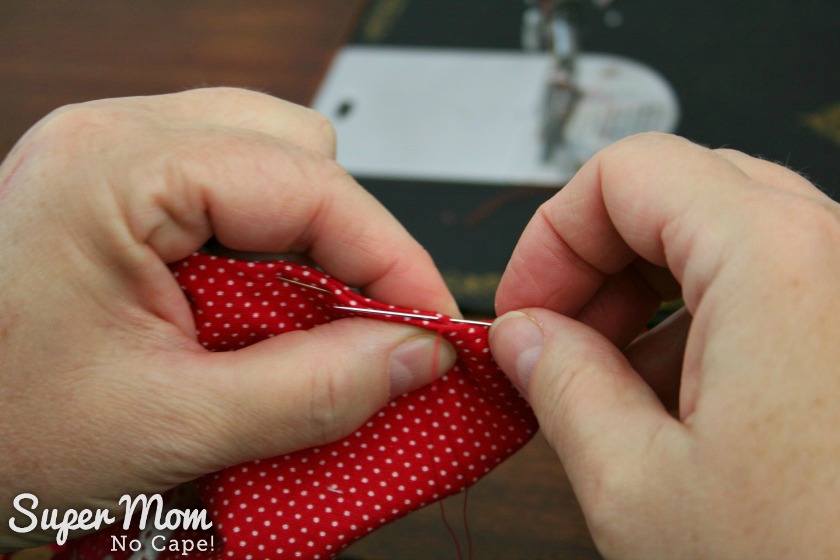
You’ll have something that looks like this:
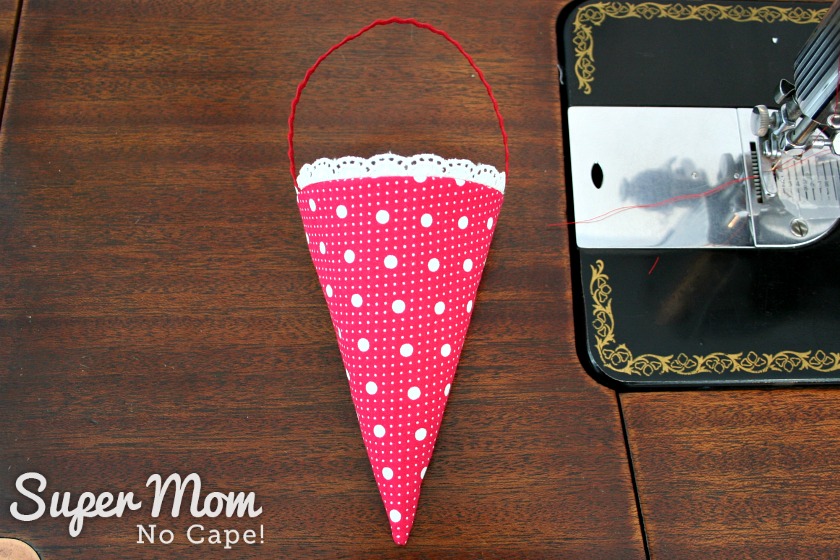
Push the lining fabric down inside the outer cone.
And there you have it… a cute little fabric cone ready to add treats.
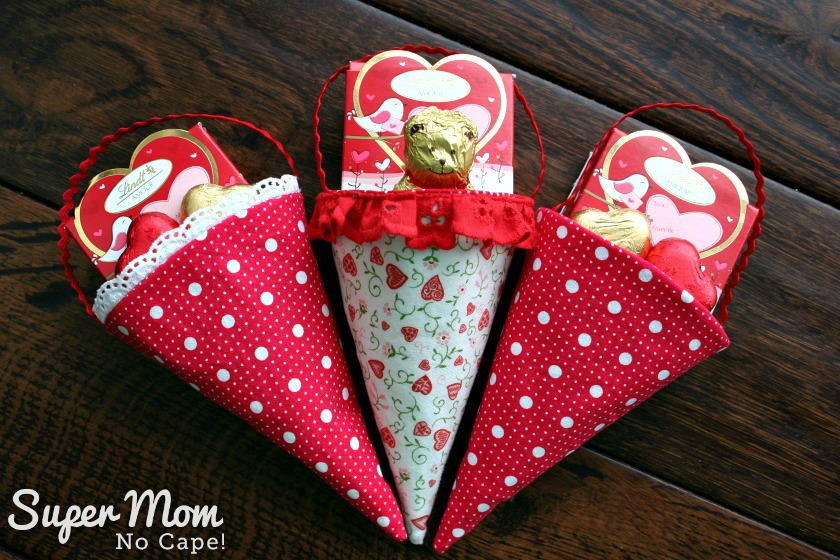
Now let’s fill those fabric cones with some treats!

Add the chocolate sucker to the fabric cone. Fill in with the chocolate hearts so the sucker stands up straight.
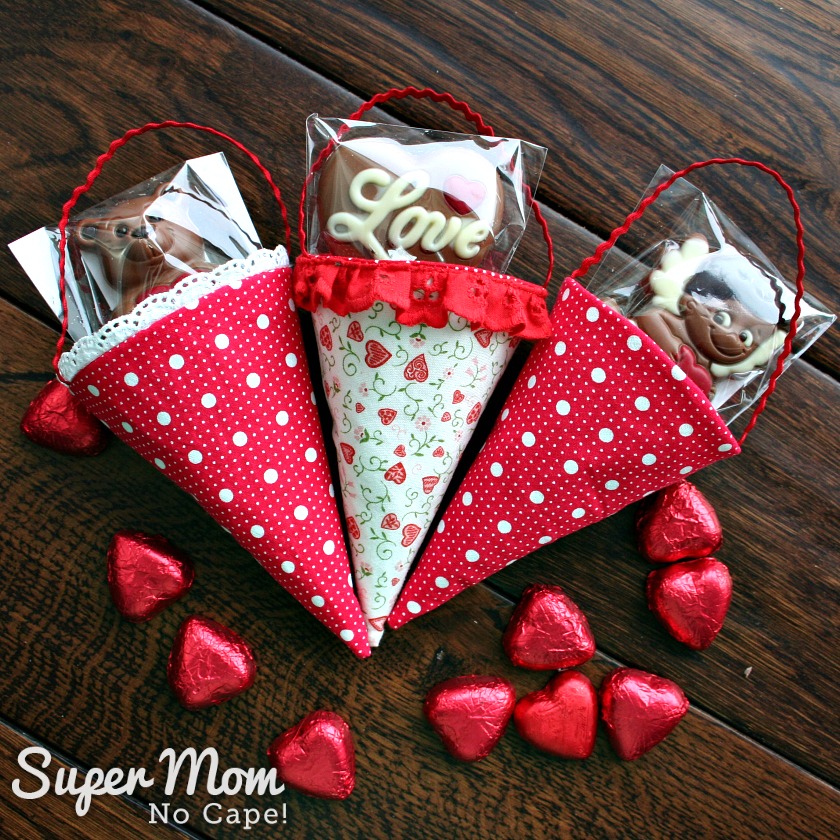 Here’s another cute option to fill the cones!
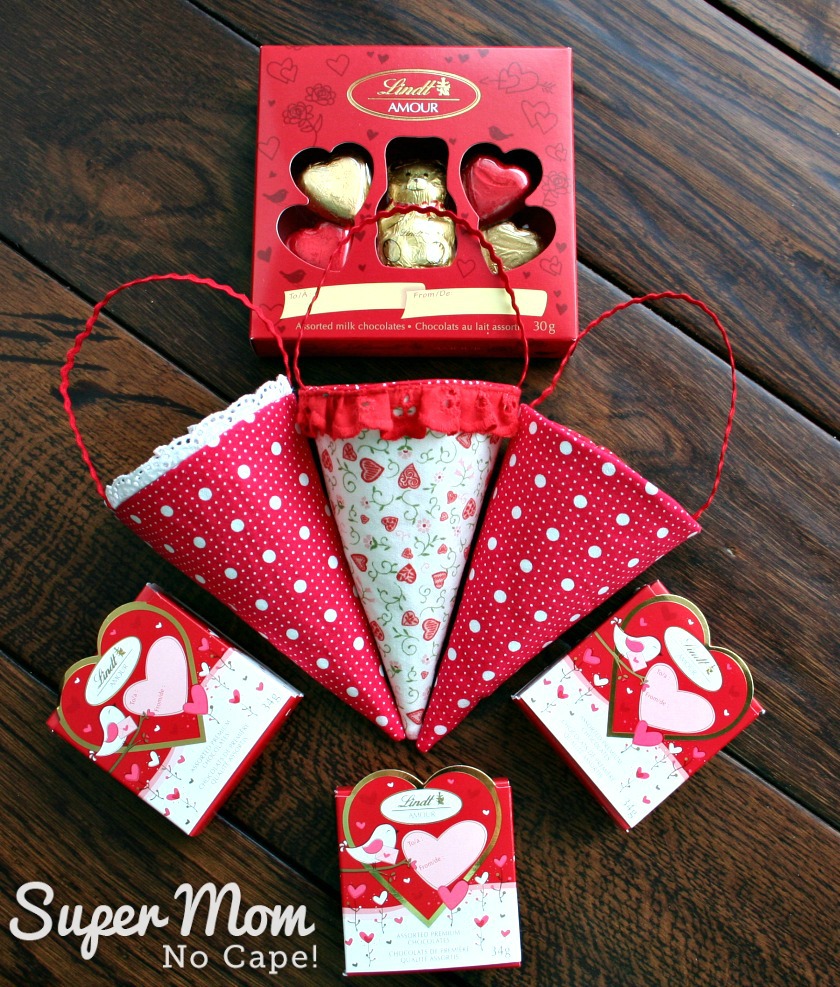
If you’re wanting to make an extra special Fabric Cone, I’ve created an Embroidered Version with a Redwork Floral Heart. The pattern for the embroidery is February’s free embroidery pattern.
Want the ad free PDF?
All the instructions you need to make beautiful Fabric Cones are right here in this post. But I realize that it might be more convenient for you to have a copy that you can download to your computer to print out and have beside you as you work. You can purchase the ad free Printable Fabric Cone Tutorial PDF file for only $5 from my shop. It has this complete step-by-step tutorial with all the accompanying photos.
Every month a group of bloggers are challenged by C’mon Get Crafty to create a new craft or project from their own stash of goodies! Check out some awesome creations you might be able to make from your own stash! #CraftRoomDestashChallenge
[clickToTweet tweet=”What crafty creations could you make today from YOUR craft stash?! #CraftRoomDestashChallenge” quote=”What crafty creations could you make today from YOUR craft stash?! #CraftRoomDestashChallenge”]
 Loading InLinkz ...
Pin this so you can find it again when you want to make some fabric cones by clicking on the Pinterest button underneath the post.
And of course, I’d love it if you shared it on Twitter and Facebook. 🙂


51 Comments
estelle Howell
January 27, 2021 7:50 amthese are beyond beautiful. I am a visual learner so I do appreciate the tutorial in details. I will be making 15 one for each of the first grade in my grand daughter class. THANK YOU VERY VERY MUCH.
Emily
January 25, 2018 9:29 pmThis is a really cute idea, and so much more creative than a paper gift bag! Thanks for sharing with Merry Monday – I’ll be featuring your treat cones at our upcoming party. I hope you’ll stop by and link up again!
Super Mom No Cape
January 28, 2018 1:52 pmThank you sooo much Emily! How kind and sweet of you to feature my Fabric Cone Tutorial!
Charlene Asay
January 23, 2018 3:03 pmThese are such a cute idea. Thanks for sharing with us all.
Super Mom No Cape
January 28, 2018 1:50 pmThank you Charlene! You are so very welcome. 🙂
Beverly
January 21, 2018 3:52 pmThese Valentine’s cones are so cute! I love them. Pinning to my Valentine’s Board. Thanks for partying with us at Snickerdoodle.
Super Mom No Cape
January 28, 2018 1:49 pmThanks sooo much Beverly for your sweet comment and for pinning!
Michele Michael
January 21, 2018 7:47 amNow I am inspired to use up my Valentine’s Day fabrics. Thx
Super Mom No Cape
January 28, 2018 1:45 pmI’m so glad to hear that Michele!
Megan
January 19, 2018 9:54 pmWhat a fun way to deliver Valentines!
Super Mom No Cape
January 28, 2018 1:38 pmThank you Megan! I think so too. 🙂
Carie @ Space for the Butterflies
January 19, 2018 4:42 pmOh aren’t they sweet – what a clever idea 🙂
Super Mom No Cape
January 28, 2018 1:37 pmThank you Carie! I had such fun making this tutorial.
Victoria @DazzleWhileFrazzled
January 19, 2018 12:27 pmVery cute! I can see little girls loving these, esp. to hold all their trinkets long after Valentine’s Day. Visiting from Sweet Inspiration party.
Super Mom No Cape
January 28, 2018 1:34 pmThanks so much, Victoria for stopping by! I think you’re right… I think little girls would love these to hold little trinkets in after Valentine’s Day.
Joy McDonald
January 18, 2018 12:26 pmHow cute are they! I am going to send the link to my nieces, they would love to make some! xx
Super Mom No Cape
January 28, 2018 1:33 pmThank you so much, Joy! I hope they do love making them.
Michelle James
January 18, 2018 11:34 amThese fabric Valentine’s Day cones are so cute!
Super Mom No Cape
January 28, 2018 1:29 pmThank you so much Michelle!
Stephanie
January 16, 2018 10:48 amLoved the way you explained fabric cone making. My daughter will like this craft, so I am forwarding this tutorial to her. I look forward to reading such inspirational crafts tutorials!
-Stephanie
Super Mom No Cape
January 17, 2018 10:22 pmThank you Stephanie! I hope your daughter likes it and makes some.
Marie
January 16, 2018 10:02 amThese are so adorable, what a great idea! I love these for Valentine’s Day but your tutorial would work for any season|holiday. Pinned
Super Mom No Cape
January 17, 2018 10:19 pmThank you Marie! There are soooo many different occasions that they could be made for. And thanks so much for pinning!
Lydia from Life Beyond the Kitchen
January 16, 2018 6:23 amWhat a pretty project and a great way to use up all the bits of this and that in your stash. Someone mentioned it as a youth project and I agree it’s an opportunity to learn a lot of sewing skills.
Super Mom No Cape
January 17, 2018 10:16 pmThanks so much Lydia! I agree, it would be a great youth project.
Habiba
January 16, 2018 4:13 amThey are super cool and I sure would love to receive one. The chocolate would be the cherry on top, lol. I haven’t used my sewing machine in ages…maybe I need to go find it this weekend.
Super Mom No Cape
January 17, 2018 10:15 pmThanks so much Habiba! If you do make some and post about them somewhere on social media, please be sure to tag me so I can come see. 🙂
Celtic Thistle Stitches
January 16, 2018 2:56 amA lovely idea that uses up fabric scraps that is definitely a win win!
Super Mom No Cape
January 17, 2018 10:12 pmThank you Fiona! Yes, they’re a great way to use up scraps of fabric and trim.
Renee
January 15, 2018 10:24 pmThese are darling! Thank you for sharing. 🙂
Super Mom No Cape
January 17, 2018 10:11 pmThank you so much Renee!
Debrashoppeno5
January 15, 2018 8:00 pmThis is an adorable idea. I can see making these for all kinds of occasions.
Super Mom No Cape
January 17, 2018 10:10 pmThank you Debra! They would be lovely little gifts for all kinds of occasions, wouldn’t they.
Florence
January 15, 2018 7:18 pmThose would make such sweet love and appreciation gifts! Love your suggestions at the beginning as to who you could give these to. Who wouldn’t love a cheerful gift like this with a bit of candy? I sure would! Thanks for the detailed tutorial too. I would be the one that would definitely need it.
Florence visiting from The Blog Hop
Super Mom No Cape
January 17, 2018 10:08 pmHello Florence,
Thanks so much for stopping by for the blog hop. And for your sweet comment too. If you do make one, feel free to email me if you need any help or suggestions. 🙂
Dione
January 15, 2018 6:58 pmI like these very much! They are the reusable versions of the paper cones my Danish friends put on their Christmas tree. And the tip on how to make the lining smaller than the outside is very helpful, thank you.
Super Mom No Cape
January 17, 2018 10:06 pmThank you Dione! I’m glad you found the tip helpful. 🙂 I do that will everything that requires a lining.
Mary Anne
January 15, 2018 5:37 pmThese would be cute to make for little surprises to hang on people’s doors wouldn’t they.
Super Mom No Cape
January 17, 2018 10:04 pmI was thinking that too Mary Anne!
Donna @ Modern on Monticello
January 15, 2018 3:51 pmThese are so cute and creative. I want to come see your fabric stash because it looks impressive just from the red and pink swatches! Thanks for sharing. V
Super Mom No Cape
January 17, 2018 10:03 pmThank you so much Donna!
And if you did, I’d probably send you home with some of it. My stash is getting out of hand so I need to start shopping my stash and get it used up. 🙂
Diana
January 15, 2018 3:46 pmThese are really cute! Thank you
Super Mom No Cape
January 17, 2018 9:57 pmThanks so much Diana!
Rachel
January 15, 2018 3:24 pmThey would make good tree decorations, too!
Super Mom No Cape
January 17, 2018 9:56 pmYes, they would Rachel. In fact, I’m hoping to make a bunch to hang on the tree this year. I’m going to check thrift stores and see if I can find a larger variety of trims to use.
Linda
January 15, 2018 2:16 pmI have a circle ruler that requires the fabric to be folded into quarters and makes different sizes up to 8 inches. I’ll bet that can be used instead of the template to get quarter circles. I will try it and let you know.
Also could you do this tutorial as a pdf download. I’d like to try it with my 4-H group.
Super Mom No Cape
January 17, 2018 9:52 pmHello Linda,
Please do let me know if that circle ruler works. I might have to see about buying one as I plan to make several more of these.
I had been planning to do a pdf of this tutorial but ran out of time before the challenge deadline. I’ll see if I can get that done soon. 🙂
Kate
January 15, 2018 1:54 pmGreat idea Sue and a good tutorial – as usual. Thank you. 🙂
Super Mom No Cape
January 17, 2018 9:49 pmThanks you so much Kate! What a sweet compliment!
mary
January 15, 2018 11:23 amThose are so cute and could be used for any occasion.
Super Mom No Cape
January 15, 2018 12:12 pmThank you Mary! And yes… they’d be great for St. Patrick’s Day, Easter, Mother’s Day, birthdays and dare I even say it… Christmas. 🙂
Comments are closed.