


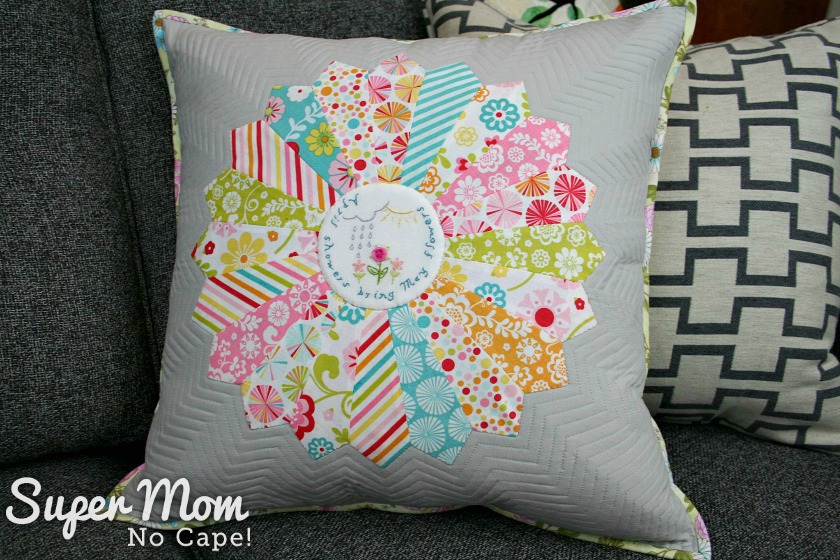
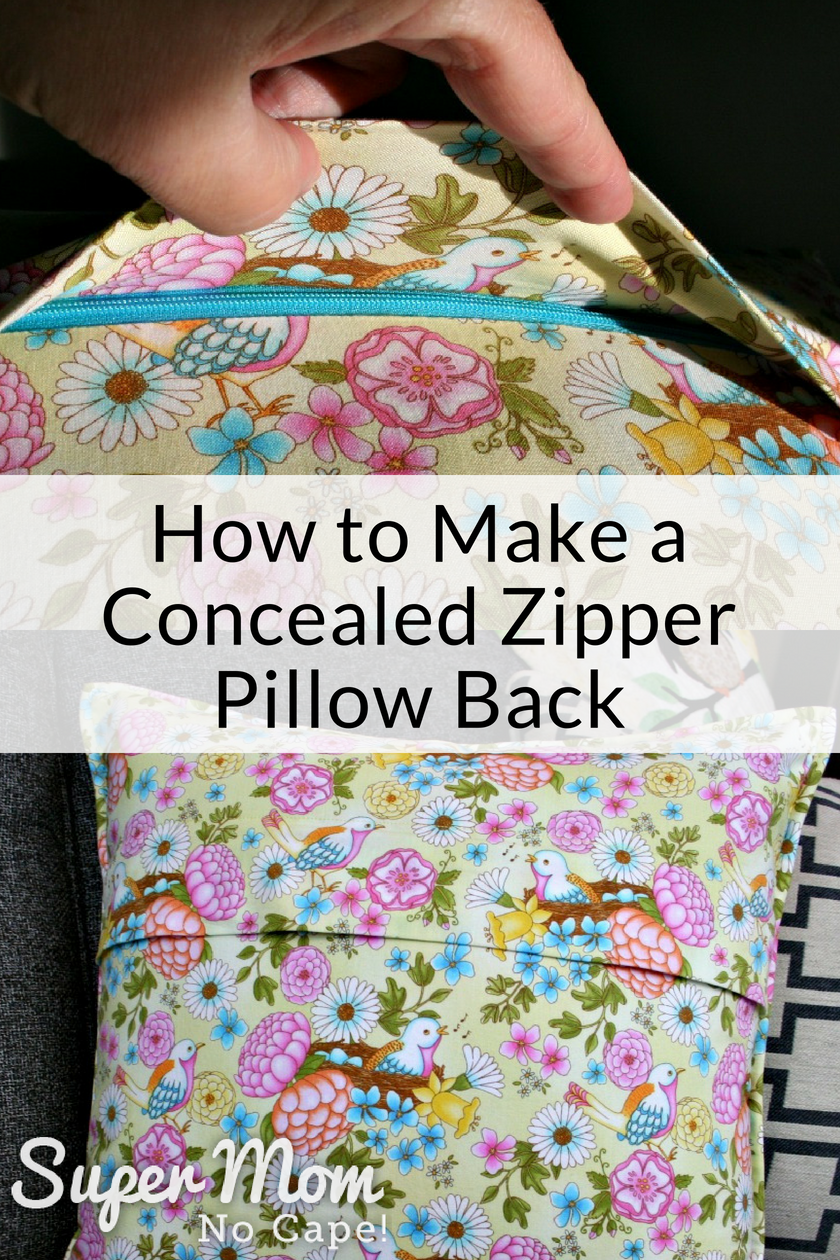
For May’s Craft Room DeStash Challenge, I’ll be showing you how to make a concealed zipper pillow back for the pillow front that I made with my April Showers Embroidery Pattern.
Every month a group of bloggers are challenged by C’mon Get Crafty to create a new craft or project from their own stash of goodies!
This is kind of a two part destash. I was so busy organizing and packing in April that I didn’t have a chance to take part in April’s Craft Room DeStash.
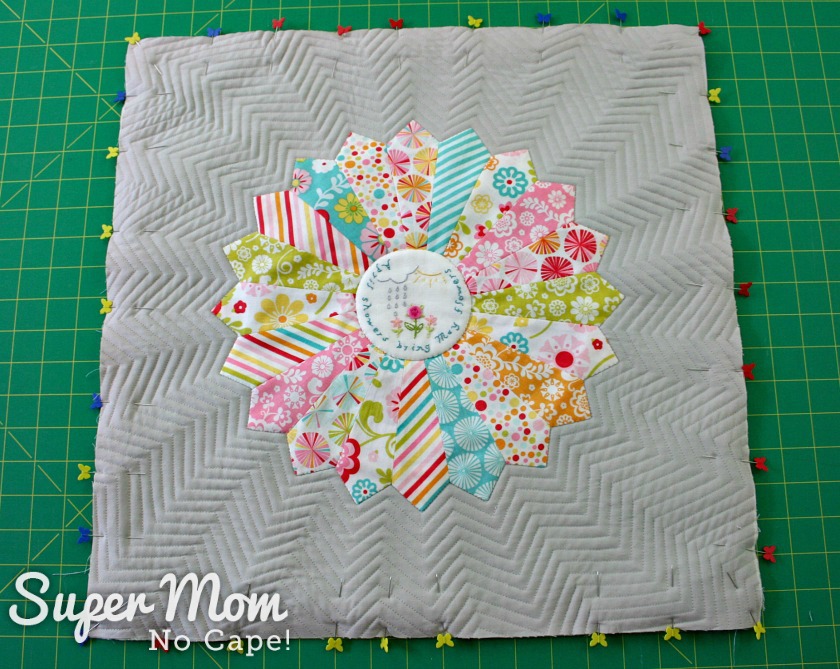
The Dresden plate had been in my stash for over a year. It was definitely time to turn it into a finished item.
At the beginning of last month, I turned it into a pillow front by appliquéing the Dresden plate onto the grey background fabric (also from stash.) Then the fabric circle with my April Showers embroidery was added to the center of the Dresden plate block.
During April, when I needed a break from packing for our move, I shadow quilted around the Dresden plate.
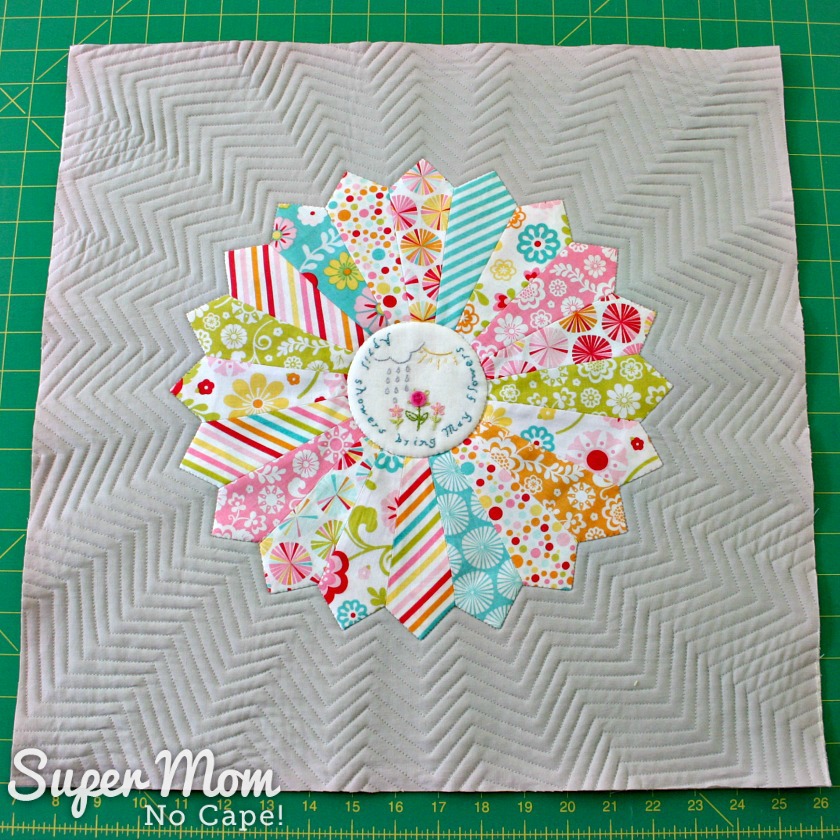
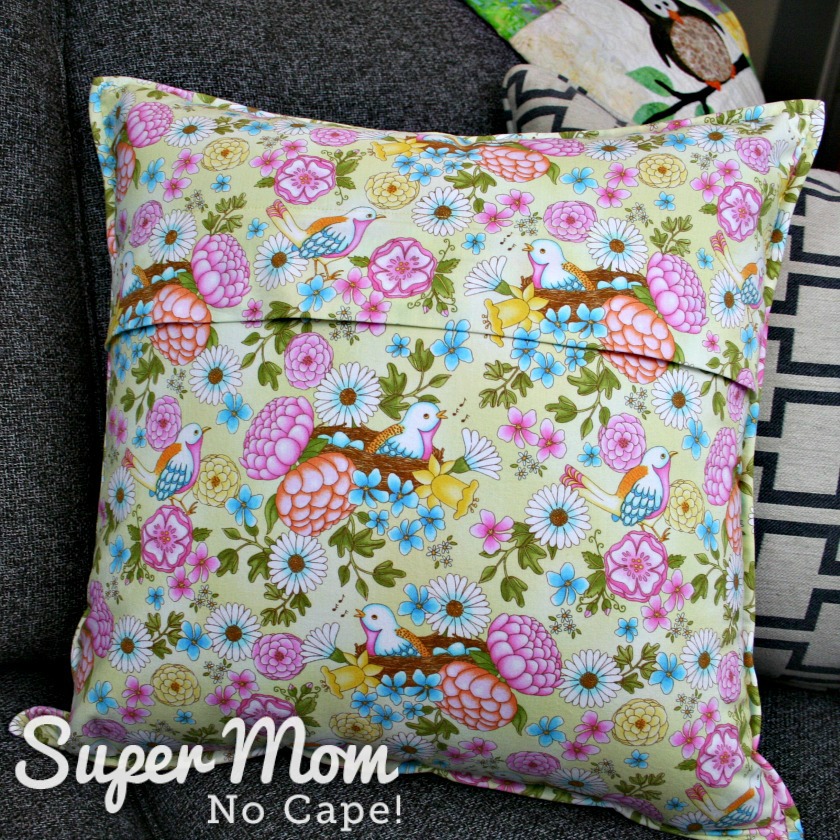
As part of the challenge we can purchase up to $10 worth of supplies to complete our project. I chose a gorgeous floral fabric with birds for the back and binding for the pillow. It’s Pattern #9766 from the Peaceful Pastimes line by Jacquelynne Steves for Henry Glass & Co., Inc.
I believe this is one of Jacquelynne’s older lines of fabric but I was able to find it at my local fabric store and it’s also available from various vendors on Ebay.
I purchased a yard for $11.99 CDN and used less than half a yard, bringing this project in well under the $10 we’re allowed.
The pretty 22″ blue zipper for the concealed zipper pillow back came from DD2’s zipper stash.

How to Make a Concealed Zipper Pillow Back
The first thing you’re going to need to do is measure the pillow you want to cover.
If you’re using the same fabric for the front and back of the pillow cut a square to that measurement adding a ¼” seam allowance all the way around.
For instance, if your pillow form is 18″, cut your front square of fabric 18 ½” X 18 ½”.
Now if you are like me, you like your pillows to be nice and full, so you may want to cut your fabric slightly smaller than the cushion you’re covering.
Note: If this is your first time making a pillow cover, you may like to make a test cover using inexpensive fabric (such as a thrifted sheet) to see how you prefer your cushion covers to look.
The pillow I’m covering in this tutorial is 20″. I squared up the front that’s pictured above to 19″ square. The measurements that follow are the ones I used to created the concealed zipper pillow back for it.
Adjust your measurements to fit your pillow.
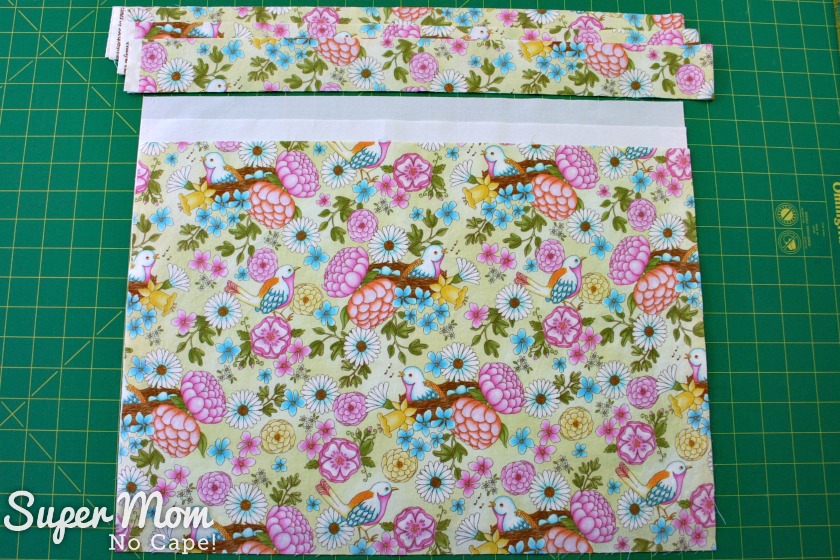
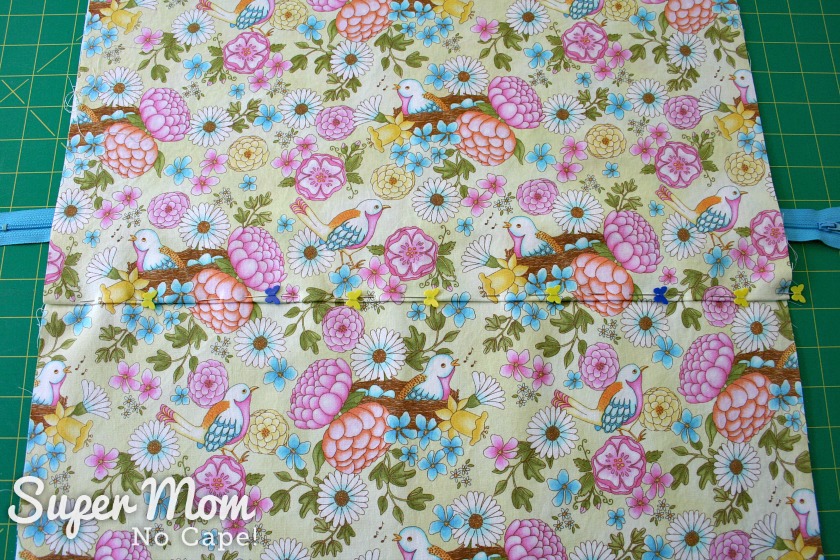
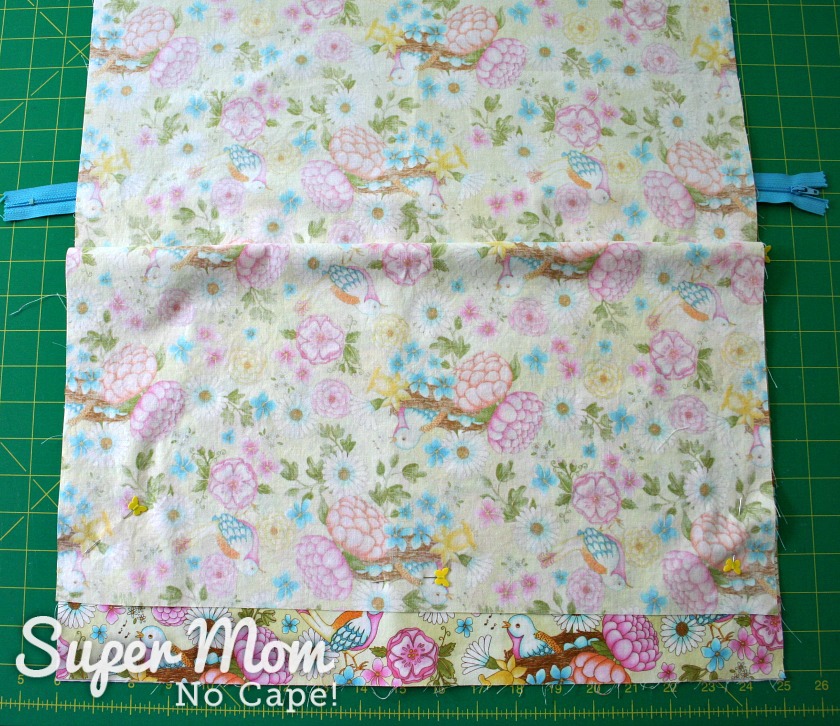
Trim the selvage from the print fabric. Cut a strip 19″ wide from the entire length of the fabric. This will give you a strip of fabric, 19″X36″.
The extra fabric will be used to match the floral print when making the top portion of the pillow back.
If you are using a directional print, measuring from the bottom of the fabric, cut one piece of your backing fabric 19″ X 13″.
Cut 2 pieces from lining fabric 19″ X 13″. I cut mine from a white thrifted sheet.
Note: If you are using a heavy weight drapery or upholstery fabric for your pillow cover, you can omit the lining fabric.
For this project, I used a light colored quilting cotton, so I like to line it with white sheeting fabric. This prevents any pattern or color from the inserted cushion from showing through.
If you are going to be adding binding to your pillow, cut three, 2″ strips WOF (width of fabric.) Set those strips aside until the end.
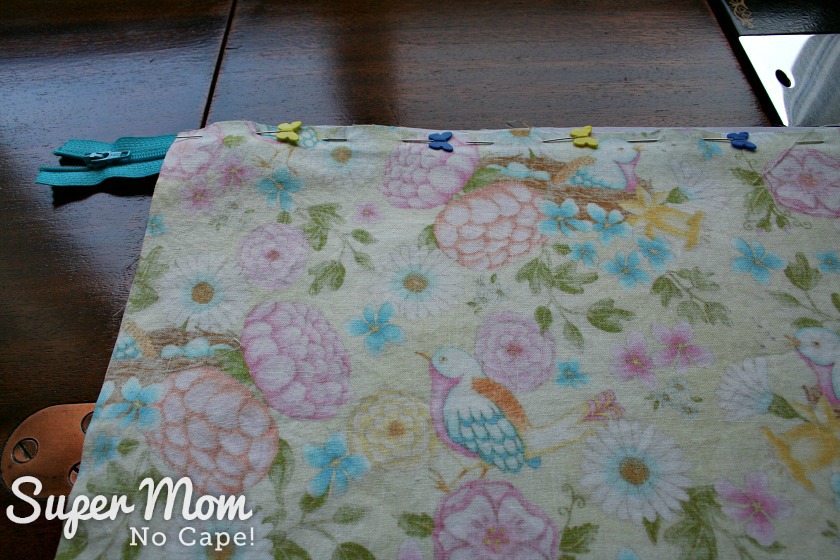
Next, sandwich the zipper between the 19″X13″ print fabric and one of the lining pieces and pin.
In the picture below, the zipper is extending beyond the ends of the fabric. I was using a zipper from stash which was longer than was actually needed. The ends will be trimmed off after the pillow back is completed.
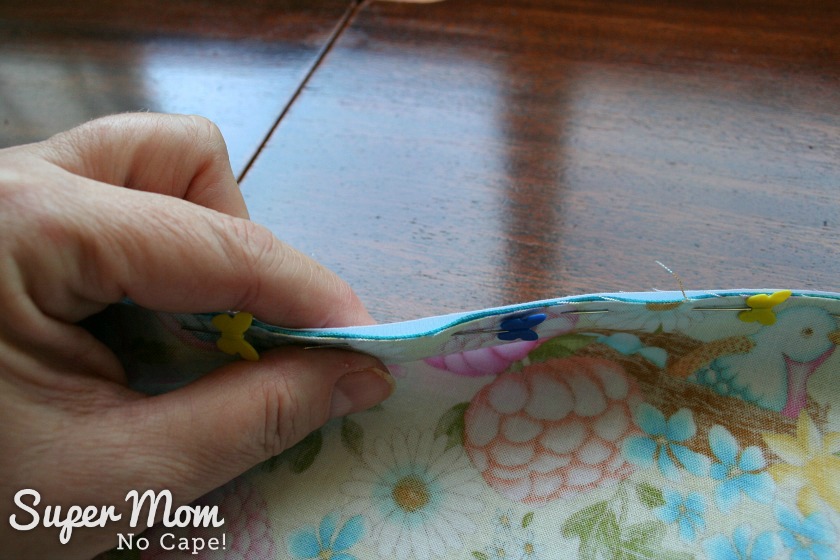
This next step is one that you may well groan when you read it; especially if you don’t like hand sewing. But trust me, taking this one extra step will make adding your zipper so much easier.
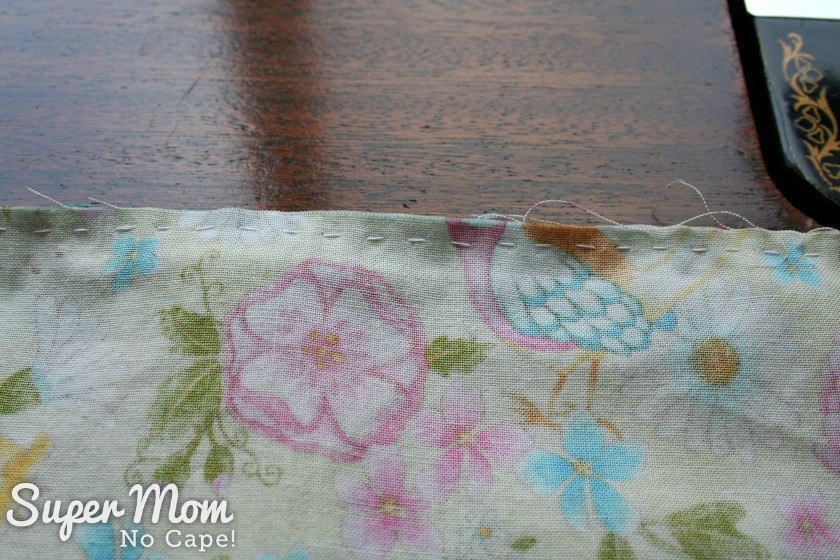
Hand baste the zipper in place.
Here’s a tip to make sure that the zipper doesn’t shift while you’re basting it. DON’T weave your needle in and out as pictured below:
Instead, use the Stab and Stitch method.
Push the needle in from the front and draw it through.

Push the needle from the back through to the front and pull through.
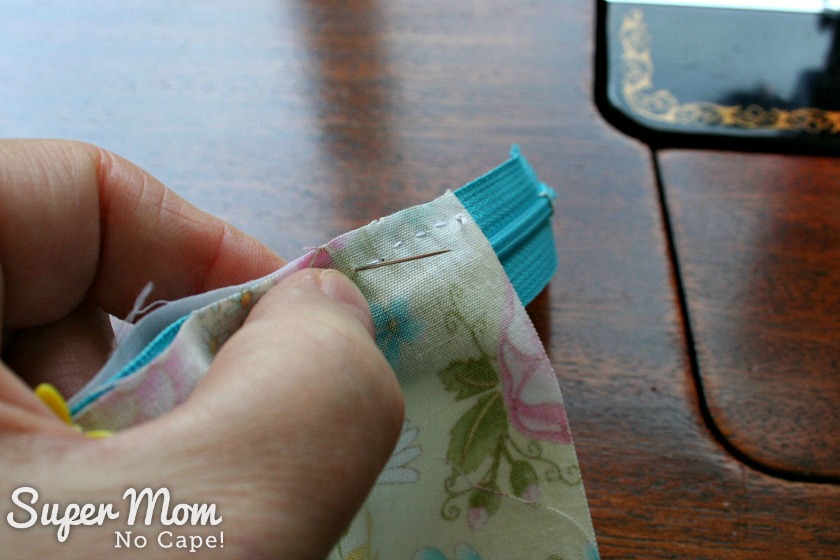
Repeat until the zipper is basted in place. Don’t worry if your basting stitches are a bit wonky and uneven. They will be concealed inside the seam and no one will ever see them.
Machine sew the zipper in place using a zipper foot.

It should look like this:
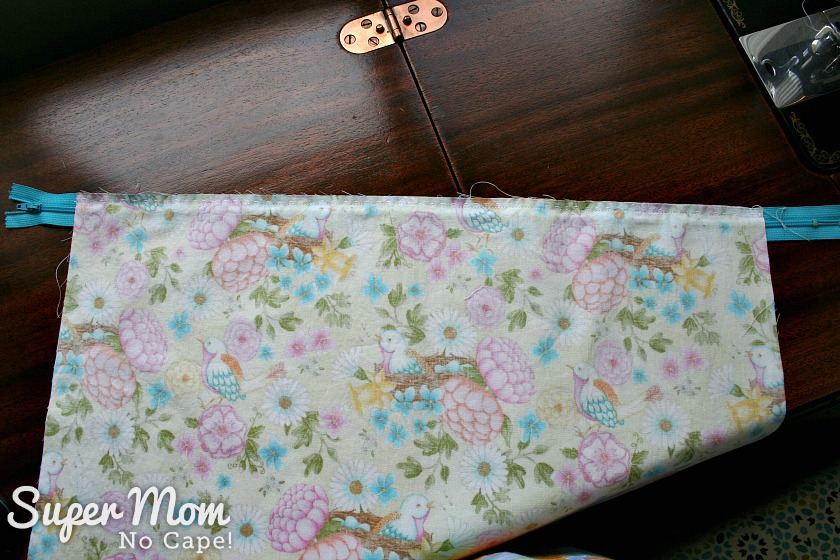
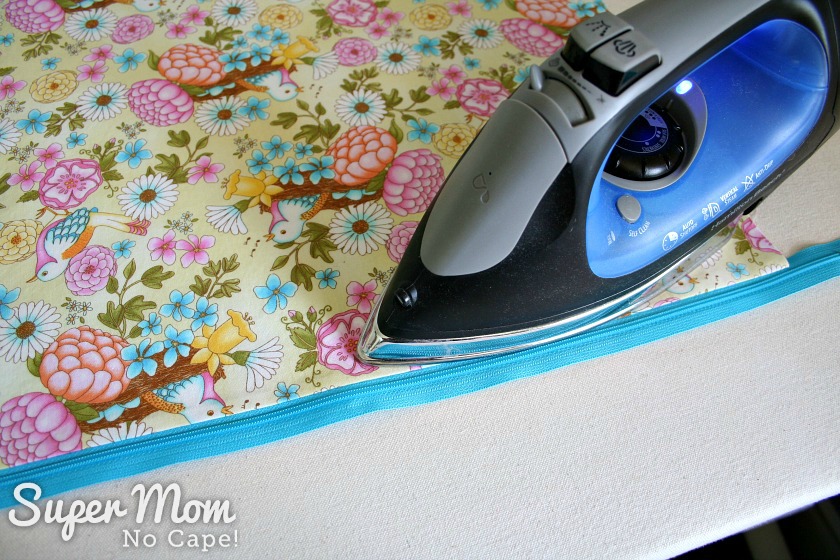
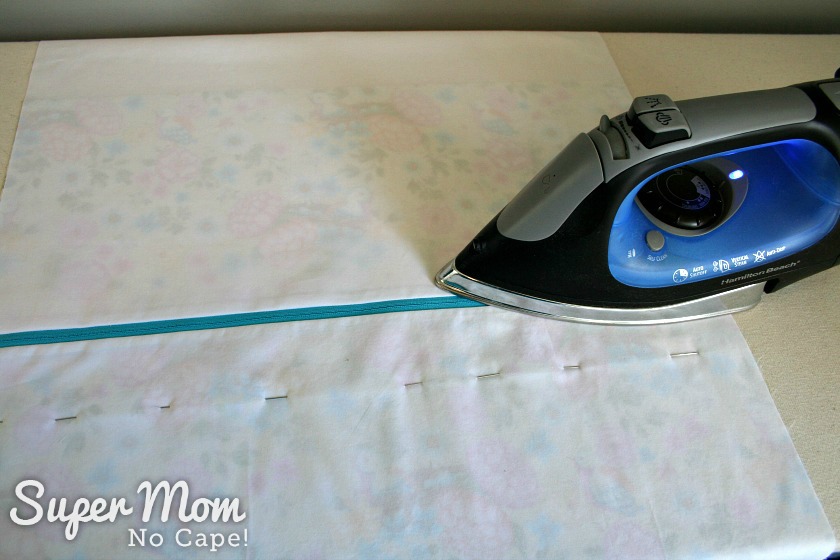
Press the lining away from the zipper teeth.
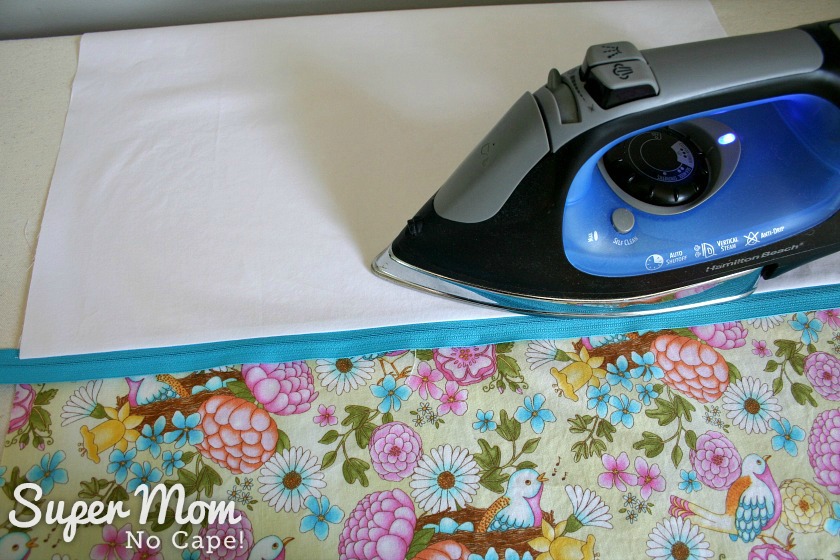
Press the print fabric away from the zipper teeth as shown:
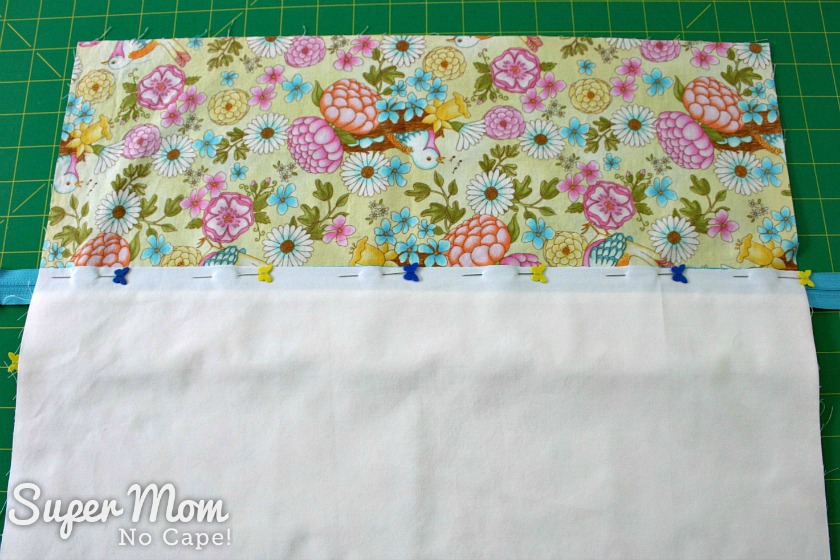
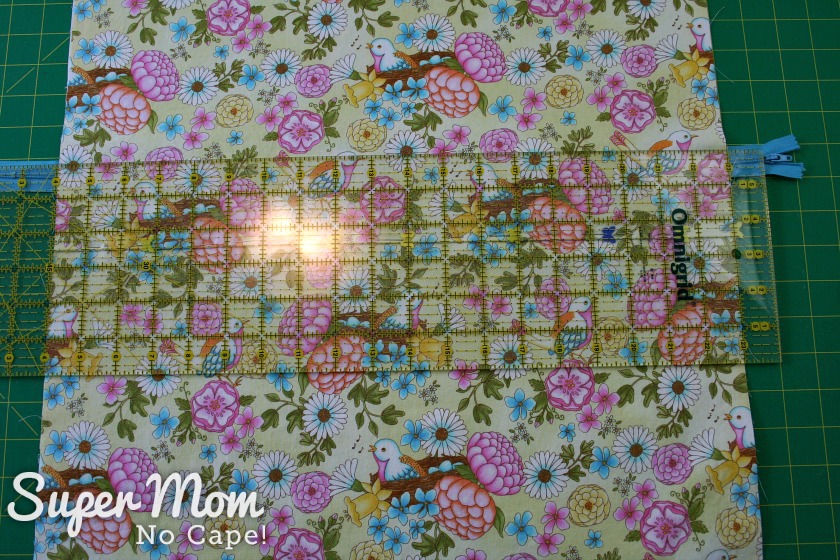
Next you’ll be creating the flap that will conceal the zipper.
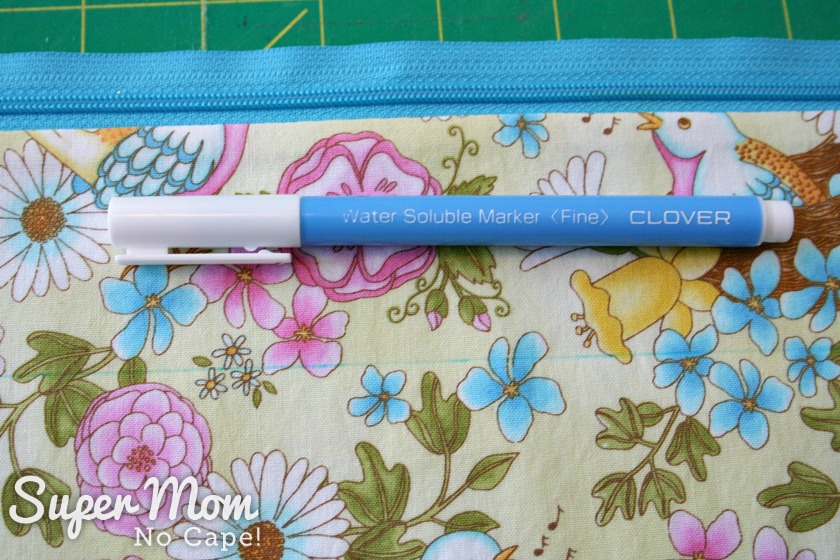
With a ruler, measure down 2″ from the pressed fabric edge.
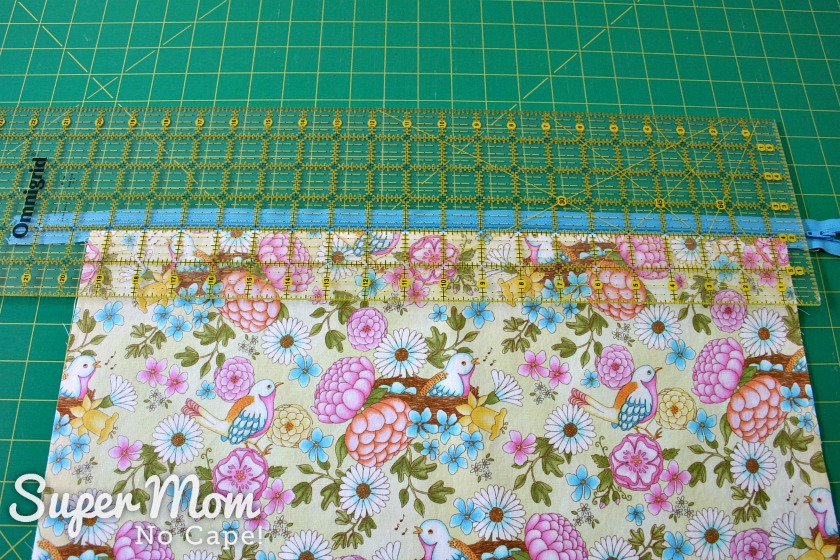
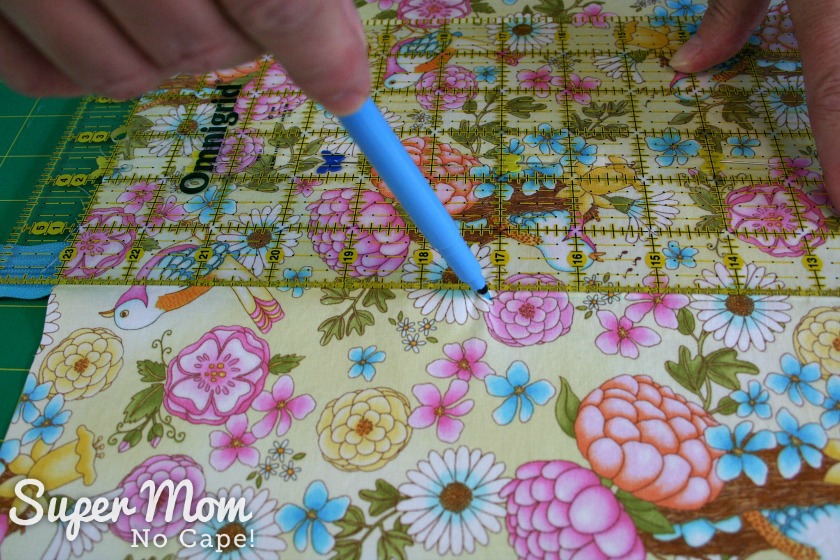
Draw a line using a Clover water soluble marker.
I use this pen whenever I need to mark on fabric because I’ve never not had it wash out. And I’ve also never had the marks come back like some others on the market have a tendency to do.

Pin in place.
Fold the top piece forward and pin so that it stays out of the way while you sew the other side of the zipper and lining.
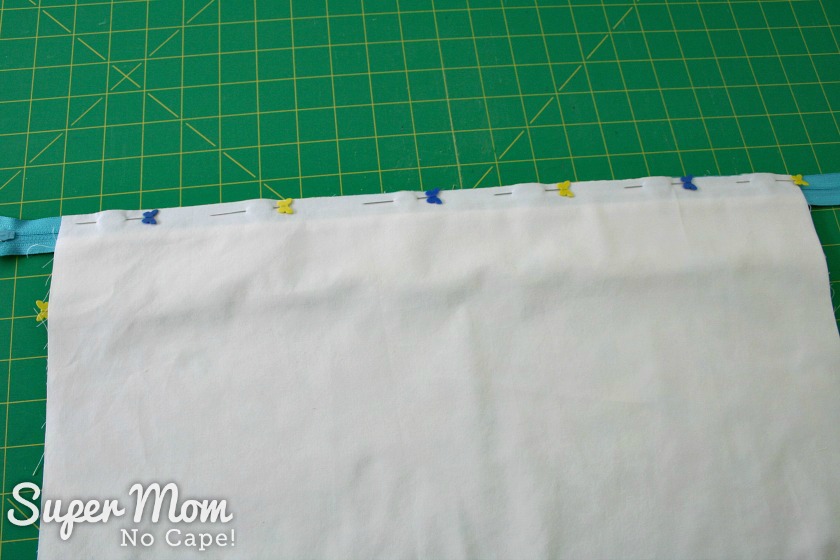
Flip the half completed pillow cover over.

Pin the other lining piece to the zipper.
Trim off the excess fabric.
Hand baste and then machine sew the zipper as instructed above.
Press the lining away from the zipper.
Measure 2½” inches from folded edge of the zipper flap.
Draw a line that you will use as a sewing line.
Use that line as a guide to topstitch the zipper in place.
The final step for how to make a concealed zipper pillow back is to square up the back to 19″ square.

Now let’s turn it into a pillow cover!
If you’re not going to be binding the pillow cover, place the pillow front and pillow back right sides together.
Make sure to open the zipper at least half way.
Sew all the way around. Then flip right side out.
Insert the cushion or pillow form and you’re done.
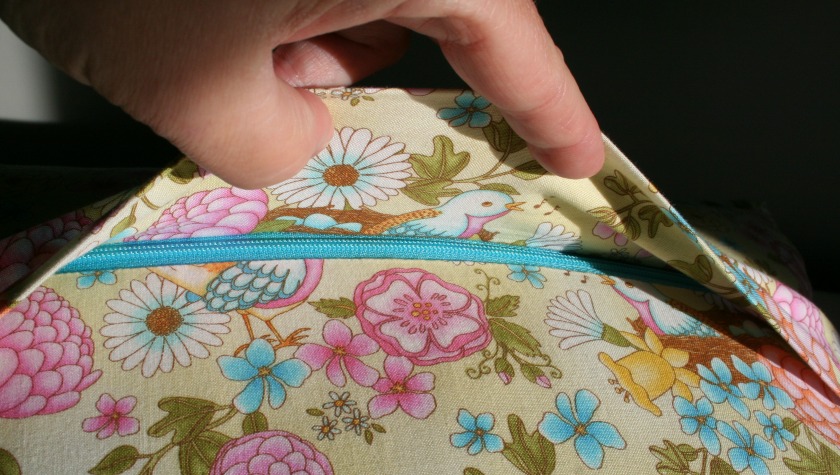
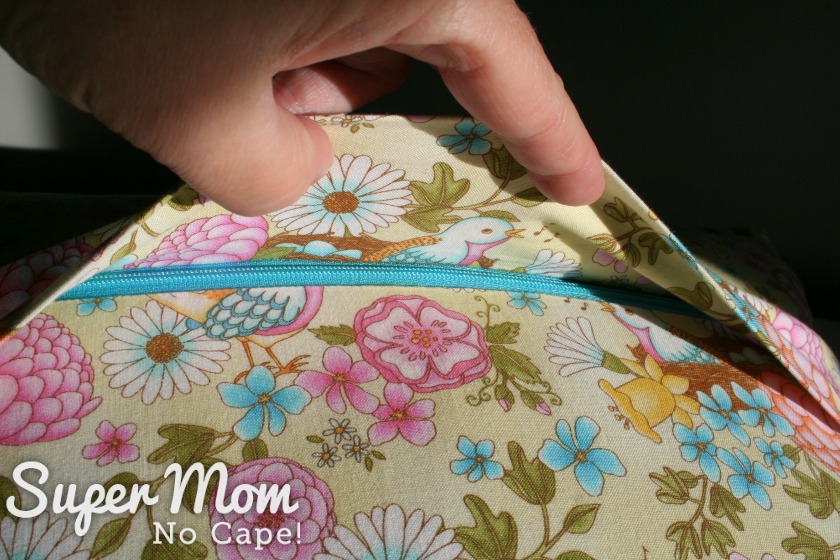
The zipper is neatly concealed beneath a flap.
If you’re going to be adding binding, join the binding strips together as I show in my How to Join Binding Strips tutorial. Once the strips are joined, press them in half lenghwise.
Pin the front to the back with the lining sides facing each other.
Machine baste through all layers, all the way around the pillow cover.
Apply the binding. I prefer to machine sew the binding to the front and then hand sew it to the back using a blind stitch (aka ladder or invisible stitch) as shown in this video:
Here is the finished pillow from the front:
And here’s the pillow back with the concealed zipper:
I hope you’ll give this method of how to make a concealed zipper pillow back a try. If you do please take a photo, post it on your blog and shoot me an email.
Or post it on Twitter, Instagram or Facebook and tag me. I’m @1SuperMomNoCape on Twitter, supermomnocape on Instgram and 1SuperMomNoCape on Facebook. I’d love to come see.
And please do follow me on each of those. Quite often you’ll see sneak peeks of projects I’m working on. 🙂
Be sure to check out some other awesome creations you might be able to make from your own stash! #CraftRoomDestashChallenge

Meet Your Hosts
Teadoddles | Our Crafty Mom | Shoppe No. 5 | Purple Hues and Me
Blue Willow House | C’mon Get Crafty | This Autoimmune Life
Salvage Sister & Mister | Domestic Deadline | Winter and Sparrow | Super Mom – No Cape!
 Loading InLinkz ...
Save this post for the next time you want to know How to Make a Concealed Zipper Pillow Back by clicking on the Pinterest button underneath this post.
And of course, I’d love it if you shared it on Twitter and Facebook as well. 🙂


10 Comments
Michelle
May 28, 2018 5:56 amYour tutorial is amazing Susan. So easy to follow with all the pictures and the way you explained each step in so much detail. Thank you very much, I learnt a lot and your pillow looks stunning
Kristie
May 27, 2018 11:16 pmWonderful pillow! Your Dresden plate is gorgeous, as well as the quilting. I’ve never thought to add a zipper into an envelope type backing. Something to try! By the way, great job matching up the fabrics on the back!
Roseann Hampton
May 27, 2018 4:42 pmWhat a great tutorial! I have a quilted piece I’d like to make into a pillow so this will come in handy!
Celtic Thistle Stitches
May 26, 2018 2:57 amI love the look of a concealed zipper back on cushions it is so much neater than other finishes. Thanks for the tutorial!
mary
May 22, 2018 9:23 amVery nice tutorial. The pillow looks great too. Thank you.
Rachel
May 22, 2018 3:46 amYou’re right about hand-basting. It’s time-consuming, but much better done than missed!
Christine B
May 22, 2018 3:04 amThis is a beautiful cushion Susan, thank you for sharing the tutorial, I think I will try this the next time I am making a cushion! Christine x
Debrashoppeno5
May 21, 2018 7:52 pmWow, this is great. In all my years of sewing I have never tried this technique. It is something I will be trying. I love how finished the piece looks.
Kimberly
May 21, 2018 2:20 pmIt turned out so nice! Thanks for the tutorial. I’ve been wanting to learn how to do this.
Deborah
May 21, 2018 11:08 amAwesome job! I really need to improved my sewing skills
Comments are closed.