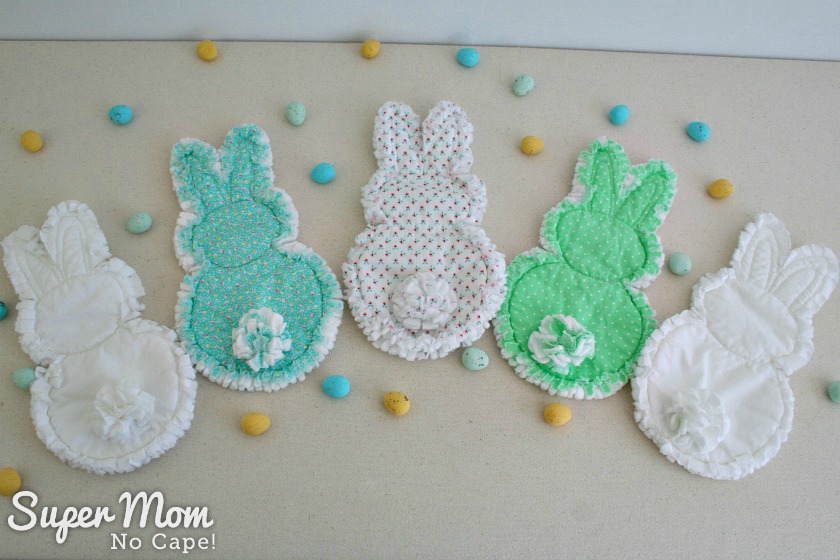
I’ve got the most adorable Rag Quilt Bunny Tutorial to share with you. The embroidered face makes these bunnies safe for even the littlest of little ones.
Each bunny measures approximately 9½” tall by 5¼” wide across the bunny’s belly, after it’s been washed.
They’re perfect to make for baby shower gifts or to pop into Easter baskets.
Can you stand the cuteness!
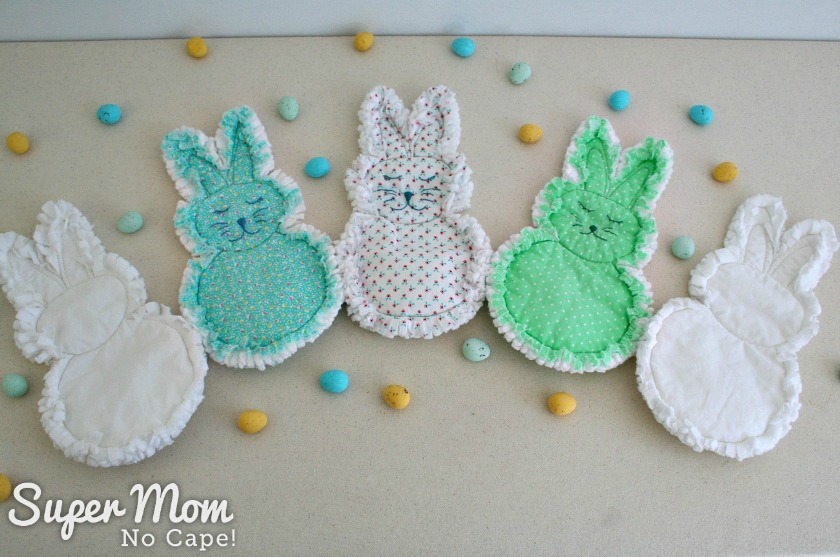
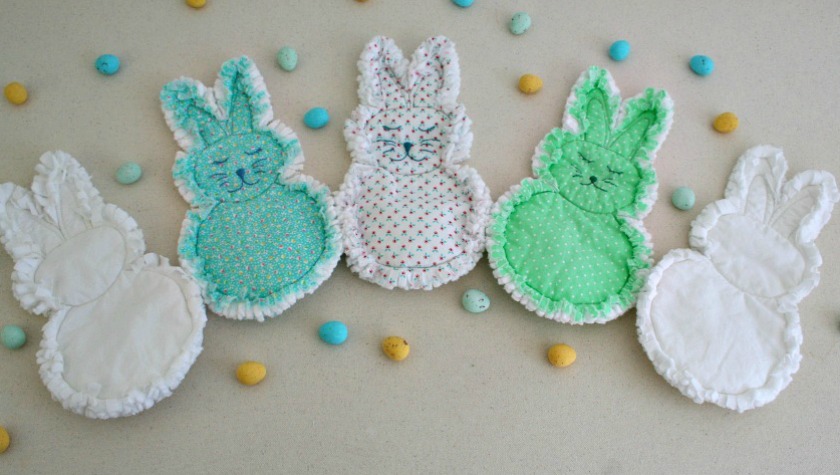
What child wouldn’t love to cuddle their own soft, floppy bunny. Even the white ones without the embroidered faces are just so sweet and huggable.
As part of the monthly Craft Room DeStash Challenge, I’ve once again dug into my fabric dresser to use up some of my fabric stash.
In the process of making these rag quilt bunnies, I managed to use up 3 fat quarters of small print fabric, approximately half a yard of a white thrifted sheet for making sample bunnies plus lots of scraps of quilt batting leftover from other projects.
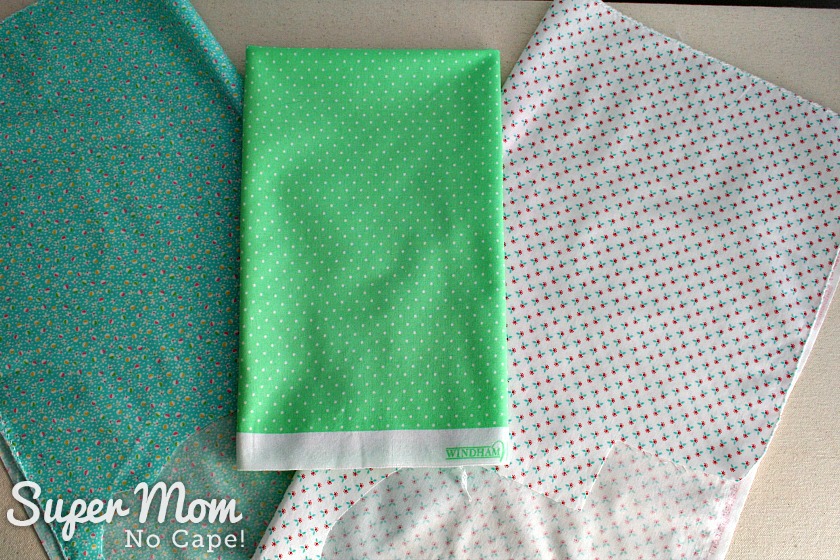
Pictured below are the fat quarters I pulled from my stash. As you can see, two of them weren’t even full fat quarters.
If you’ve been quilting for any amount of time you may have seen the animal rag baby quilts made from the vintage (and apparently very rare) Simplicity Pattern #4993. It must be rare because there’s one for sale on Ebay right now for $54.95!
But that is not where the idea for these rag quilt bunnies came from. The idea actually came from a swap I did over 20 years ago with one of our neighbors when we lived in PMQs (Permanent Married Quarters.)
Back then, we were living on a Master Corporal’s pay and while it paid the bills, it didn’t allow for any of life’s little luxuries. Our neighbor, Adrienne, knew that I occasionally took on sewing projects to earn extra money.
One day when she popped by for coffee, she brought along a cute little rag quilt bear that she’d received as a baby shower gift. It was about 10″ tall and kind of floppy but her little one absolutely loved it.
If you’ve ever lived on a military base, you know that there’s usually a population explosion that occurs nine months after the end of every major exercise. She explained that she had a bunch of baby showers to go to and wanted me to make a dozen of those rag bears.
However, they too were living on a Master Corporal’s pay. Buying gifts for all those baby showers wasn’t in their budget so she proposed a swap.
She knew that I loved the tole painted items she made to sell. After we’d worked out how much it would cost in materials for me to make the bears and how much it would cost for her to make one of her tole paintings, it worked out pretty much even. The final deal ended up being that I would make her 12 rag quilt bears, she would paint one of the wooden hat boxes she sold with a design of my choice.
I still have the tole painted hat box. But I’m sure by now, all those bears have been loved to bits and are no longer around. Also no longer around is the pattern I created to make them.
So I’ve designed a new pattern and since Easter is coming up I decided to make rag quilt bunnies for this tutorial instead of rag bears.
Note: Patterns for a rag quilt bear, kitten and puppy are in the works. I always want my patterns to be easy for people to complete, so I’m trying out different ideas for faces, ears and tails.
To make one Rag Quilt Bunny you will need:
- 1 fat quarter (small prints work best)
- large scraps of cotton quilt batting
- Matching thread
- Embroidery floss for stitching the bunny’s face
Print out the pattern. (Scroll down to the end of the instructions for the link.)
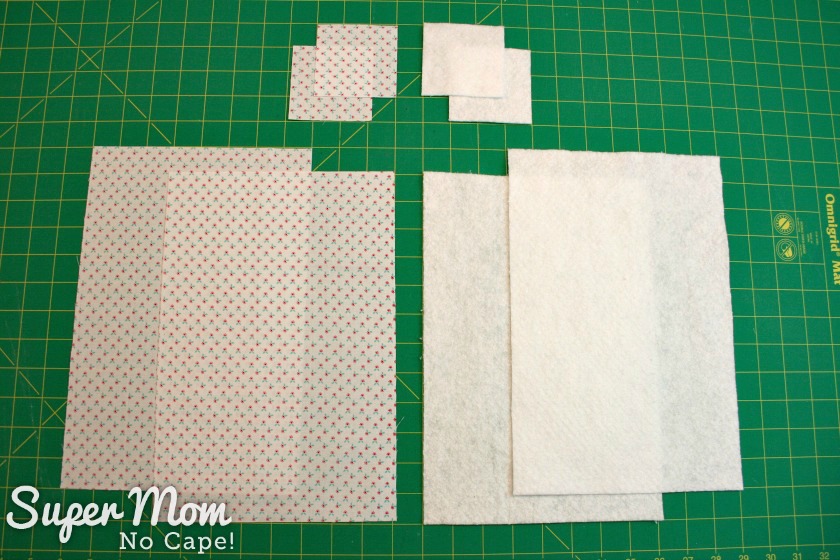
Next, cut two pieces of fabric 8″X12″ and two pieces 3″X3″. Then cut two of cotton quilt batting 8″X12″ and 2 at 3″X3″.
Trace the pattern on to one of the pieces of fabric.
You will trace the entire pattern… both the cutting lines (solid) and the sewing lines (dotted) as well as the bunny’s face.
If you are using lighter colored fabric, the easiest way to trace the pattern on to the fabric is to use a light box.
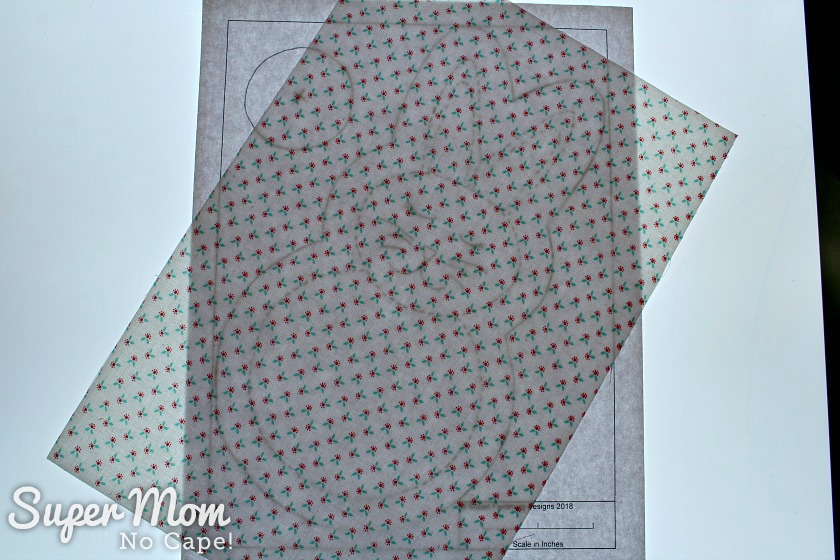
Last summer, I purchased a Huion LED Light Pad. And I must say, it is one of the best craft room investments I’ve ever made.
I love that you can easily adjust the brightness just by tapping the On button. It also has a neat smart memory feature that remembers the brightness you set it to the last time you used it. It’s AC powered and light weight with a nice size drawing surface (16″X12″.)
Alternatively, you could tape the pattern and fabric to a window and trace it that way.
If you’ve chosen a darker fabric that the pattern isn’t visible through, place the pattern on top of the fabric and insert a piece of embroidery tracing paper between them.
To embroider the face:
The eyes, mouth and whiskers are done in backstitch. Use satin stitch for the nose.
On this white print fabric I chose a floss a few shades darker than the blue in the tiny flowers.
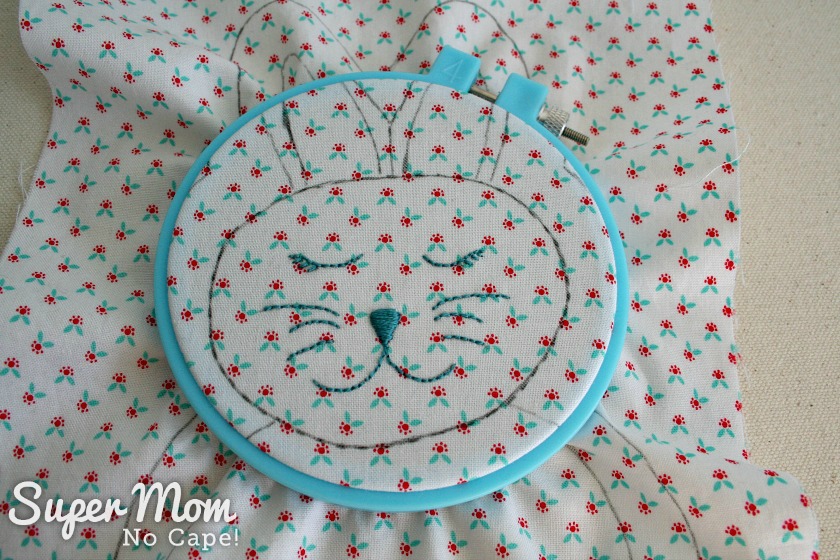
For the green bunny and blue bunny, I chose a floss color that was a few shades darker than the fabric.
If you don’t usually knot your floss when embroidering, please be sure to knot it for this project to make sure that the stitching doesn’t come out when washed.
If you don’t embroider, the face can be left blank and the bunny will still be really cute.
Next, you’re going to create a quilt sandwich. With the second piece of fabric wrong side facing up, layer on the 2 pieces of batting. Place the embroidered piece right side facing up on top.
Pin through all layers.
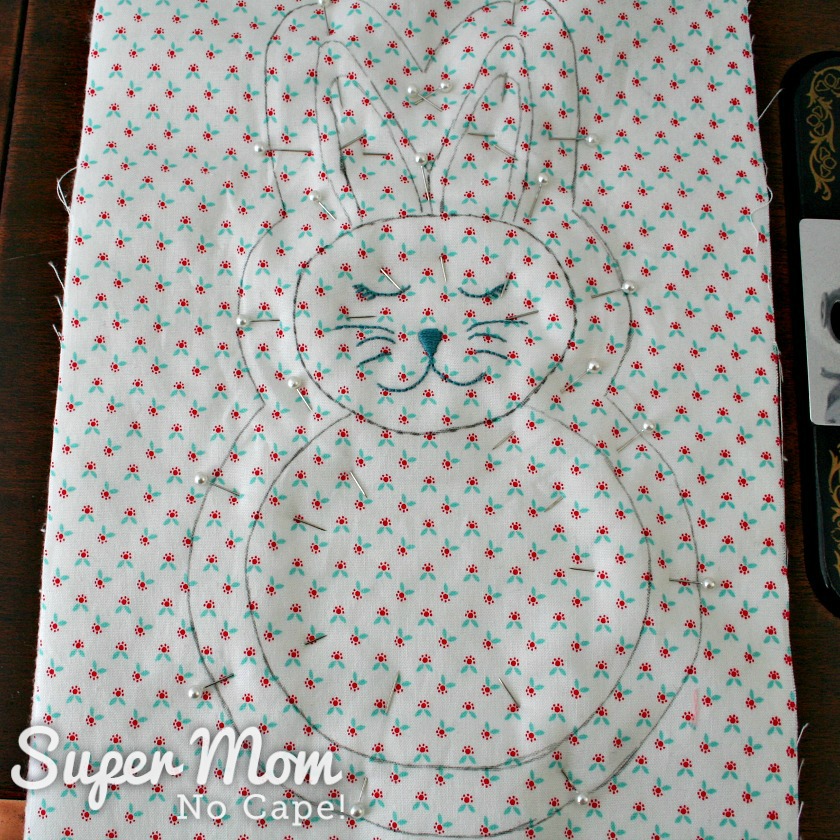
Sew on all the dotted lines as indicated on the pattern piece.
Note: When I was tracing the pattern, I started out making all those little dots but gave up and then just drew a solid line. If you do the same, just remember that you’re sewing on the inner lines. The outer line is the cutting line.
Begin by inserting your needle at the neck. Make sure to draw the bobbin thread up to the top so that it doesn’t get tangled in the stitches on the back.
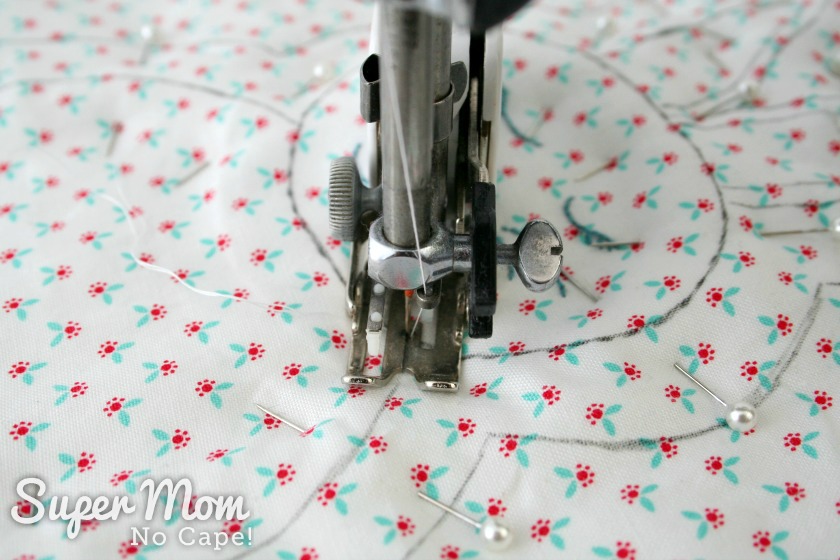
Sew around the body of the bunny.
Once you get to the other side of the neck, turn and sew around the head.
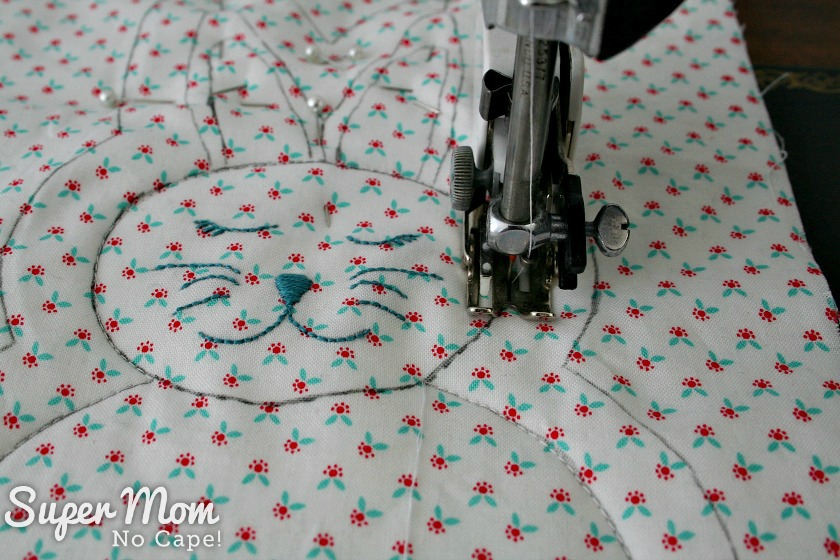
End off.
Sew around the outer ears. Then sew around the inner ears.
The trick to sewing around the tight corners on the ears is to reduce your speed and sew really slowly, lifting the pressure foot with the needle in the down position and turning the fabric as necessary.
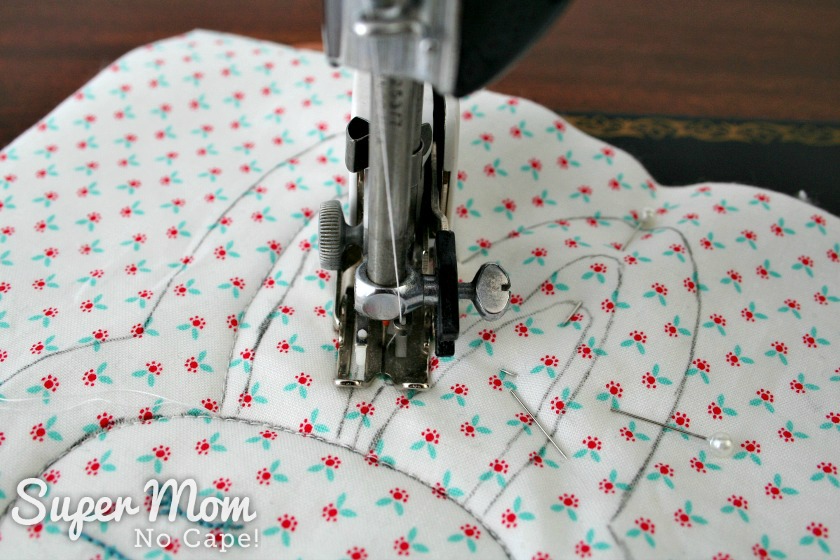
End off. Knot all the threads and bury them between the batting layers.
Following the cutting line (the solid line on the pattern) cut through all layers to cut out the bunny.
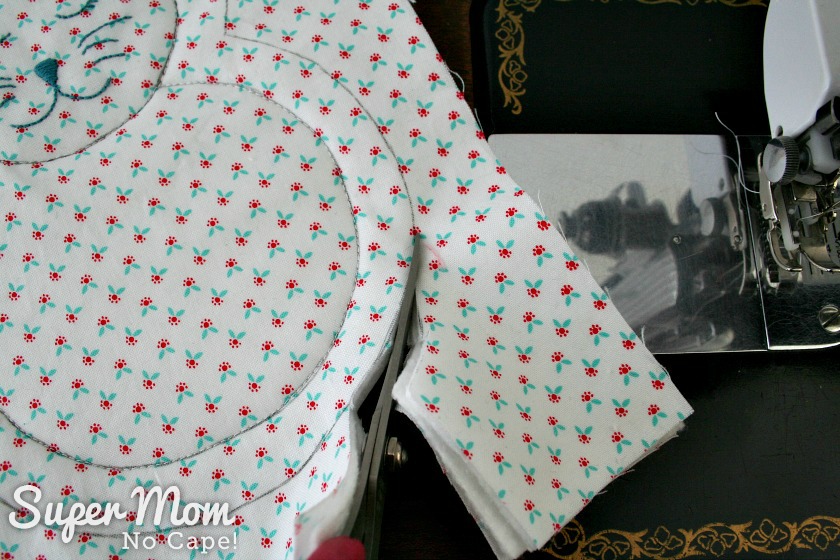
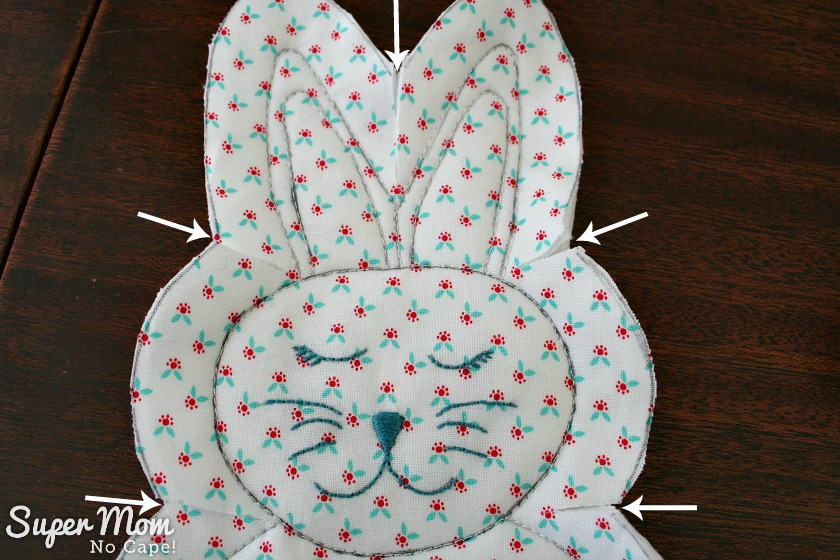
When you’re done cutting her out, the bunny should look like this:
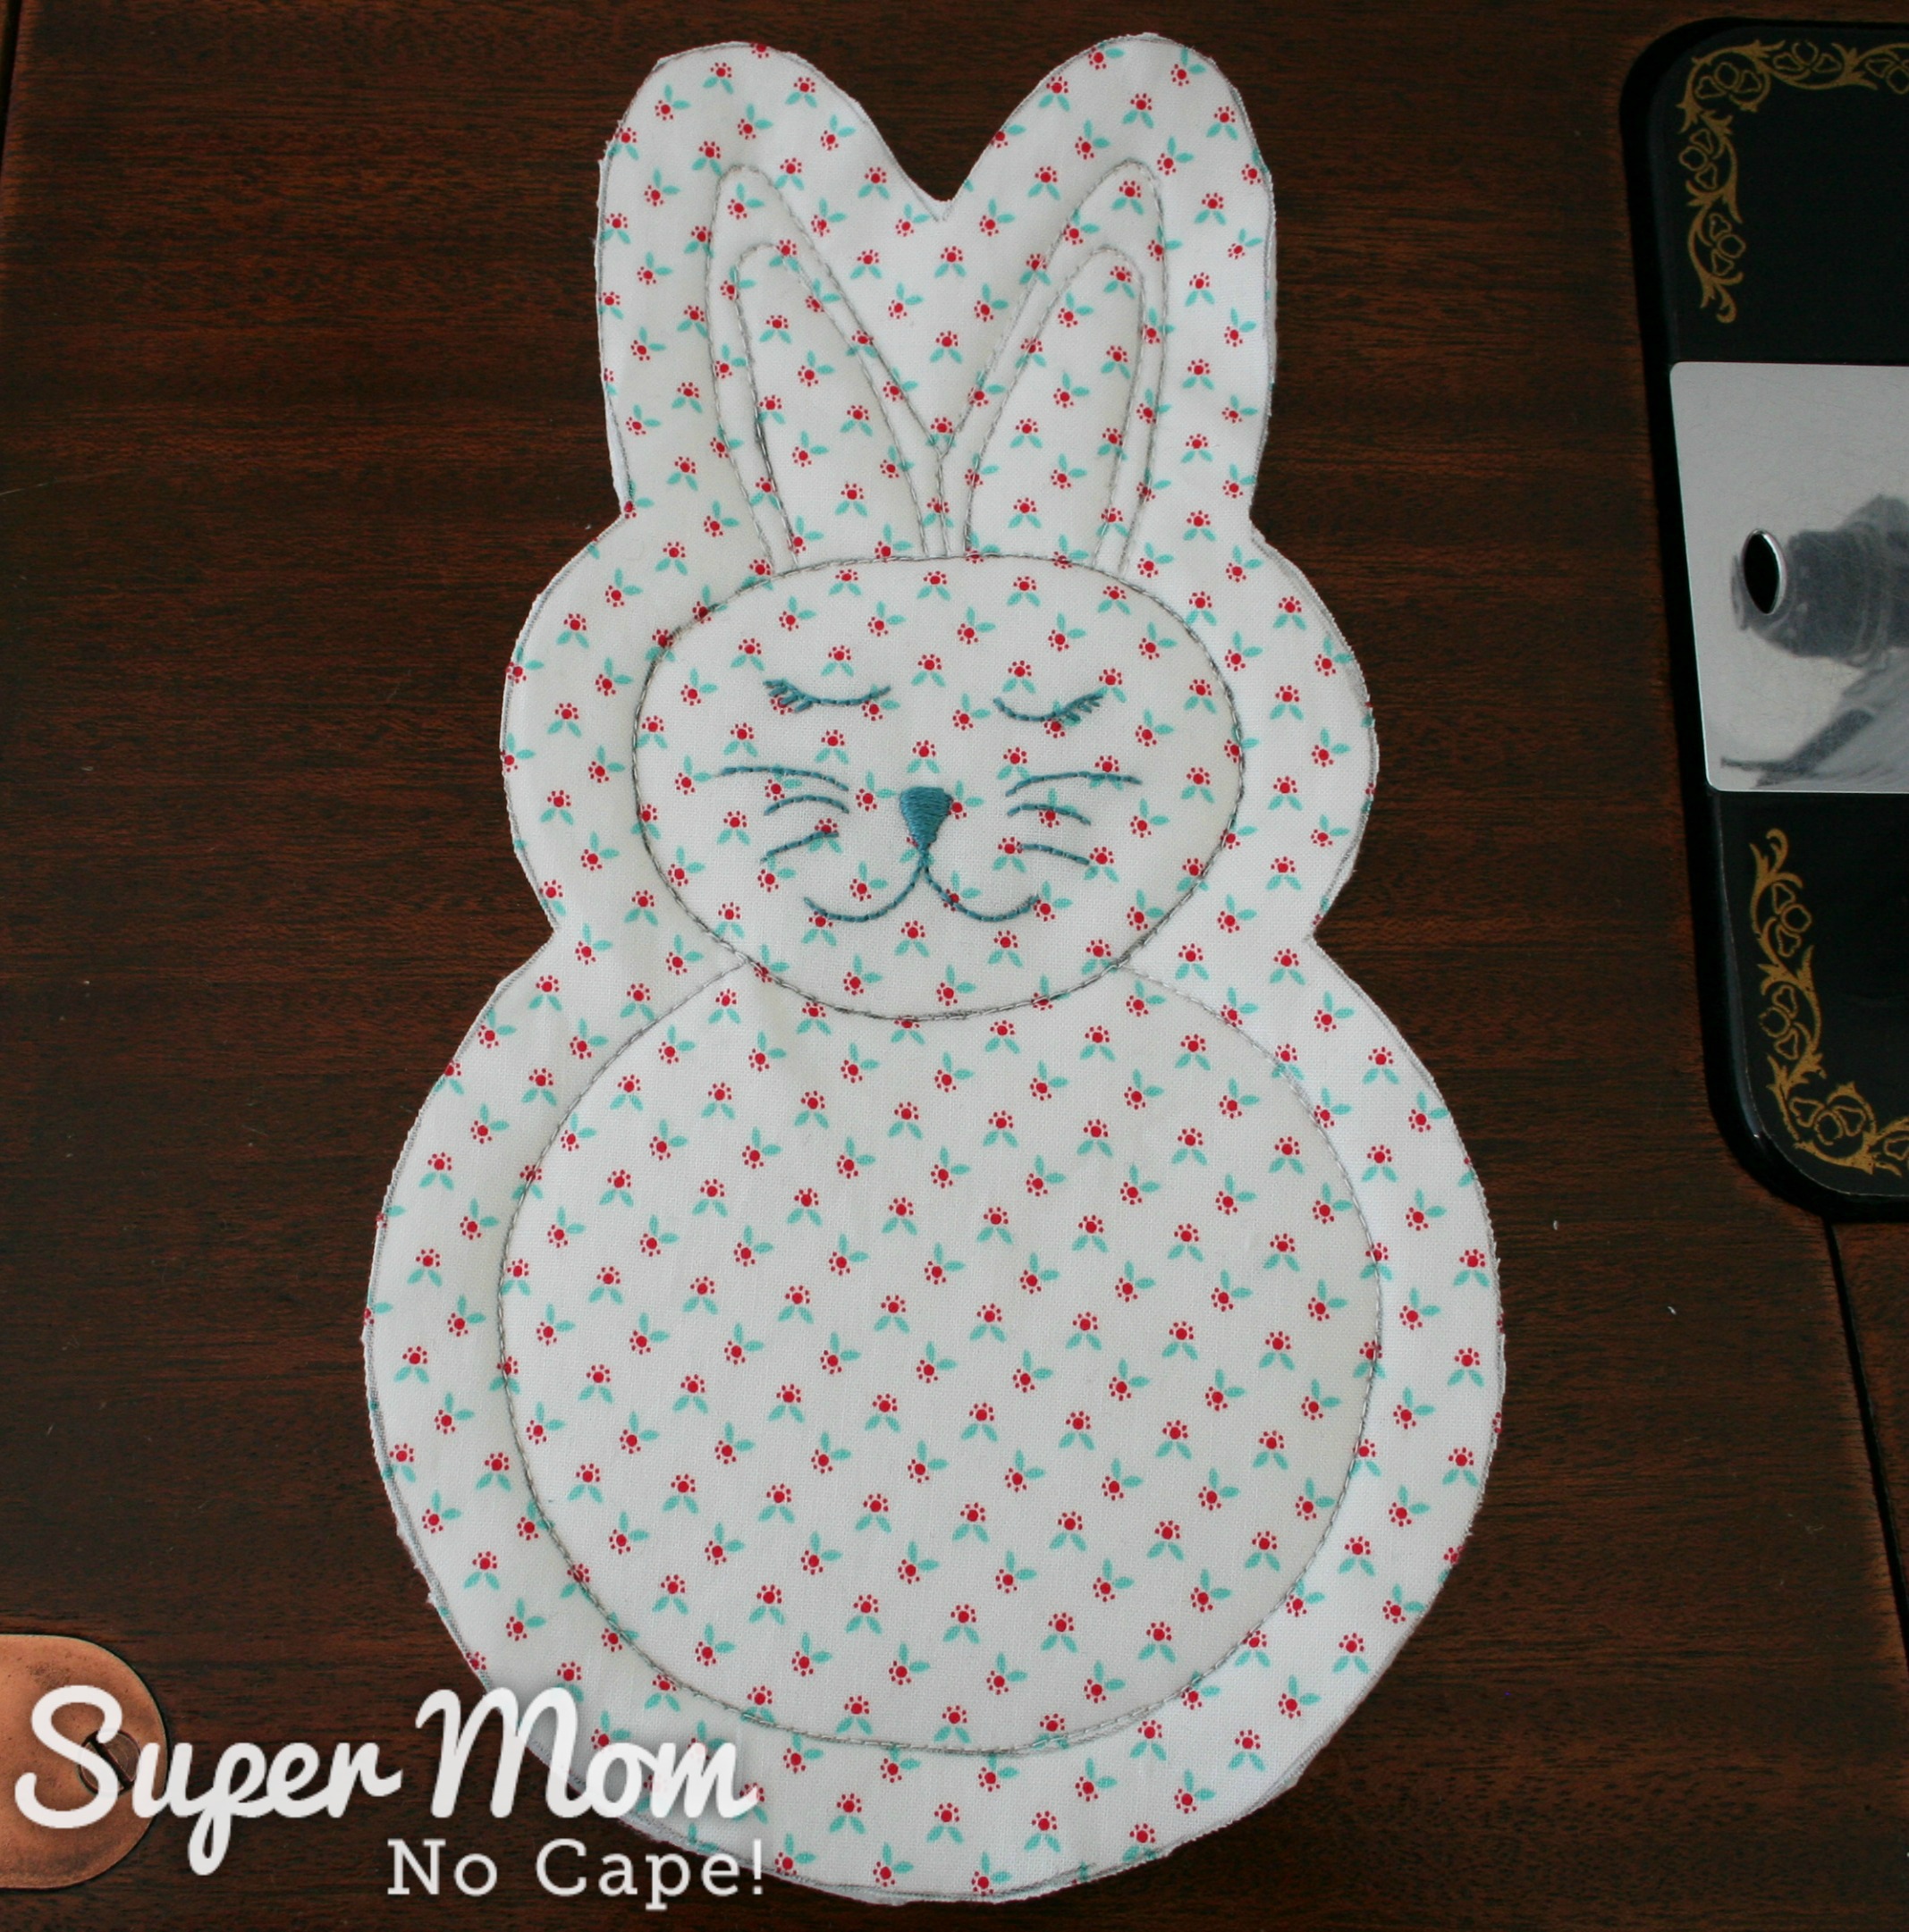
To create the ragged edge:
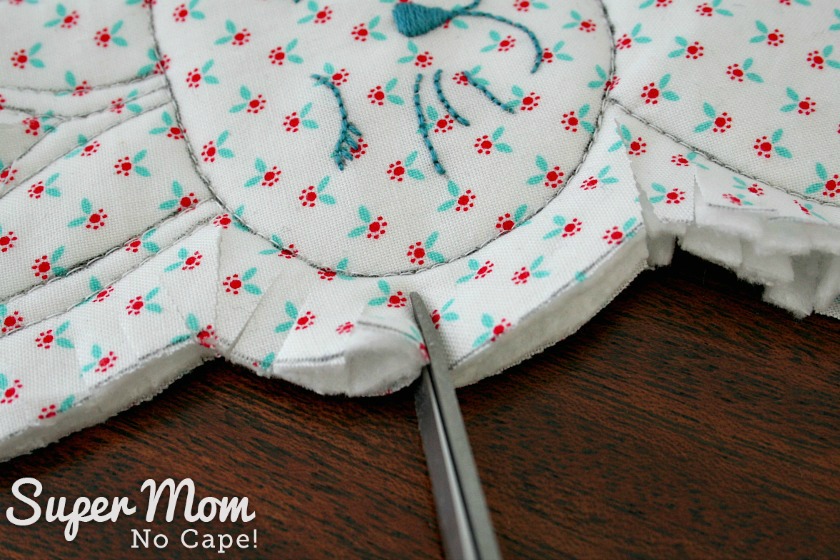
Make snips with a scissors approximately 1/4″ to 3/8″ apart all the way around the outside of the bunny being careful not to snip through the sewn lines.
I begin by clipping at all the inside corners as pictured below:
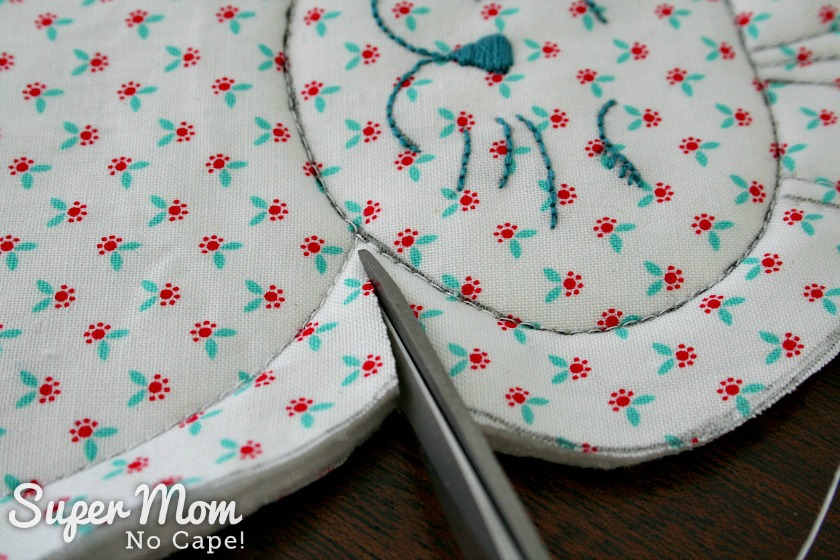
 Once those cuts are made, continue clipping all the way around the bunny.
To make the bunny’s tail:
Trace the circle from the pattern onto one 3″X3″ square of fabric.
Layer the fabrics and batting as you did for the body of the bunny.
Sew an X in the center of the circle.
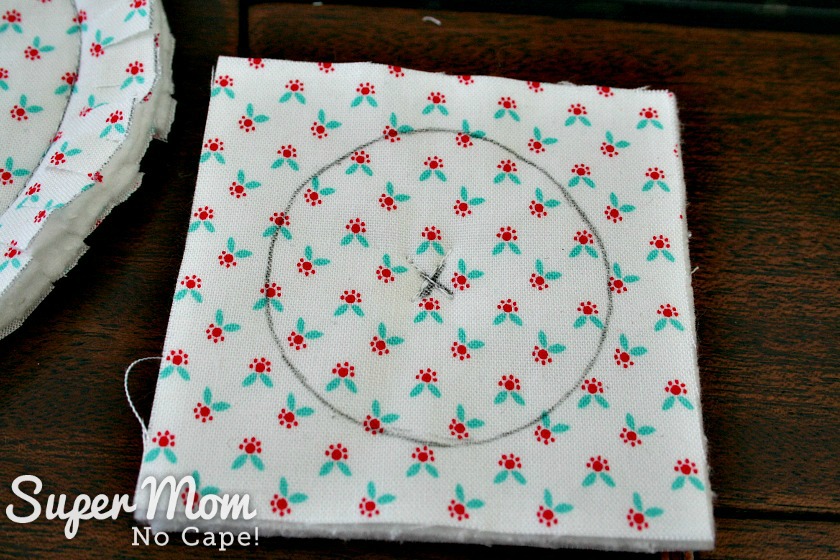
Cut out the circle, cutting through all layers.
Make cuts about 3/4″ deep all the way around the circle without cutting into the center.
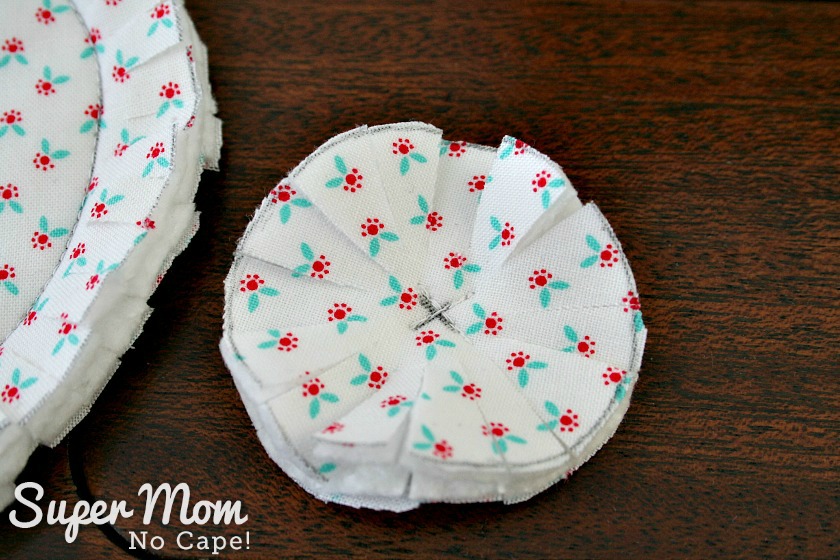
Hand sew the center of the bunny tail to the bunny’s bum as pictured below:
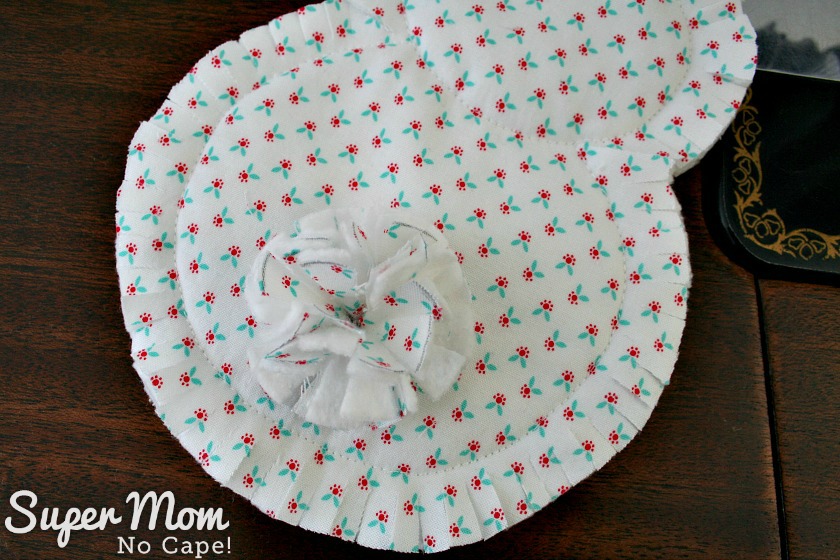
The final step is to wash your bunny in hot water and dry in a dryer. I threw mine in with a load of tea towels.
Now bunny’s fur is all fluffy!
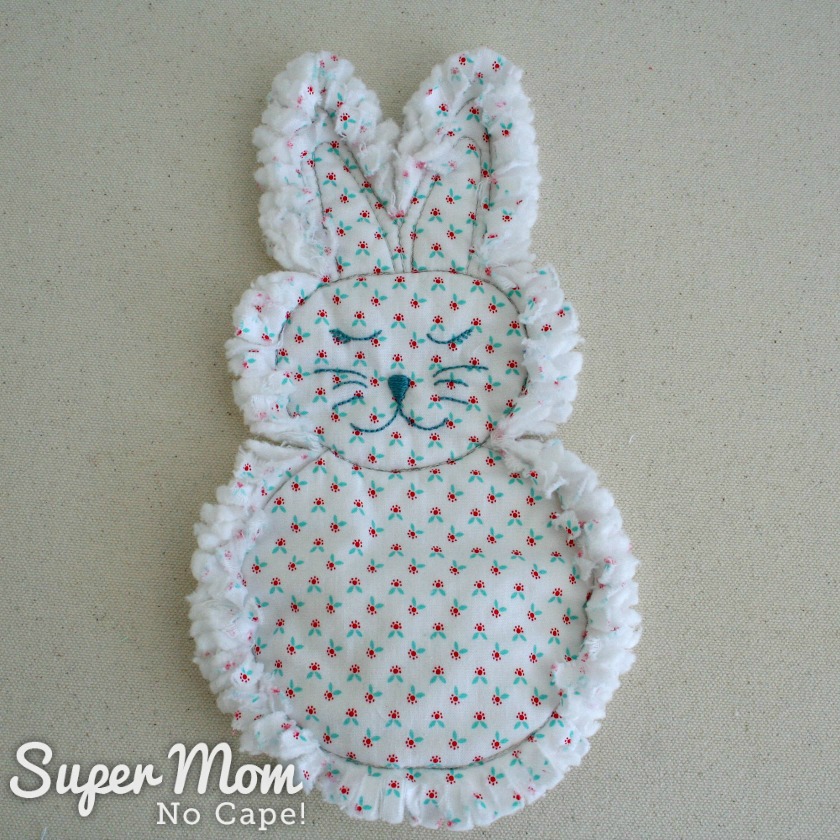
And so is her tail!
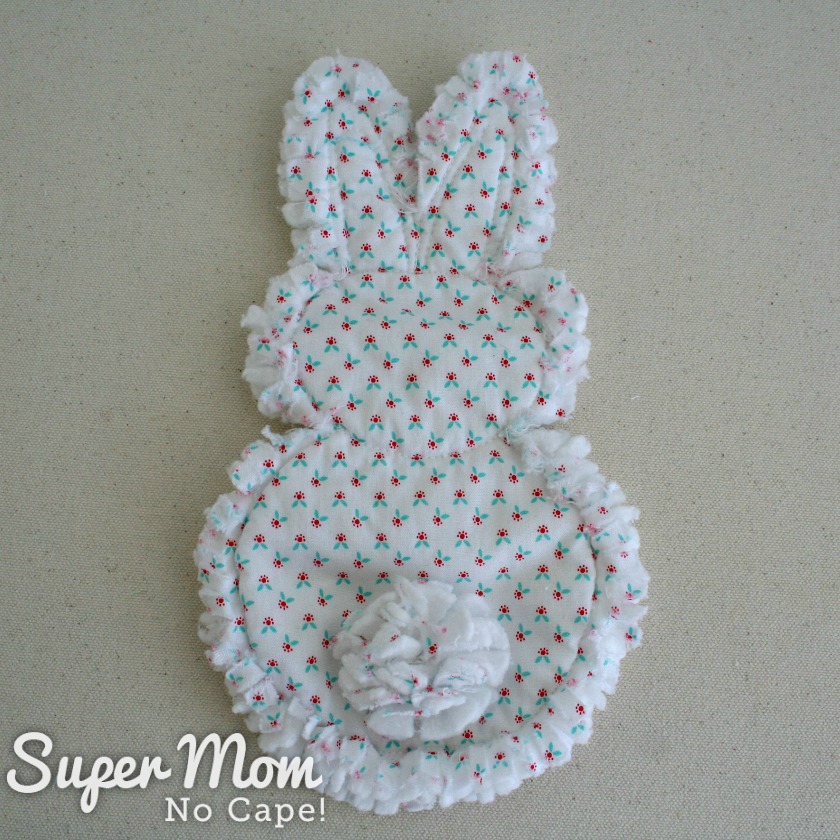
I love her and all her bunny friends! I had so much fun creating them.
Get the ad free PDF
All the instructions you need to make these cute rag quilt bunnies are right here in this post.
But I realize that it might be more convenient for you to have a copy that you can download to your computer to print out and have beside you as you work. You can purchase the ad free Rag Quilt Bunny Tutorial PDF tutorial for $5 from my shop.
To see what I created for the previous two Craft Room DeStash Challenges, check out the links below:
For January’s Destash, I created this sweet Fabric Cone Tutorial. Done up in Easter themed fabric or pastels they’d be perfect to hang on an Easter tree!
Then in February, I shared a pretty Tablet Pouch Tutorial. It’s just the right size to fit a tablet or iPad but could be used for all sorts of things. I also made a Sashiko embroidered version complete with free Sashiko pattern. These would awesome Mother’s Day or Teacher gifts.
Every month a group of bloggers are challenged by C’mon Get Crafty to create a new craft or project from their own stash of goodies! Check out some awesome creations you might be able to make from your own stash! #CraftRoomDestashChallenge
[clickToTweet tweet=”What crafty creations could you make today from YOUR craft stash?! #CraftRoomDestashChallenge” quote=”What crafty creations could you make today from YOUR craft stash?! #CraftRoomDestashChallenge”]
 Loading InLinkz ...
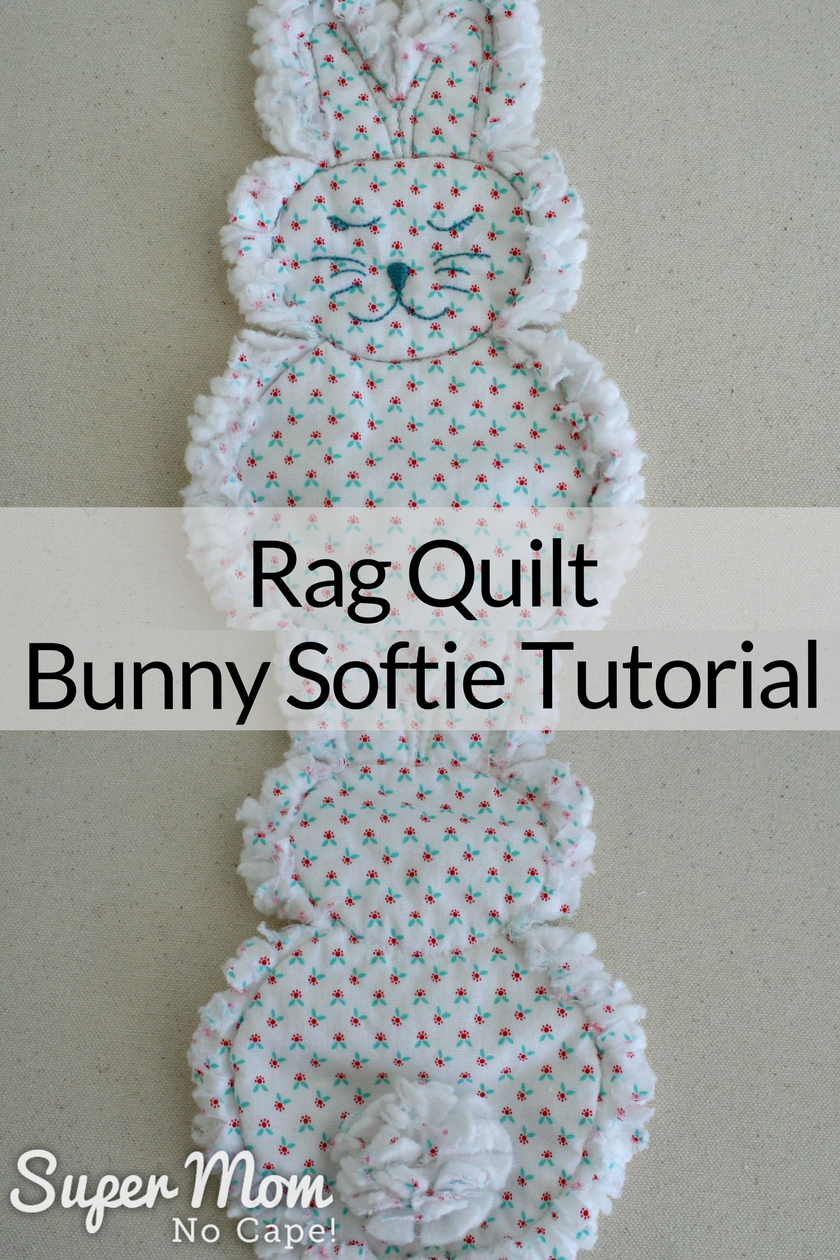
Pin this so you can find it again when you want to make an adorable Rag Quilt Bunny Softie for one of the littles in your life by clicking on the Pinterest button underneath the post.
And of course, I’d love it if you shared it on Twitter and Facebook. 🙂


68 Comments
Cindy
January 16, 2021 11:08 amAdorable….
Do you have the other patterns…am interested in the bear.
Sue
March 2, 2020 12:29 pmCan these be made and sold?
Super Mom No Cape
March 23, 2020 4:42 pmHello Sue,
The bunnies can be made and sold on a small scale basis but not on a large commercial basis. As well, I retain all rights to the tutorial and pattern. So please do not copy and/or distribute the tutorial or pattern.
Wanda
February 23, 2020 9:48 amI, for some reason, cannot find the drawing of the bunny pattern to print out🤔
Please help
Super Mom No Cape
February 23, 2020 12:56 pmHello Wanda,
If you scroll down the post, under the picture of the five bunnies with their cute little tails facing up, you’ll see a link in blue capital letters that says RAG QUILT BUNNY PDF PATTERN. Click on that link to be taken to the pattern.
Karen Blank
September 4, 2019 5:14 pmHi I printed off the rag bunny but it did not print the bunny pattern I have page 1 to 15 and printer said 19 pages, page one is the material/cutting instructions, any idea how to print the pattern?
Super Mom No Cape
September 4, 2019 6:18 pmHello Karen,
I just clicked through the link provided in the post and did a test print of the pattern and all the pages printed for me, including the last page with the pattern for the bunny, so I’m not sure what might be happening when you try to print it.
The only things I can think of are to check your settings when you click on print and make sure that it’s set to print all pages. Or since you’ve already been able to print up to page 15, set it to print pages 16 to 19.
As well… check to make sure that your printer isn’t out of paper.
Sorry I couldn’t be more help.
Barbara Falkner
April 14, 2019 4:38 pmTicking the cuteness button, and so easy to boot! Thank you
Patricia
April 14, 2019 11:41 amLove the bunny, thank you!
Cheryl A Norwood
April 6, 2019 11:24 amI made a bunny for our first granddaughter and not only can she hold it all by herself (I visited when she was almost 5 months old) my daughter LOVES it for catching all of the baby’s drool! She has asked me to make more as it gets so soaking wet, she has to lay it out to dry—and then Bailey doesn’t have her sweet bunny. Did you ever post the other patterns you mentioned (puppy, kitten, etc.?) We have another grandbaby on the way and a great niece/nephew, so I want to make more—these are not only very cute, but very useful and so much cuter for the baby and mom to carry than a burpcloth or spitcloth!
Super Mom No Cape
April 9, 2019 12:48 pmHello Cheryl,
I’m so glad that your granddaughter loves her rag quilt bunny! And I can see how they’d be great for catching and wiping up drool. 🙂
Unfortunately the patterns for the other animals are still a work in progress.
D
March 25, 2019 6:29 pmWould love to know if you have the other rag animal patterns available yet
Super Mom No Cape
March 26, 2019 8:59 amHello D,
Unfortunately not. I’m still working on the patterns for the other animals.
Ashleigh
February 25, 2019 5:15 pmThis may be a super dumb question, but would polyester or a blended batting work? I feel like not, but I’m not really familiar with battings.
Super Mom No Cape
February 25, 2019 7:38 pmIt’s not a dumb question at all Ashleigh.
The original rag bears that I made for my friend years and years ago were made with polyester batting, so it would work. I used what I had on hand at the time.
The only thing that might come out different is I don’t think they’d get the same raggedy edges after washing.
So if you don’t have cotton batting scraps but do have polyester batting scraps, maybe do a test one without the embroidery and see if you like that look.
Kathleen
December 14, 2018 4:15 pmLove this bunny!!! Thanks for sharing!
Debbie
October 6, 2018 6:11 pmThese are so precious. I just got to try making one. Hope it turns out as half as pretty as yours. I don’t embroider, but may check out a YouTube video. Could you give me the approximate completed size? If I missed it in your explanation, I apologize for asking.
Linda Goodall
September 14, 2018 3:20 pmThis is adorable and it just so happens I have a baby shower coming up in two weeks. Perfect timing. Thank you.
Super Mom No Cape
September 20, 2018 10:30 amI’m so glad you like them Linda. A rag quilt bunny will be the perfect baby shower gift!
Anita
August 26, 2018 5:48 pmThis is a great tutorial! Thank you for sharing it. Want to make these with some folks for a sewing day.
Super Mom No Cape
August 27, 2018 8:41 pmThank you so much Anita! They’d be great fun to make with a group of friends on a sewing day. 🙂
Driedger
July 7, 2018 8:30 pmSo cute! I sew a lot for charities and these will be quick and easy to make. Wondering if you’ve posted the other animal shaped patterns you mentioned in your post.
Super Mom No Cape
July 9, 2018 10:27 amHello Driedger… I’m still working on the other animal patterns. I’m hoping to have them available soon. 🙂
Elsie Wade
May 28, 2018 11:57 amI cannot find the pattern. I’ve looked and looked for the blue link and can’t find it. Any way I can get this pattern? Would love to make some of these.
Super Mom No Cape
May 30, 2018 7:53 amHello Elsie,
I sent you an email. 🙂
Catherine AuntIirsh
April 22, 2018 10:17 amOh my gosh this is so adorable! I am making myself a rag quilt bedspread and we’ll have lots of little scraps left over. I have grand nieces and nephews that I will really enjoy making these for. Thank you so much for sharing
Lori Morton
April 14, 2018 11:00 amWondering where bunny pattern is? Clicked like it said..doesn’t give the pattern tho.
Super Mom No Cape
April 14, 2018 3:01 pmHello Lori,
When you click on the blue link that says “RAG QUILT BUNNY SOFTIE TUTORIAL AND PATTERN” a pop up window should appear for you to subscribe. Enter your email address and then within a short time, you should receive an email with the link to download the pdf of the tutuorial and the pattern.
T’onna | Sew Crafty Crochet
April 4, 2018 11:28 amSupper adorable! I love the bunny faces!
Super Mom No Cape
April 4, 2018 5:49 pmThank you T’onna! I love those bunny faces too. 🙂
Lori Morton
April 3, 2018 2:14 pmThese Bunnies are ADORABLE!! Thank you soooo much for sharing with us!! 🙂
Super Mom No Cape
April 4, 2018 5:47 pmThank you for your sweet comment Lori!
kim
March 27, 2018 1:09 pmthese are adorable and you make them look so easy!
Super Mom No Cape
April 4, 2018 5:03 pmThank you Kim! They really are easy to make.
Leanna
March 25, 2018 9:22 amYour little bunnies are adorable. I always enjoy your tutorials because they are so thorough, thank you for the hint about knotting the thread. My Mommy taught me never ever knot your thread so I wouldn’t have. lol
These are so cute for a baby to snuggle with, easy to wash, and perfect for in a diaper bag as they aren’t stuffed. Perfect for Easter
Super Mom No Cape
April 4, 2018 4:47 pmThanks so much Leanna. What a lovely compliment!
The bunnies would be perfect for babies to snuggle with and to add to a diaper bag.
Mother of 3
March 24, 2018 1:46 pmThose are such darling bunnies! I love how soft and fluffy they look. Pinned.
Super Mom No Cape
April 4, 2018 4:42 pmThank you so much Mother of 3! And thanks for pinning!
Mary Anne
March 23, 2018 4:34 pmAbsolutely adorable! Thank you for sharing your how to – I think I’ll make a couple of these for our grandson to play with.
Super Mom No Cape
April 4, 2018 4:40 pmThank you Mary Anne! Your grandson will love them!
Lydia from Life Beyond the Kitchen
March 22, 2018 5:38 amThese are super sweet! Love the little faces! This seems like a great project to learn basic rag quilting.
Super Mom No Cape
March 22, 2018 7:48 amThanks so much Lydia! I love their faces too. It took me a few tries to get them just right. And I think you’re right… they could be a fun way to try out rag quilting for the first time.
Susan Nixon
March 21, 2018 11:45 pmThat’s really cute! Thanks for sharing.
Super Mom No Cape
March 22, 2018 7:45 amThank you Susan!
Deborah
March 21, 2018 10:09 pmThose turned out so great. How darling
Super Mom No Cape
March 22, 2018 7:45 amThank you Deborah! I’m glad you like them. They’re my new favorite project. 🙂
Erlene
March 21, 2018 5:08 amThese are adorable and would be so easy for moms to carry in the diaper bag or for kids to carry around too. Pinned.
Super Mom No Cape
March 21, 2018 4:46 pmThank you Erlene! You’re right they would be a great thing to carry in the diaper bag. And for kids to carry around.
Thanks for pinning!
Debrashoppeno5
March 20, 2018 8:25 pmMy disclaimer, I love bunnies. This rag bunny is so precious.
Super Mom No Cape
March 21, 2018 4:44 pmThank you Debra! I love bunnies too. 🙂
Emily @DomesticDeadline.com
March 20, 2018 8:11 pmI love these so much, your faces are just darling. Pinned for later!
Super Mom No Cape
March 21, 2018 4:42 pmThanks so much Emily! The faces do make a person smile.
Thanks for pinning!
Roseann Hampton
March 20, 2018 6:40 pmThese are so adorable! And I enjoyed reading your story about living on a military base!
Super Mom No Cape
March 21, 2018 4:41 pmThank you so much Roseann for your sweet comment about the bunnies!
Being an army wife shaped the person I became. 🙂
JaneEllen
March 20, 2018 4:44 pmAs one of your commenters asked are you making a garland?, if not sure could, would be even more adorable than one bunny.
Such a wonderful project and so many ways this could be used and changed to a bear or other critters possibly. Very smart of you how you made this bunny.
Not sure will be making them this year but have printed out all so can be made any time the urge strikes me, never know when that will be. I craft/create on spontaneous urges.
Organized all my fabric recently so am sure have some appropriate fabric to make these, just need some quilt batting.
So glad you shared this great project.
Happy Spring nd Easter
Super Mom No Cape
March 21, 2018 4:38 pmThank you for your wonderful comment JaneEllen. I arranged them that way so they’d fit in the camera frame when taking the photo but they do look like a garland. They could be made into a garland, but I think a very heavy interfacing would need to be added between layers of the batting to make them stiff enough for a garland.
Happy Spring and Easter to you too!
Lydia @ Thrifty Frugal Mom
March 19, 2018 11:52 pmAw, these are so darling! I love the soft, “fluffy” edges. And that tail? The perfect touch!
Super Mom No Cape
March 21, 2018 4:33 pmThank you so much Lydia! That fluffy tail really is the perfect touch… it makes me smile. 🙂
mary
March 19, 2018 7:02 pmThose are adorable. I’ll bet they are super cuddly too.
Super Mom No Cape
March 21, 2018 4:31 pmThank you Mary! They’re super cuddly the perfect size for little arms.
FLORENCE
March 19, 2018 6:31 pmMy goodness, how SUPER adorable!!! I love your little bunnies! I can’t see how a bear could be any cuter! The way you have them placed in the photo, they look like a garland. Are they forming one? No matter. I love them, and love the way they all fluffed up in the dryer.
Super Mom No Cape
March 21, 2018 4:30 pmThanks so much Florence! They do look like a garland, don’t they?
But no… I just arranged them that way so they’d all fit in the frame. I love the way the fluff up in the dryer too. It’s a little like magic.
Donna @ Modern on Monticello
March 19, 2018 3:22 pmBeyond adorable! I don’t quilt or sew but I certainly appreciate the art. You are very creative. Thanks for sharing.
Super Mom No Cape
March 21, 2018 4:21 pmThank you Donna! What a sweet compliment!
Rachel
March 19, 2018 2:25 pmHow sweet! Very cuddly for a small people …
Super Mom No Cape
March 21, 2018 4:20 pmThank you Rachel! I need to find some little people to give them to so they can be loved. 🙂
Habiba
March 19, 2018 10:36 amWhat a gorgous Little bunny and her friends!!! I am saving this to pinterest as there are quite a view pregnant ladies in my surroundings lately. I’ll be probably making these cuties in the near future 😉
Super Mom No Cape
March 21, 2018 4:09 pmThank you so much Habiba! If you do make some and post about them, please tag me so I can come see them. 🙂
Comments are closed.