


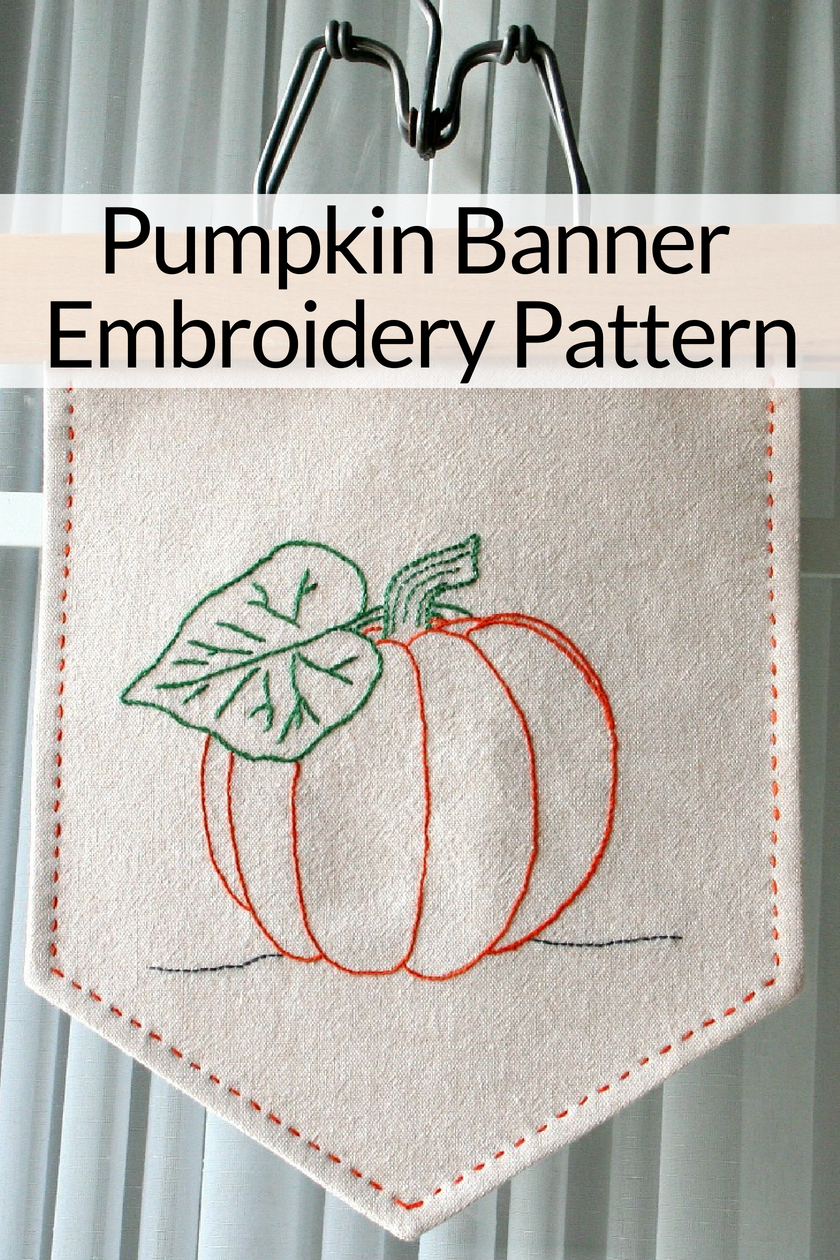
Welcome to another Embroidery Monday where I share a free embroidery pattern on the first Monday of each month and host the Stitchery Link Party for all things hand embroidered. Today’s pretty Pumpkin Banner Embroidery Pattern is the perfect small project to stitch up in time to add to your fall decor later this month.
To make the Pumpkin Banner you’ll need to download and print off the pattern.
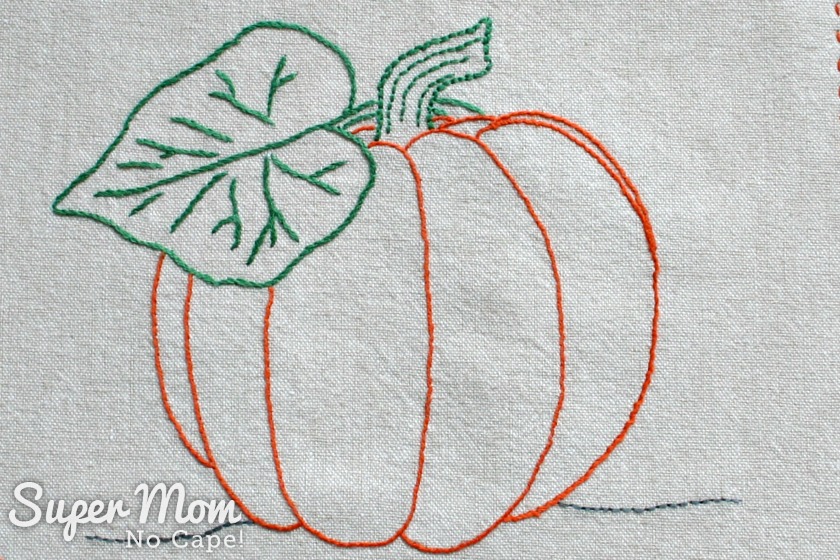
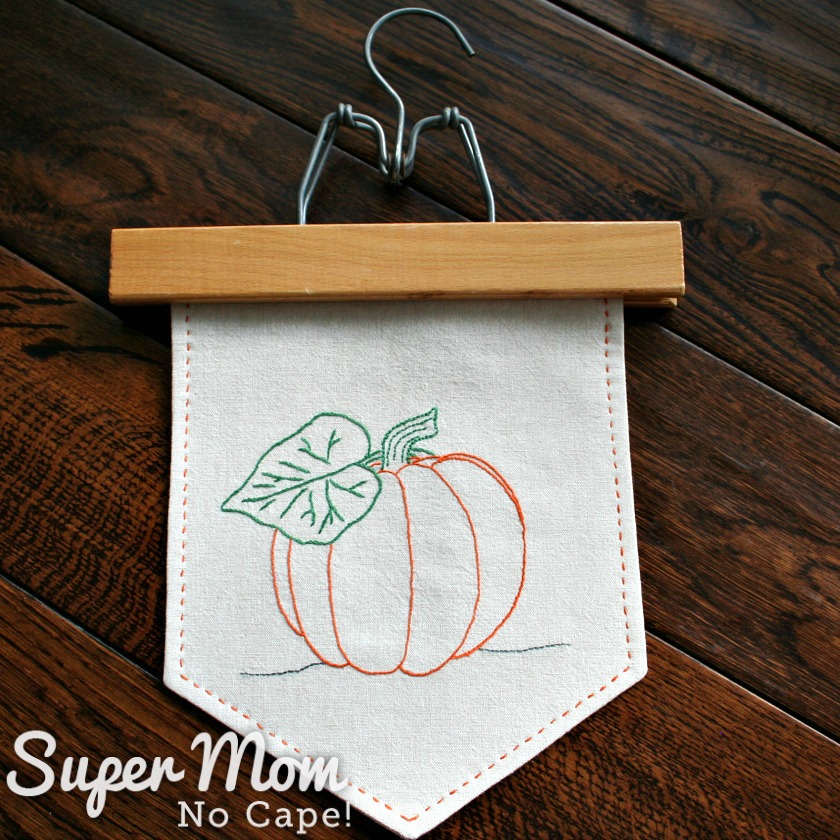
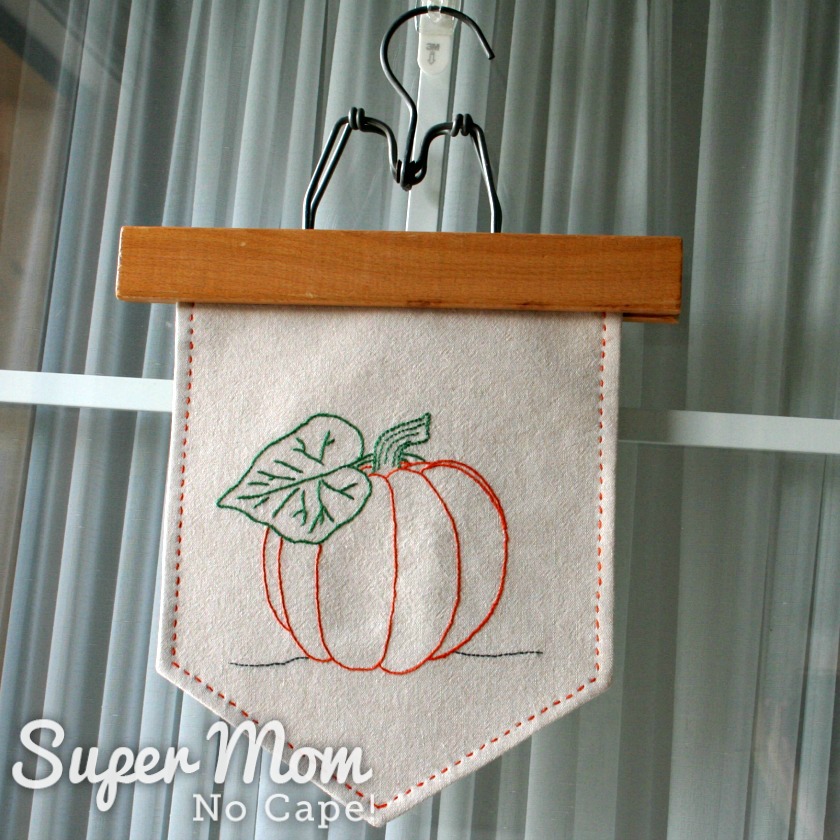
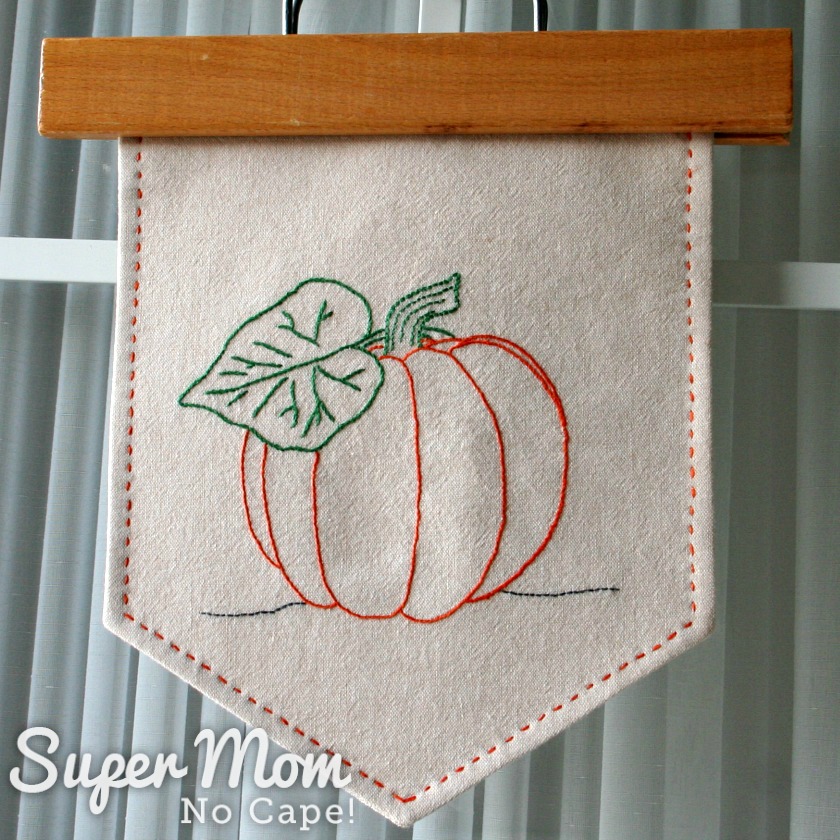
Pumpkin Banner Embroidery Pattern
Begin by tracing the pattern onto a 9″X12″ piece of fabric of your choice.
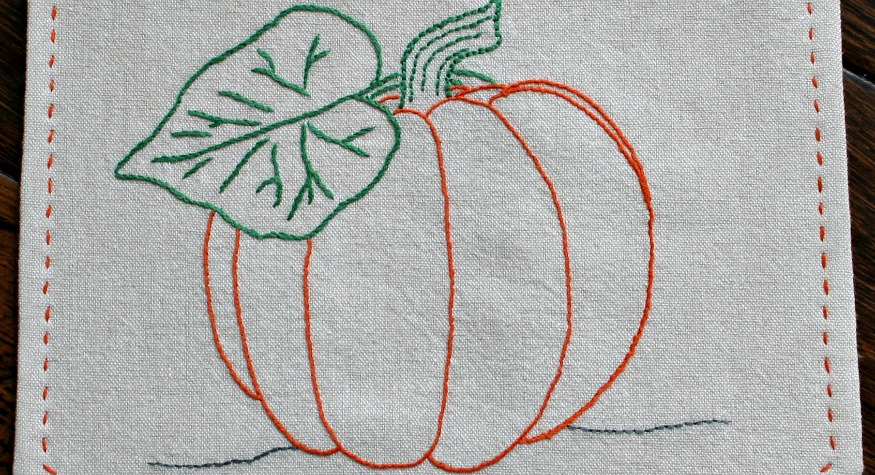
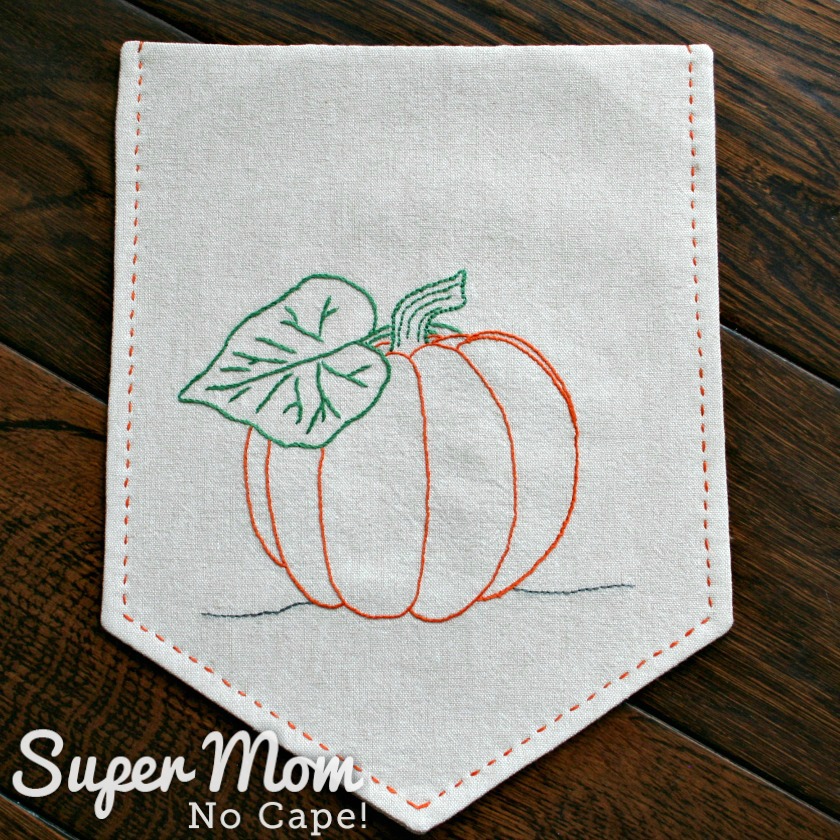
Embroider the pumpkin.
For my Pumpkin Banner, the body of the pumpkin was done in a whipped backstitch with DMC 720 Dark Orange Spice.
The stem was backstitched with DMC 505 Jade Green.
The leaf also used the Jade Green in stem stitch.
And a section of medium grey from DMC 53 Variegated Steel Grey was used to backstitch the garden soil.
After the pumpkin is stitched, press well.
To create the pattern for the banner:
Fold an 8½”X11″ piece of printer paper in half lengthwise.
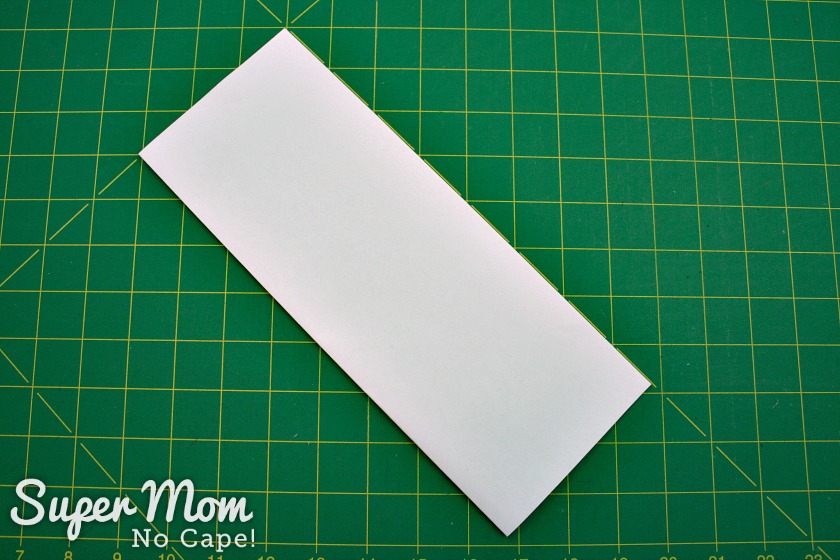
Make a mark 2¾” up from the bottom of the side opposite the fold.
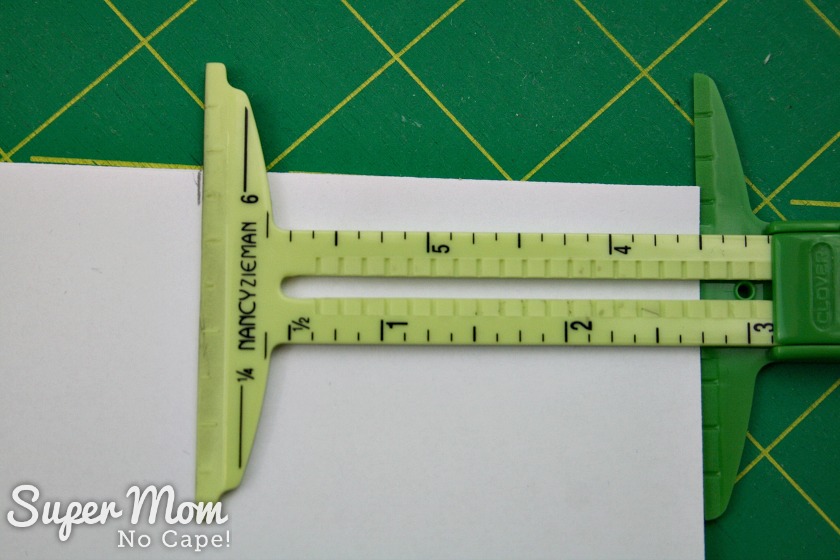
Draw a line from the pencil mark to the bottom of the folded edge.
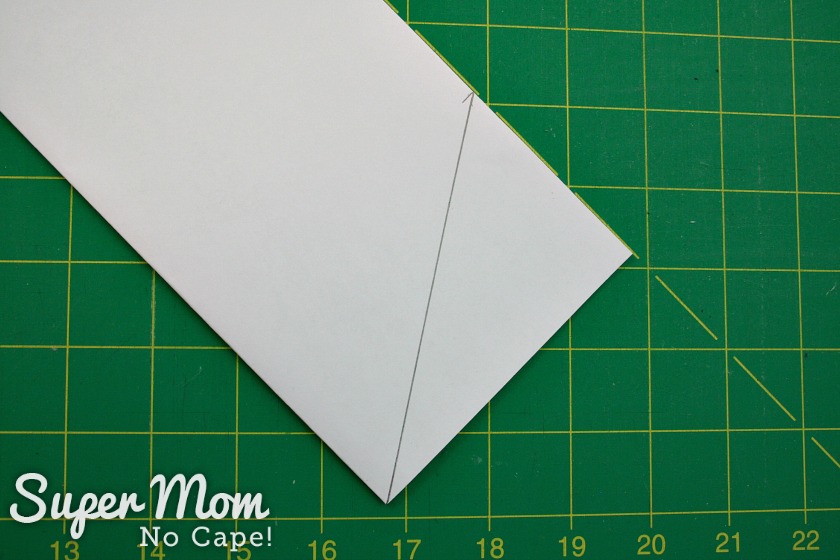
Unfold the paper and you have the paper pattern for the banner.
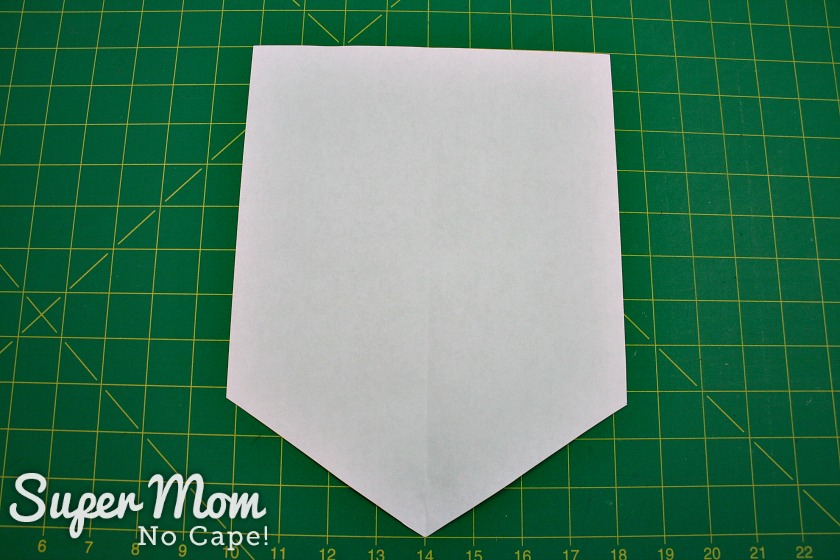
Pin the paper pattern to the embroidered piece being careful to position the pattern so that the embroidery will be centered horizontally with the bottom of the pumpkin approximately 3″ up from the bottom point.
Cut out the banner.
Cut a second banner piece for the back of the banner and a third from heavy weight interfacing. I used a heavy weight sew-in interfacing.
Place the fabrics right sides together, layer the interfacing on top, pin and sew all the way around using ¼” seam allowance making sure to leave a 5″ opening at the top for turning.
Turn right side out and press well. Sew the opening closed using a ladder stitch.
If desired, embroider a running stitch down one side, across the bottom V and up the other side.
The top of the banner can be folded over and stitched to create a pocket to insert a dowel for hanging.
Or you can use an old wooden pants hanger like this.
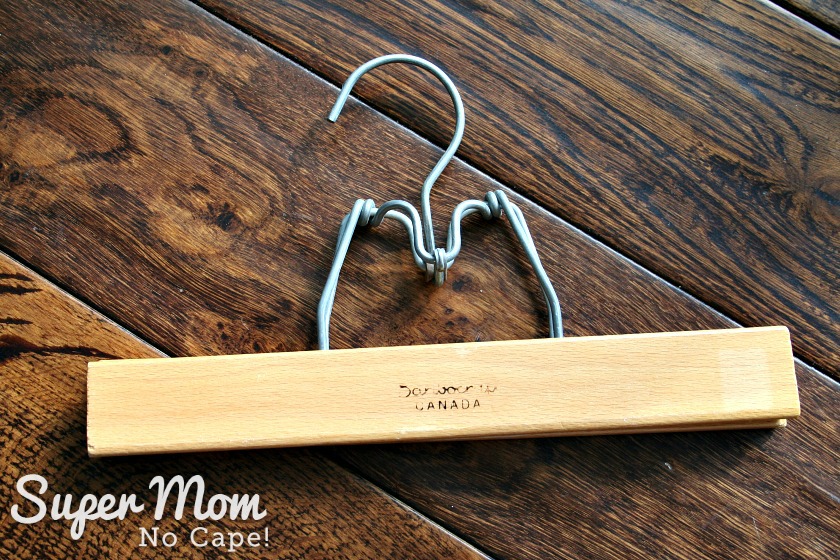
Open the hanger, position the banner so that the top of the banner is centered along the top of the wood of the hanger and close the hanger.
Hang the Embroidered Pumpkin Banner on your front door, on a wall in the entry way or anywhere else in the house where you’ll be able to see and enjoy it throughout the fall season.
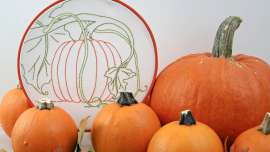
Alternatively, the Pumpkin Embroidery Pattern could be stitched onto tea towels, napkins or any number of items to add a touch of fall here and there throughout the house.
I hope you have fun stitching this month’s pattern!
STITCHERY LINK PARTY #143
If you’ve never linked up to a link party before and would like to join in, I’ve written a quick tutorial on How to Link Up to a Link Party. It provides step-by-step instructions for linking to this party (or any other link party you might like to participate in.)
The rules for the Stitchery Link Party are super simple but please do read before linking up as links that don’t follow the rules will be removed:
1. The project can be anything as long as it includes hand embroidery stitches in some form. Such projects might be but are not limited to redwork, blackwork, goldwork, bluework, (etc), counted cross-stitch, crazy quilting, crewel, silk ribbon, pulled thread, hardanger and sashiko.
2. Link directly to your blog post, not to your blog home page.
3. If you happen to sell your embroidery or embroidery patterns, feel free to link up to a blog post you’ve written about a project you’re selling, but No direct links to shops or websites selling things.
4. This will be a curated link party. In other words, if a link does not conform to the three simple rules above, it will be removed.
The next three are more requests than rules. They are by no means a requirement to take part in the party:
5. Please link back to the Stitchery Link Party with a text link somewhere in your post.
6. As well, please share the love and visit one or two (or more) of the other links and take time to leave a comment.
7. It would be wonderful if you decided to follow me but it’s not necessary in order to take part in the link party.
 Loading InLinkz ...
Be sure to save this Pumpkin Banner Embroidery Pattern so you can find it again by clicking on the Pinterest button underneath this post.
And of course, I’d love it if you shared it on Twitter or Facebook. ?


17 Comments
monique
September 27, 2020 4:05 amMerci pour le partage de cette belle citrouille en bannière
Jennifer David
October 27, 2018 2:23 amLove this cute pumpkin pattern. It is going to be perfect for Halloween.
Mother of 3
October 2, 2018 4:36 pmI love your festive fall banner! I haven’t tried embroidery since I was a young child. Thanks so much for sharing with us; Pinned.
Emily
September 20, 2018 8:00 pmThis is such a cute banner! Thank you for sharing at our Merry Monday party. I’ll be featuring your pumpkin banner at next week’s party.
Super Mom No Cape
September 21, 2018 1:31 pmThank you so much for stopping by Emily and thank you for featuring it in your next party!
Ali B
September 14, 2018 12:08 amWhat a cute little pumpkin embroidery project! I have been meaning to do some embroidery and I think this would be so cute on a tea towel in my kitchen! Thanks for sharing at The Ultimate Pinterest Party, I’ll be featuring your pin in this weeks party!
Super Mom No Cape
September 17, 2018 2:04 pmThanks so much Ali B for stopping by and taking time to leave your sweet comment! And thanks also for featuring my pin!
The pumpkin would be perfect to embroider on a tea towel. 🙂
MA
September 5, 2018 5:14 pmCute pumpkin! I can see a number of uses for it – thank you!
Super Mom No Cape
September 6, 2018 1:58 pmThank you MA! You’re right, it could could be used for many different things.
Deborah
September 4, 2018 4:23 pmThis is just the little pumpkin pattern I was looking for I just didn’t know it till I seen it. I love how your banner turned out.
Super Mom No Cape
September 6, 2018 2:00 pmThank you so much Deborah! I love when I come across things that I didn’t know I needed until I come across them. 🙂
Susan
September 3, 2018 9:31 pmThanks! Lots of uses for this one all fall long!
Super Mom No Cape
September 6, 2018 2:01 pmOh yes… it could be used on all sorts of fall things, Susan.
Velia
September 3, 2018 4:12 pmgreat job! perfect for dish towels too
Super Mom No Cape
September 6, 2018 2:02 pmThank you Velia! It would be perfect for dishtowels!
Leanna
September 3, 2018 2:07 pmThis is really cute and different. I love the little stitches you did all around the edge, beautiful job.
Super Mom No Cape
September 6, 2018 2:02 pmThanks so much Leanna!
Comments are closed.