


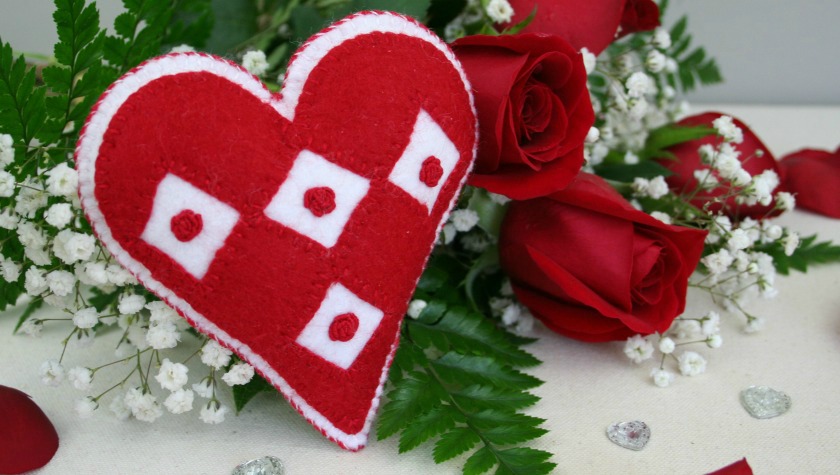
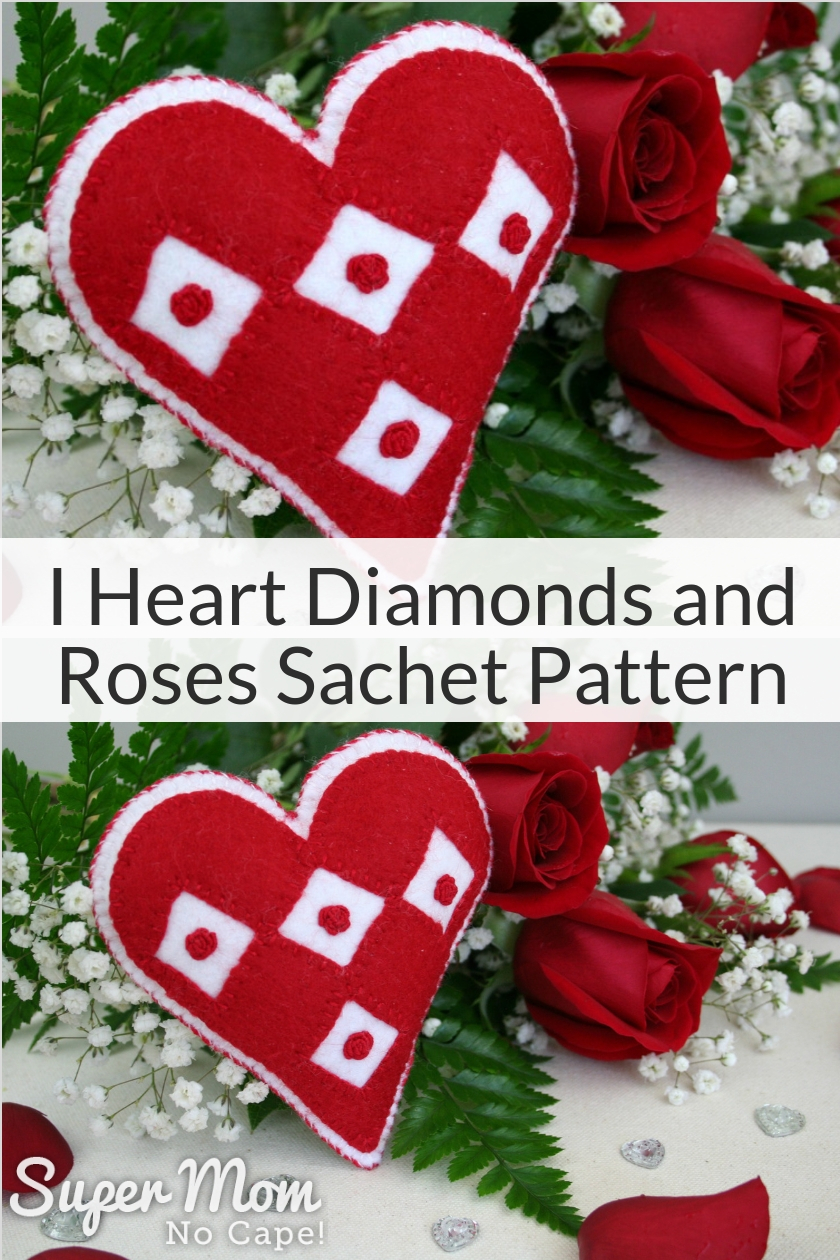
With Valentine’s Day coming up now’s the perfect time to stitch this pretty little I Heart Diamonds and Roses Sachet Pattern to give to someone special.
I’ve kept this month’s free embroidery pattern simple so that you can get one or more of them done in lots of time before Valentine’s Day.
The sachets would also be perfect to make for Mother’s Day, best friends’ birthdays, for bridal shower favors or simply as something pretty for your own use to make you smile each time you open the drawer or closet where you’ve tucked it away.

I Heart Diamonds and Roses Sachet Pattern
Materials required to make one sachet:
- Scrap of white felt 5″ X 10″
- Scrap of red felt 5″ X 5″
- DMC 321 red embroidery floss
- Small amount of Polyester fiber fill for stuffing
- Essential oil or dry herbs of your choice for scent (optional)
- Freezer paper
for tracing the patterns
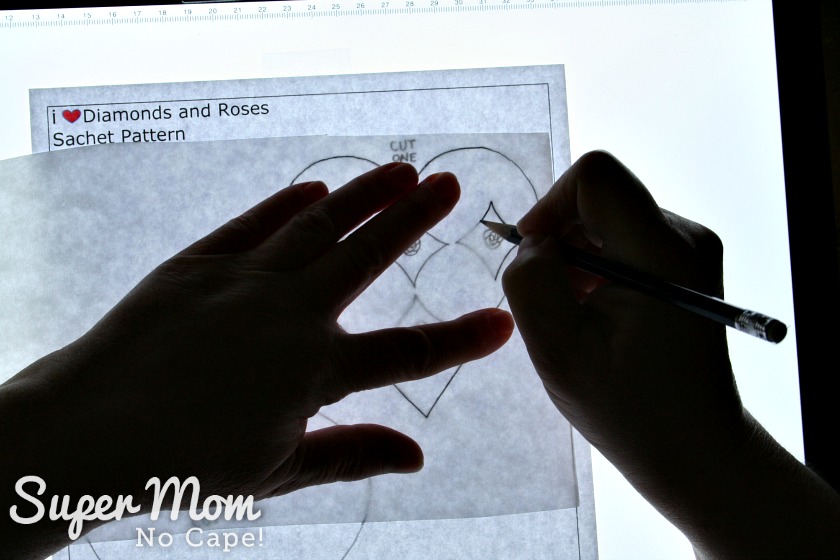
Trace the patterns on to freezer paper using a light source of some kind.
My Huion lightbox
Cut out the patterns you traced on the freezer paper about 1/8 inch away from the lines. Fuse the pieces shiny side down onto their corresponding color of felt (scroll down to download and print the I Heart Diamonds and Roses Sachet Pattern.)
Cut 2 white hearts and 1 red heart with diamond cut outs.
I used a small fabric scissors for cutting out the hearts but found it easier to use a small super sharp embroidery scissors to cut out the diamonds.
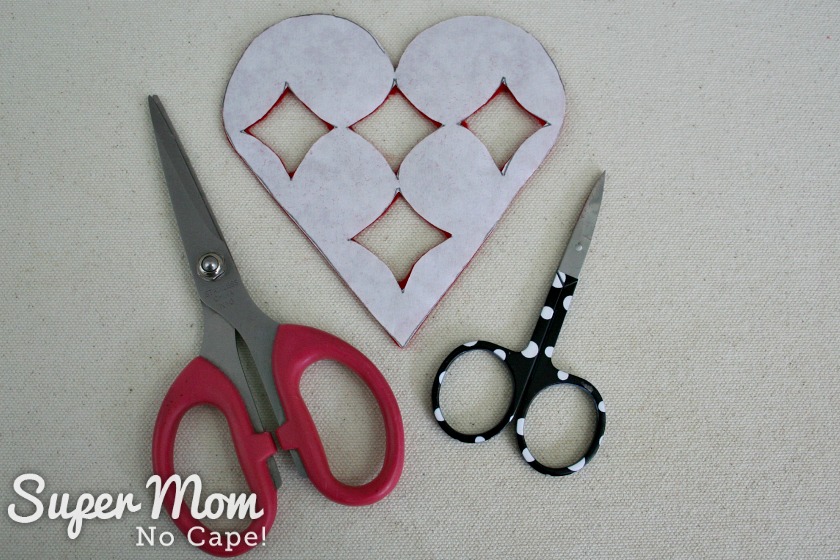
Peel the freezer paper off the felt. Be gentle when peeling the parts around the cut out diamond.
Now that you’ve got your white hearts and red heart all cut out, it’s time to start stitching.
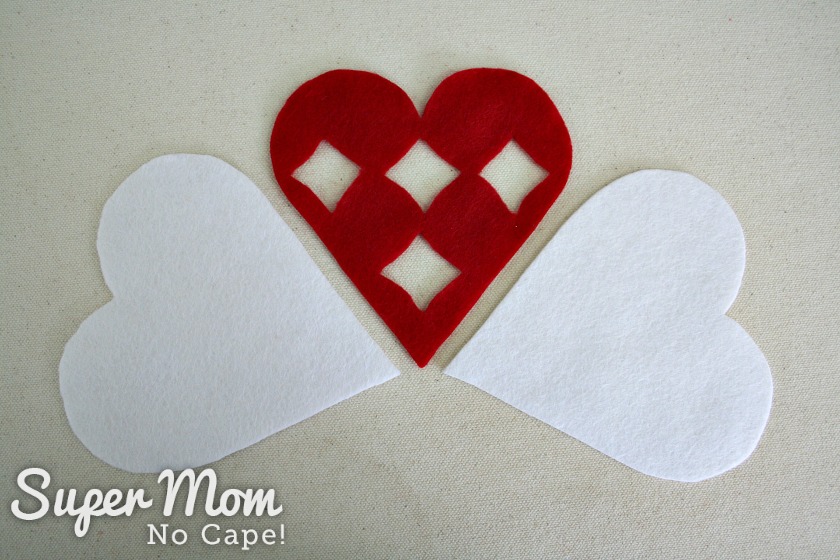
Pin the red heart with the diamond cut outs to one of the white felt hearts.
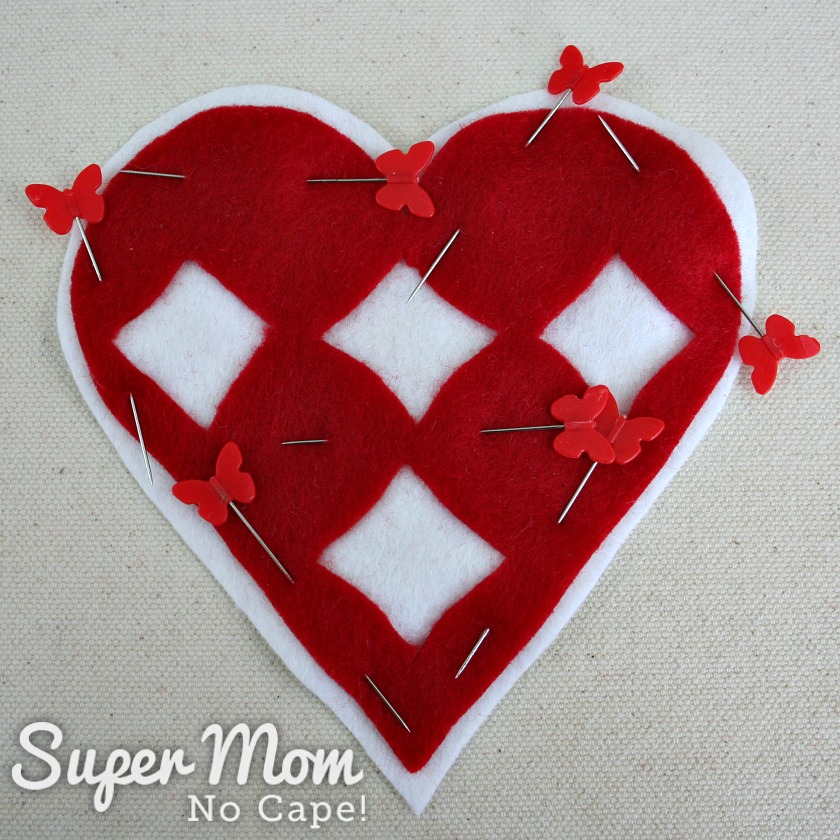
Applique all the way around the red heart and each of the diamonds using a blanket stitch.
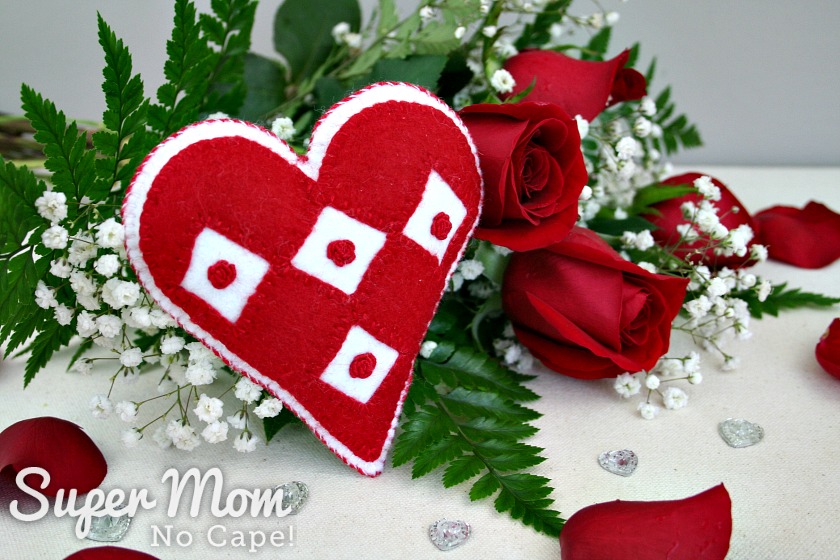
Embroidery a bullion rose in the center of each diamond.
If you’ve never stitched a bullion rose before, this Bullion Knot Rose embroidery video tutorial shows you how starting at about the 5:18 minute mark.
After all the embroidery is finished, pin the two white hearts together wrong sides facing.
Sew around the outside edge using a blanket stitch. Be sure to leave an opening for stuffing.
Stuff the heart sachet lightly. If desired add a few drops of essential oil to a small piece of stuffing and insert into the center of the sachet.
Once the sachet is stuffed evenly, continue to blanket stitch to close the opening.
Cut a length of red floss long enough to go all the way around the edge of the sachet. Using all six strands of floss, begin at the top center of the heart and whipstitch over the blanket stitches all the way around.
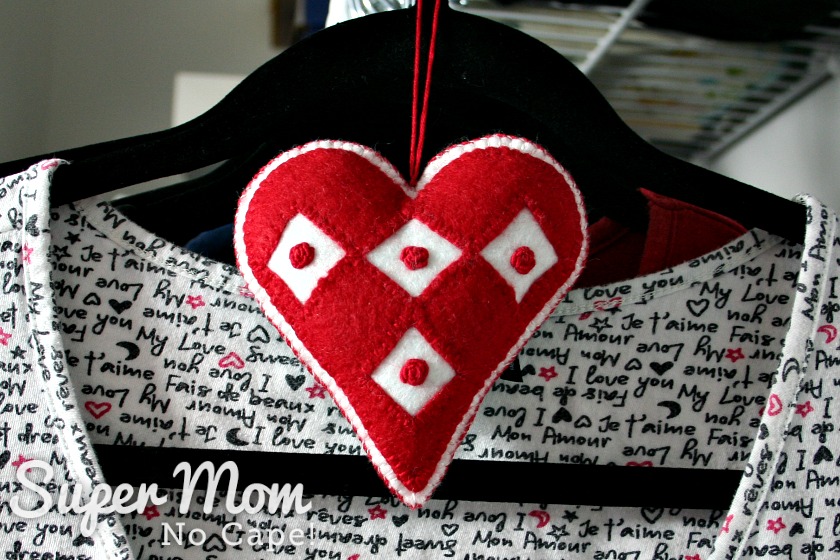
When you get back to the top of the heart, the ends can be knotted then buried inside the heart or can be used to create a hanging loop to hang in your closet (scroll down to see the photo.)
The sachet measures approximately 4.5″ tall from the top of the heart to the tip and 4.5″ wide at it’s widest when finished.
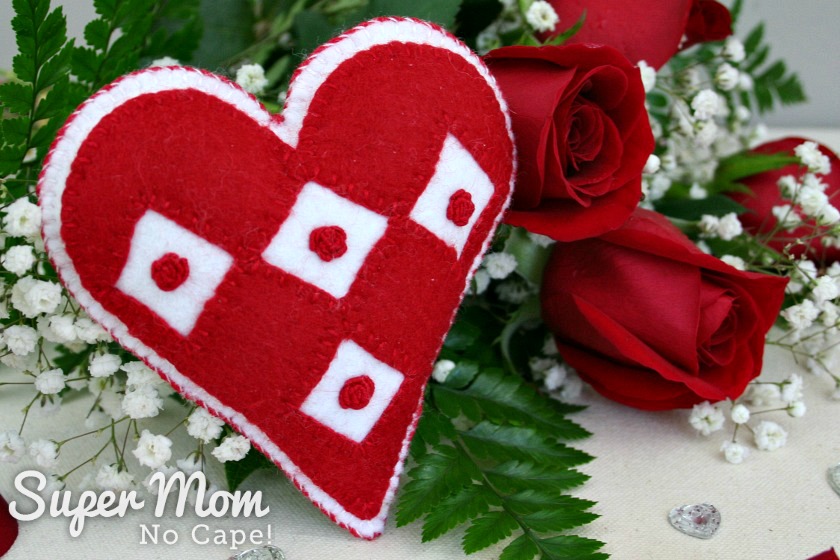
This I Heart Diamonds and Roses Sachet turned out soooo pretty!
I can’t wait to make more red and white ones as well as some in other color combinations.
I love those little bullion roses. It’s just such fun to stitch each bullion knot and watch the rose forming with each knot you add.
Place your sachet in a drawer with all your pretty lacey bits and pieces.
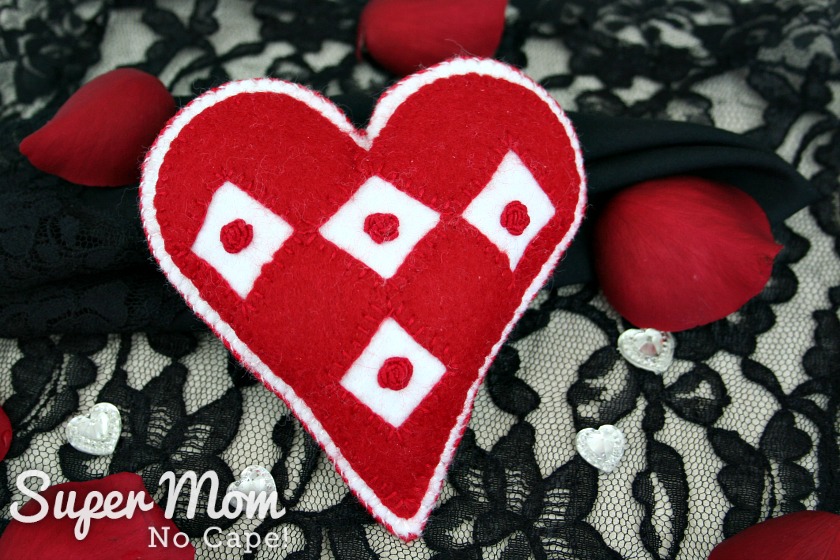
Or hang it in your closet.
Click the link below to download the pattern:
I Heart Diamonds and Roses Sachet Pattern
If you make one or more of these pretty sachets, please do post about it somewhere online and tag me so I can come see. I’m @supermomnocape on Instragram, @1SuperMomNoCape on Twitter and @1SuperMomNoCape on Facebook.
Of course, I’d love it if you decided to follow me on any or all of the above social media.
Don’t forget to check out these other pretty heart and Valentine’s patterns from the archives:
This Fabric Cone with Embroidered Heart could be filled with candy and small treats and gifted to a special friend or family member.
Five small heart motifs could be stitched on bookmarks, handkerchiefs, small sachets. They’re also perfect to add to a crazy quilt block.
Lazy Daisies form a small heart in this vintage Workbasket embroidery pattern.
You’ll find hearts hidden within these Abstract Heart Flower motifs.
Wouldn’t this Heart Banner look pretty stitched on a small pillow or a quilt block in a Valentine’s quilt.
The Be My Valentine pattern features a sweet young woman holding three hearts with the words “Be” “My” “Valentine” printed on them. She is centered on a heart with pretty ruffled edges.
The Ruffled Heart Pillow pattern has been reversed to be used to stitch the back of the Be My Valentine pillow but could also be used separately to create a specialized gift such as a ring bearer pillow or stitched on a journal cover to create a wedding guest book.
STITCHERY LINK PARTY #147
For those who are newly subscribed or are visiting for the first time, at the beginning of each month I host a link party in which I invite others to share their hand embroidery projects. The party runs for the entire month.
If you’ve never linked up to a link party before and would like to join in, I’ve written a quick tutorial on How to Link Up to a Link Party. It provides step-by-step instructions for linking to this party (or any other link party you might like to participate in.)
The rules for the Stitchery Link Party are super simple but please do read before linking up as links that don’t follow the rules will be removed:
1. The project can be anything as long as it includes hand embroidery stitches in some form. Such projects might be but are not limited to redwork, blackwork, goldwork, bluework, (etc), counted cross-stitch, crazy quilting, crewel, silk ribbon, pulled thread, hardanger and sashiko.
2. Link directly to your blog post, not to your blog home page.
3. If you happen to sell your embroidery or embroidery patterns, feel free to link up to a blog post you’ve written about a project you’re selling, but No direct links to shops or websites selling things.
The next three are more requests than rules. They are by no means a requirement to take part in the party:
4. Please link back to the Stitchery Link Party with a text link somewhere in your post.
5. As well, please share the love and visit one or two (or more) of the other links and take time to leave a comment.
6. It would be wonderful if you decided to follow me but it’s not necessary in order to take part in the link party.
Be sure to save the I Heart Diamonds and Roses Sachet Pattern so you can find it again by clicking on the Pinterest button underneath this post.
And of course, please do share it on Facebook and Twitter as well.


4 Comments
Rachel
February 5, 2019 10:54 amIt’s a charming pattern!
Super Mom No Cape
February 5, 2019 11:38 amThanks so much Rachel. It was fun to make!
Mary
February 4, 2019 9:16 pmThat is so pretty. You did such a nice job with it.
Super Mom No Cape
February 5, 2019 11:38 amThank you Mary! I’m glad you like it. 🙂
Comments are closed.